Quick Start Guide
Get Smart Product Options and Addons working on your store in under 10 minutes. This guide walks you from zero to a live product option on a real product page — no prior experience with the plugin required.
What You'll Build
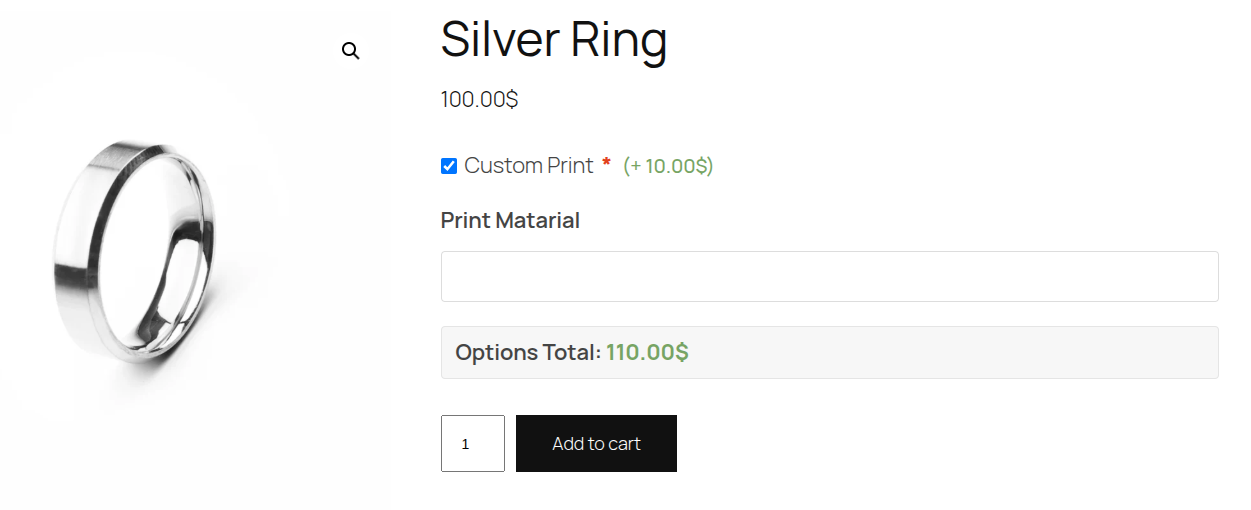
By the end of this guide, you'll have a custom option group attached to a product. Customers will see it on the product page, directly above the Add to Cart button, with a text input for engraving and a radio button for gift wrapping with a $4.00 surcharge.
Step 1 — Open the Addon Builder
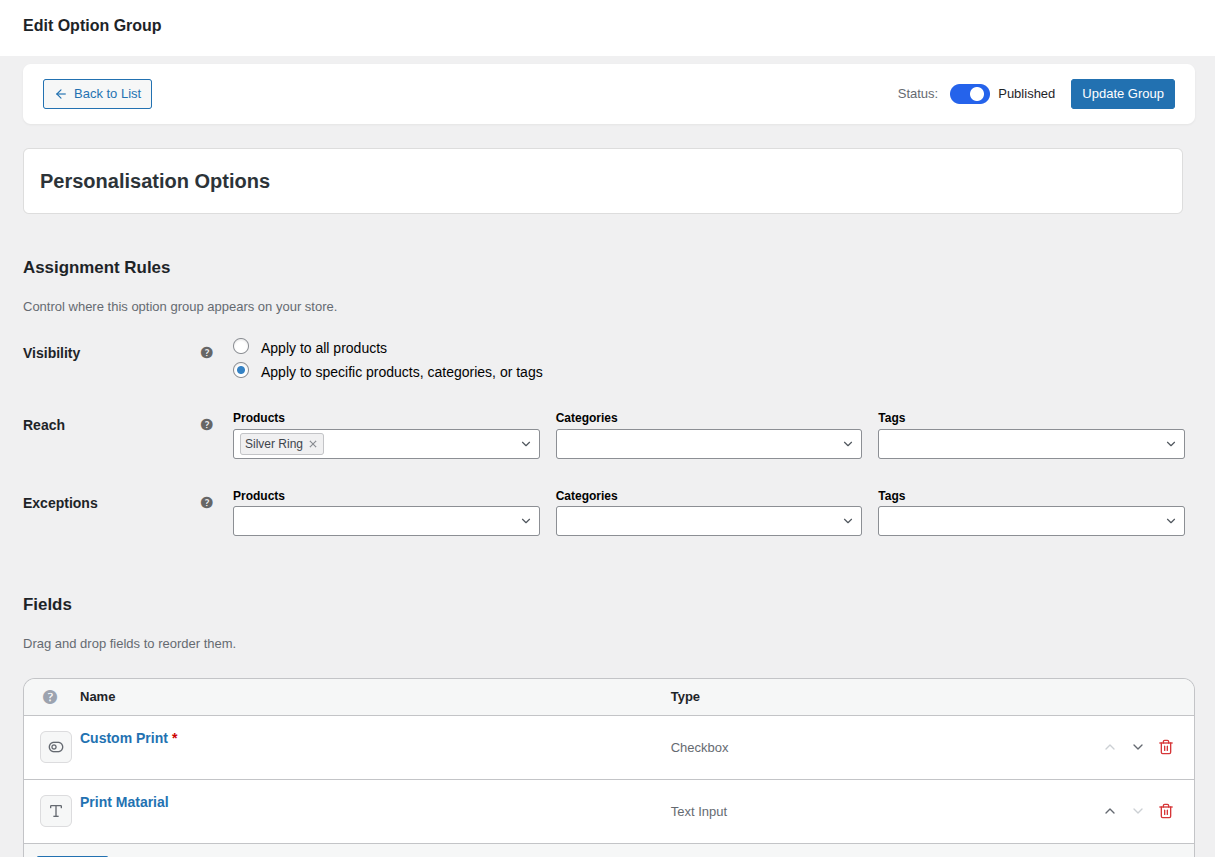
In your WordPress admin, navigate to Products → Options.
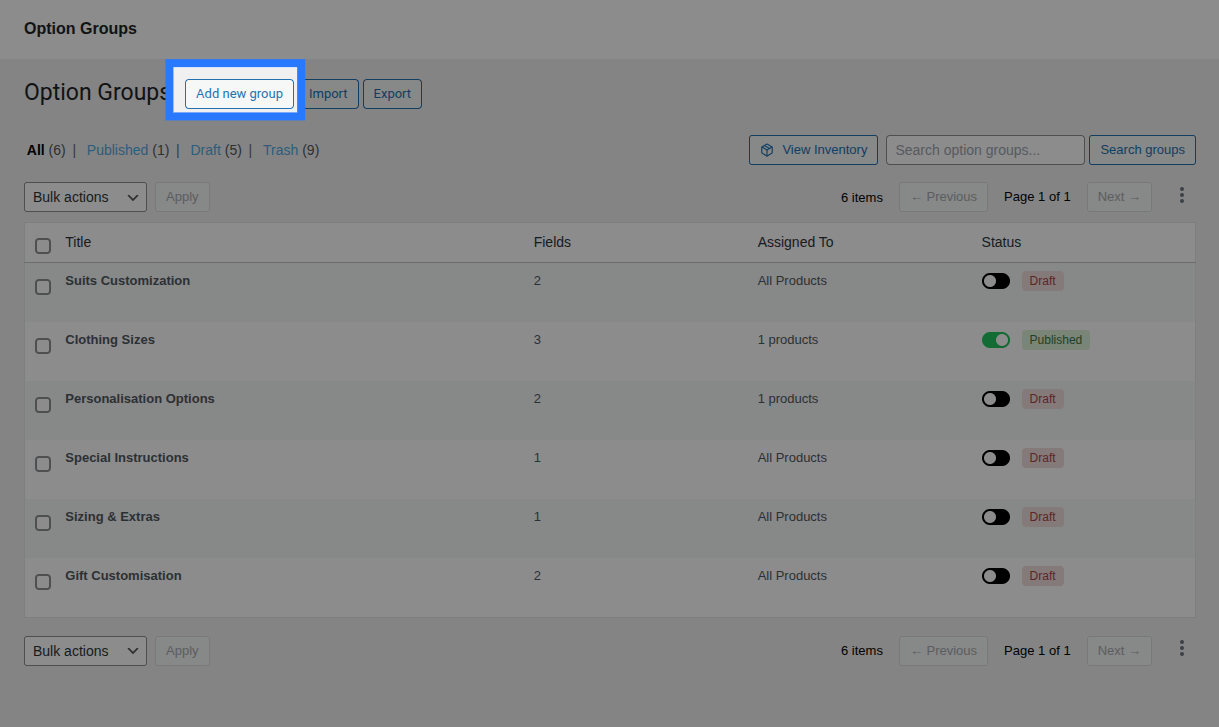
You'll see the Option Groups list — a table showing all of your existing groups. If this is a fresh install, Smart Product Options and Addons has already created a few example groups for you to reference.
Click the Add new group button at the top of the page to open a blank Addon Builder.
Step 2 — Name Your Group
Type a clear, descriptive name into the Group Title input at the top of the builder. This name is for admin reference only — it is never shown to customers on the product page.
- Example:
Personalization Options
Set the Status toggle in the header bar to Published so the group is immediately live when saved.
Step 3 — Add Your Fields
Look at the Add Fields sidebar on the right. Click any field type button to add a new field to the canvas. For this quick start, we'll add two fields:
Add a Text Input (Engraving)
- Click the Text Input button in the sidebar. A new field row appears in the fields list.
- Click the row to expand its configuration panel.
- Set the following values:
- Label:
Engraving Text - Placeholder:
Enter your message (max 30 characters) - Max Length (Restrictions tab):
30
- Label:
- (Optional) Enable Field is Required in the Validation section if the customer must fill this field.
Add Radio Buttons (Gift Wrap)
- Click the Radio Buttons button in the sidebar.
- Expand the new field row and set:
- Label:
Gift Wrap?
- Label:
- In the Options block, click Add Choice twice to create two options:
- Option 1: Label
No— leave the Price Type asNone. - Option 2: Label
Yes— expand the settings panel (click the chevron), set Price Type toFlat Fee, and enter4.00as the amount.
- Option 1: Label
Explore All Field Types
Smart Product Options and Addons supports 12 different field types — from color swatches to file uploads. See the full Field Types Reference to explore what's available.
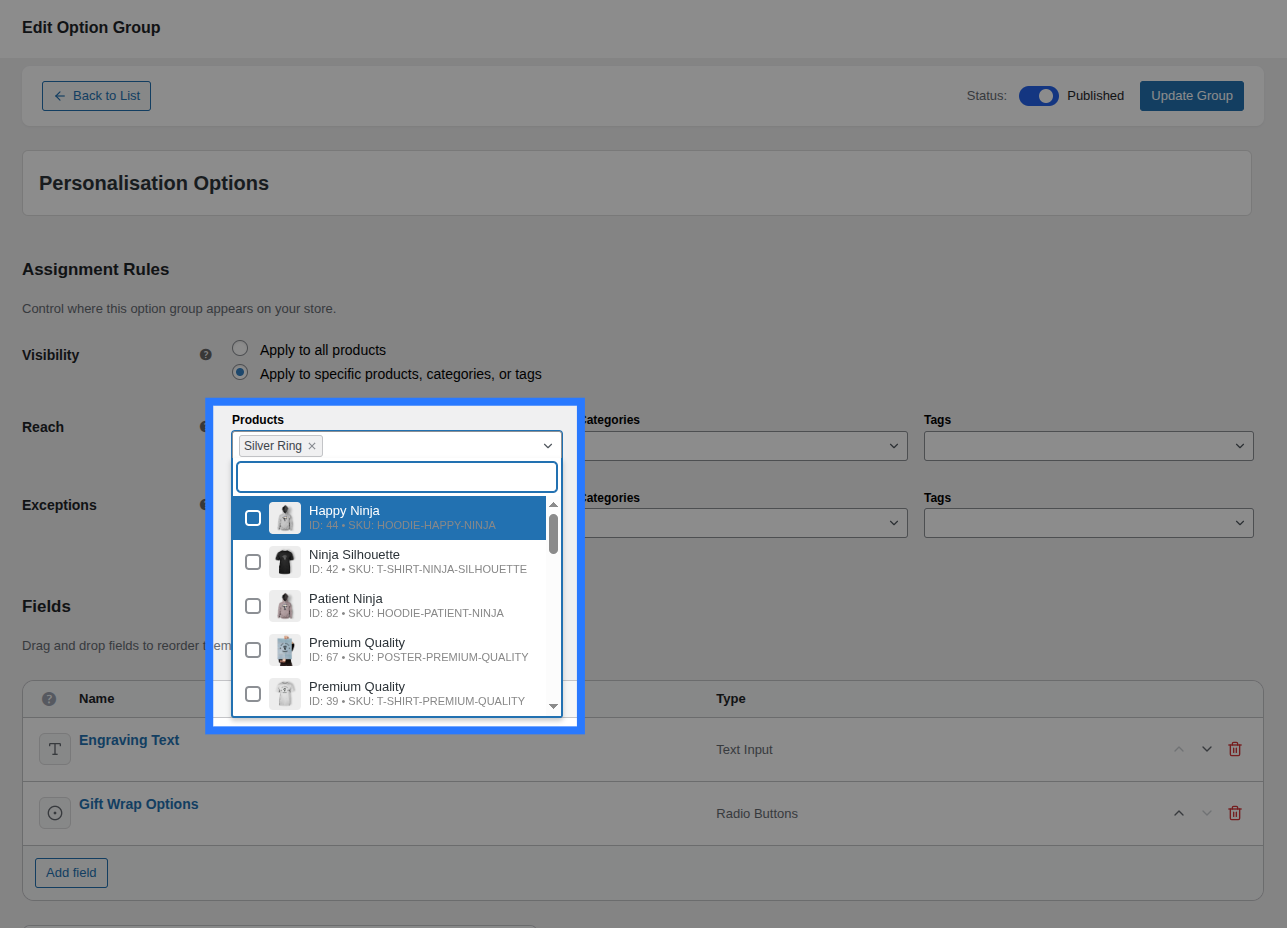
Step 4 — Assign the Group to Products
Scroll up to the Assignment Rules section in the builder. This controls which products the option group will appear on.
You have two choices:
- Apply to all products (Global): The group appears on every product in your store. Great for quick testing.
- Apply to specific products, categories, or tags (Targeted): The group appears only on the items you select.
For this quick start, select "Apply to specific products, categories, or tags", then use the Products search field in the Reach section to find and select any product in your store.
Learn More About Assignments
Assignment Rules support powerful include/exclude logic. You can target entire categories, exclude individual products, and combine multiple rules.
Step 5 — Save the Group
Click the Create Group button (or Update Group if editing) in the builder header bar.
Smart Product Options and Addons validates your configuration before saving. If anything is missing (empty labels, no assignment targets), inline error messages will appear and the first problematic field will be automatically expanded.
Once saved successfully, a success toast notification will appear at the top of the page.
Step 6 — View It on the Product Page
Open the product you assigned the group to in Step 4. Navigate to the product's frontend page (the page your customers see). You should see your fields rendered directly above the Add to Cart button.
Not showing up?
If the fields aren't visible, check these common issues:
- Make sure the group's Status is Published (not Draft).
- Confirm the assignment is correctly set to the product you're viewing.
- Clear any page caching if you use a caching plugin (WP Rocket, LiteSpeed Cache, W3 Total Cache, etc.).
- Make sure the product is a Simple or Variable product type — Smart Product Options and Addons renders on standard WooCommerce product pages.
Step 7 — Test Adding to Cart
Fill in your custom options on the product page:
- Type a message into the "Engraving Text" input (e.g.,
Happy Birthday!). - Select "Yes" for Gift Wrap.
- Click Add to Cart.
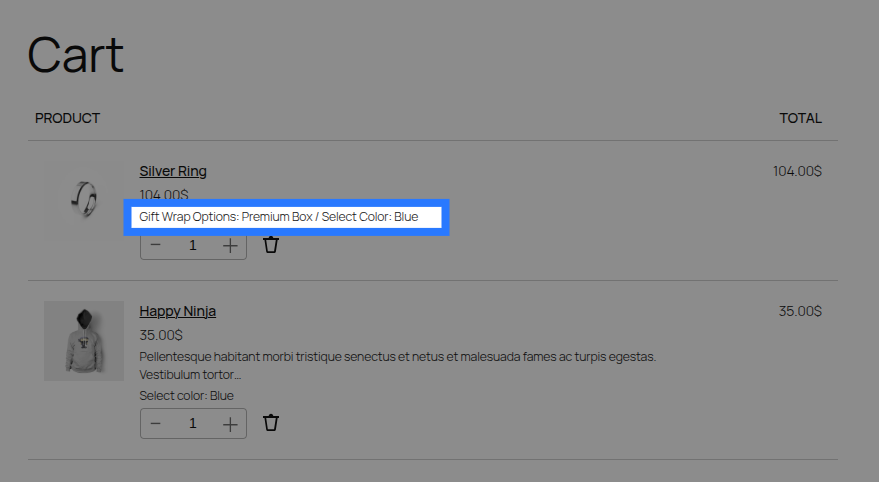
Open the cart page — you'll see the selected options listed clearly under the product name:
Handmade Ceramic Mug × 1
  Engraving Text:   Happy Birthday!
  Gift Wrap?:       Yes
The +$4.00 gift wrap price is automatically added to the cart total and displayed on the checkout and order screens.
What's Next?
Now that you've got the basics working, explore more of what Smart Product Options and Addons can do:
- The Addon Builder — Learn the full builder interface: drag-and-drop reordering, duplication, and validation.
- Pricing Strategies — Flat fees, percentages, per-character pricing, and dynamic math formulas.
- Conditional Logic — Show or hide fields based on what the customer has selected.
- Assignment Rules — Advanced include/exclude targeting with categories, tags, and product-level overrides.
- Global Stock Management — Limit how many times a specific option can be ordered across your entire store.