Export & Import
Smart Product Options and Addons features a built-in migration utility that can export your configuration to a single JSON file and import it back. This is highly useful for creating backups, staging-to-production site migrations, or sharing pre-configured options between separate WooCommerce stores.
You can access the Export & Import tools from the top toolbar on the main Option Groups list dashboard. Clicking Export Data or Import Data expands their respective panels inline directly above your list of groups.

Exporting Data
The export utility compiles your chosen options database records and settings into a clean, portable JSON format.
What Can Be Exported
You can choose to export any combination of the following database objects:
- Option Groups: Includes all option group details (Title, Status, Field schemas with pricing/validation/conditional logic settings, and Assignment Rules structures).
- Inventory Items: Includes all Global Stock Items (Name, Stock Count values, and Allow Backorders status).
- Plugin Settings: Includes all global settings (swatch display sizes, text/label sizes, positions, validation behaviors, and debug options).
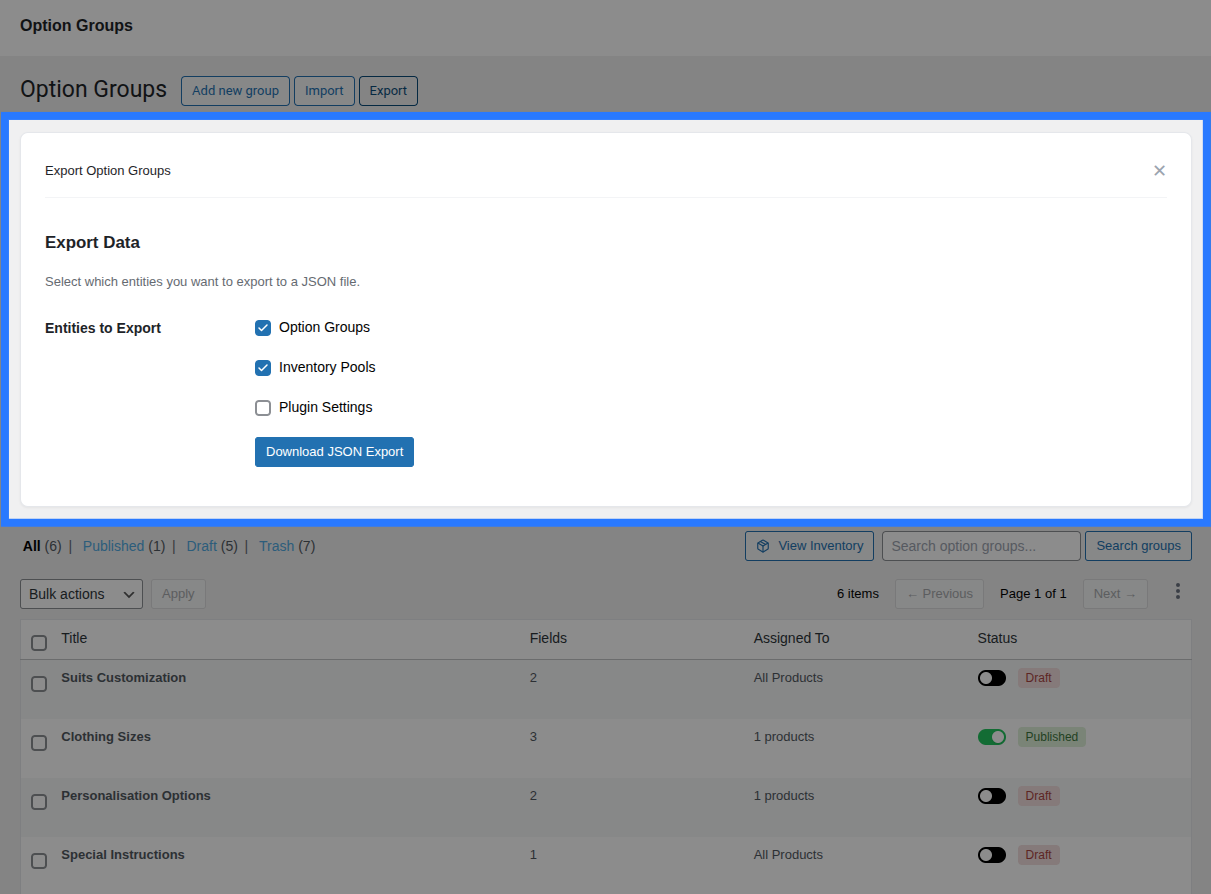
How to Export
- Navigate to Products → Options.
- Click the Export button in the dashboard's top controls bar.
- Use the checkboxes to select which entities to include in the file (Option Groups, Inventory Items, and/or Settings).
- Click the Download JSON button.
A .json file is compiled and downloaded by your browser. The filename is generated automatically with a date stamp:
- Example Filename:
smart-product-options-addons-export-2026-05-19.json
Export File Structure
The exported file is a standard JSON object containing root keys for each selected entity. Here is an example schema of the exported data:
{
  "groups": [
    {
      "title": "Personalisation Options",
      "status": "publish",
      "schema": [
        {
          "id": "field_1a2b3c",
          "type": "text",
          "label": "Engraving Text",
          "pricing": {
            "type": "character_count",
            "amount": "0.50"
          }
        }
      ],
      "assignments": [
        {
          "target_type": "product",
          "target_ids": [104],
          "is_exclusion": false
        }
      ]
    }
  ],
  "inventory": [
    {
      "name": "Engraving Slots",
      "stock_count": "150.0000",
      "allow_backorders": 0
    }
  ],
  "settings": {
    "global_optionsOrientation": "vertical",
    "global_swatchSize": "32px"
  }
}
Importing Data
You can upload a previously exported .json configuration file or paste raw JSON directly to import Smart Product Options and Addons entities.
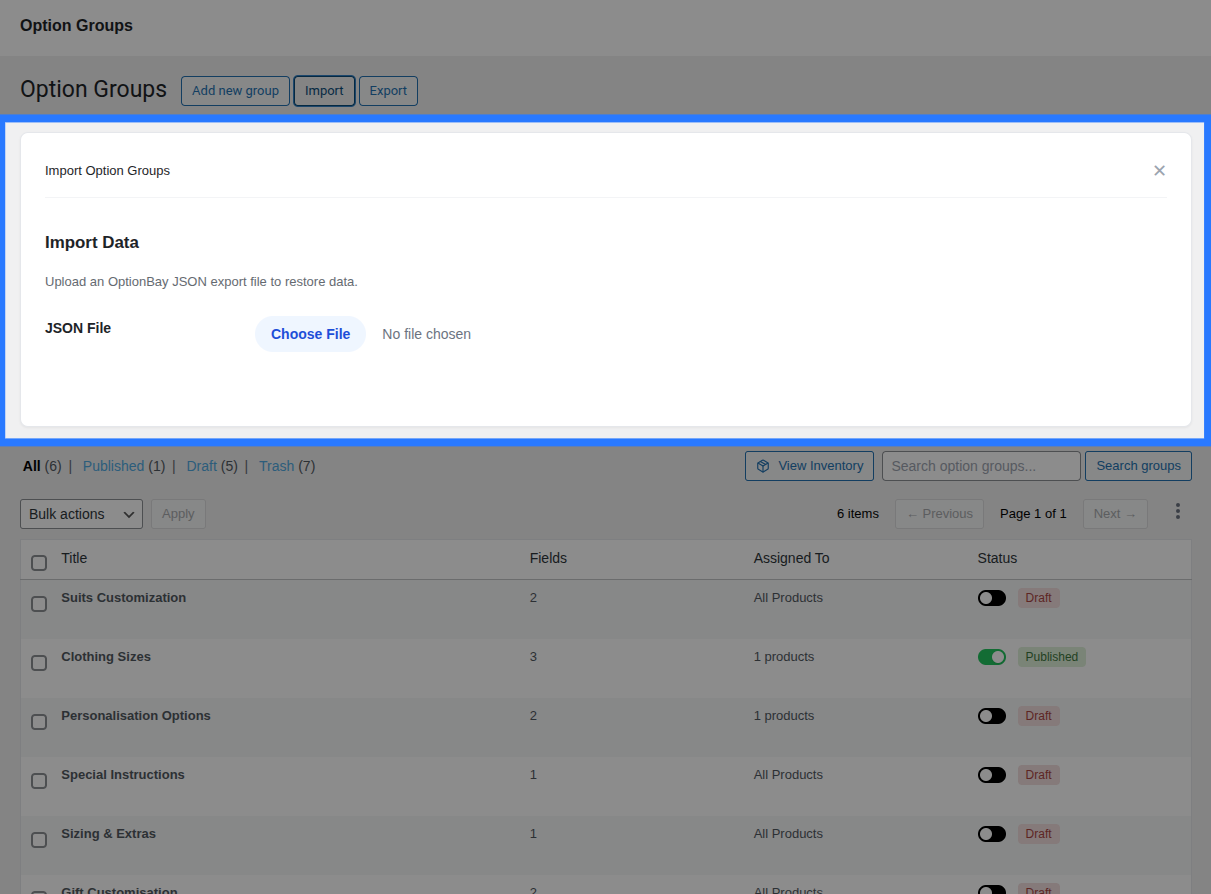
How to Import
- Navigate to Products → Options.
- Click the Import button in the dashboard's top controls bar.
- Import your configuration using one of these two methods:
- Upload File: Drag and drop or browse to select your exported
.jsonfile. - Paste Raw JSON: Paste the raw text content of an export directly into the JSON textarea input.
- Upload File: Drag and drop or browse to select your exported
- Click the Import button.
- Smart Product Options and Addons validates the JSON structure. If successful, a toast notification confirms the counts of successfully imported items.
What Happens During Import
When Smart Product Options and Addons imports a JSON package, it processes each entity type using specific database routines:
- Option Groups: Imported groups are created as new custom posts. Smart Product Options and Addons does not check for pre-existing titles; it will not overwrite or replace matching groups. If a group with the same title already exists, a new, duplicate group is created.
- Inventory Items: Imported stock items are added as new rows in the
wp_smart_product_options_addons_inventorycustom database table. - Plugin Settings: Settings keys from the file are merged into your database option array. Existing settings not mentioned in the import file are left untouched. Only overlapping settings keys are overwritten with the new values.
Import Processes Do Not Overwrite (Duplicates Created)
Because Smart Product Options and Addons imports groups and inventory as fresh records rather than matching and replacing, re-importing the same file multiple times will generate duplicate entries in your list. Always check your Option Groups list and the View Inventory modal after importing to prune any unwanted duplicate rows.
Migration Workflow (Staging to Production)
Smart Product Options and Addons makes it simple to prepare options on a staging clone of your site and migrate them safely to your live production store:
- Build and Test: Build and test all your field groups, pricing rules, and conditional visibility flows on your staging site.
- Export Configuration: Open the Export panel on the staging dashboard, select all checkboxes (Groups, Inventory, and Settings), and download the JSON file.
- Import to Production: Open the Import panel on the live production dashboard, select the JSON file, and run the import.
- Link Verification: Check the Option Groups list and the Centralized Inventory modal to verify that your fields, rules, and stock items have imported correctly.
- Product Link Auditing: If your assignment rules on staging targeted specific product IDs, confirm that those product IDs exist on the production database. If the IDs differ, open the Addon Builder and update the assignments.
- Frontend Testing: Navigate to the product page on the frontend of your production store, select options, and test adding them to the cart to verify calculations and stocks function as intended.
Regular Backups
You don't need to wait for migrations to use the export tool. Download a full configuration backup before making major changes to your field structures or prior to updating the plugin.