

System Health & Advanced Settings
NotifyBay is built to be a robust, “set and forget” solution. However, for high-volume stores, it’s important to know how to check the “health” of your notification engine and where to go if something isn’t working as expected.
This guide covers the Status and Advanced tabs located in your NotifyBay settings.
1. Monitoring the Background Engine
Section titled “1. Monitoring the Background Engine”Navigate to NotifyBay > Status to see the real-time performance of your automated notification queue.
The Engine Queue (Jobs)
Section titled “The Engine Queue (Jobs)”NotifyBay processes emails in small batches to ensure your site remains fast for other shoppers. The Action Scheduler Queue card shows exactly how many notifications are in flight.
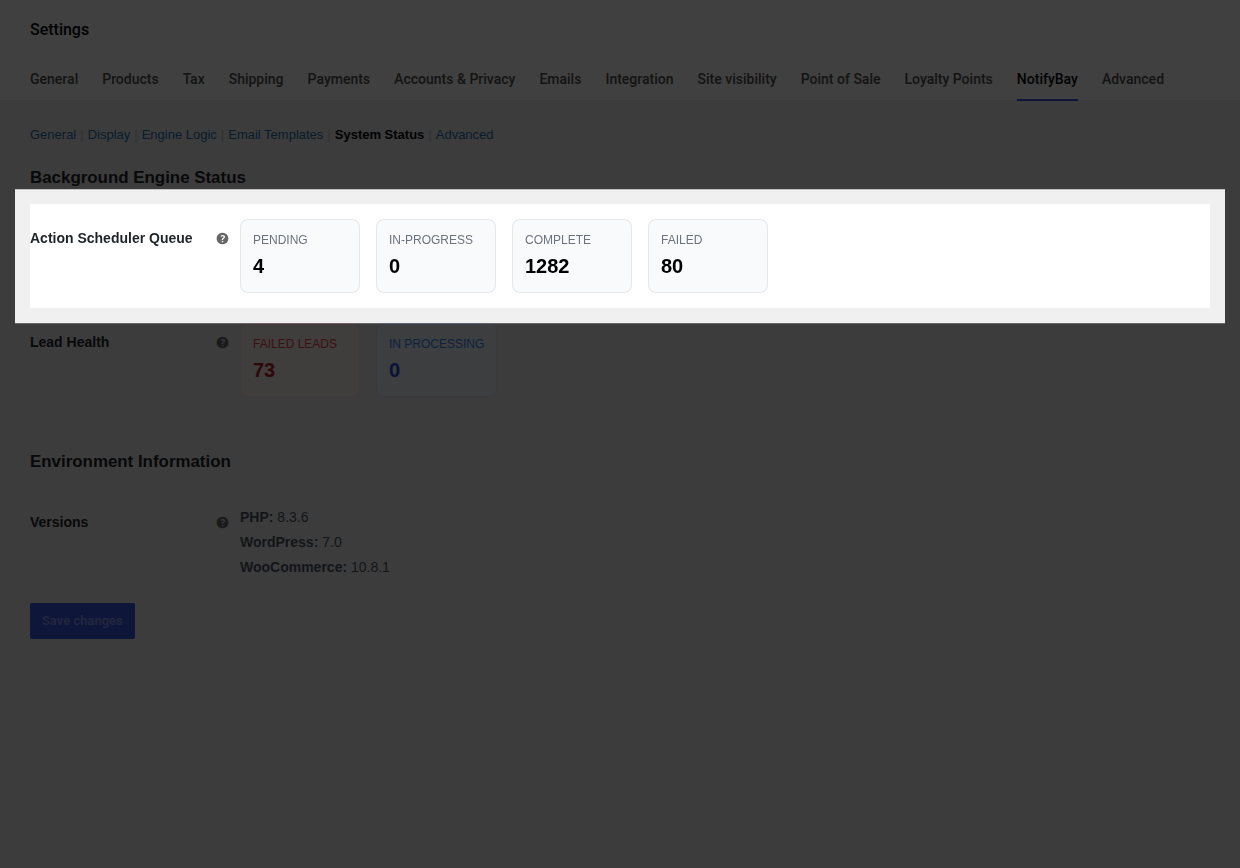
- Pending: Your “to-do” list. These are customers waiting for an email in the next scheduled batch.
- In-Progress: What the engine is working on at this exact second.
- Complete: A historical count of successfully sent notifications.
- Failed: Emails that couldn’t be sent. This usually points to an issue with your site’s email server (SMTP) rather than the plugin itself.
Lead Health (Diagnostics)
Section titled “Lead Health (Diagnostics)”This card helps you identify if specific customer data points are getting stuck in the database.
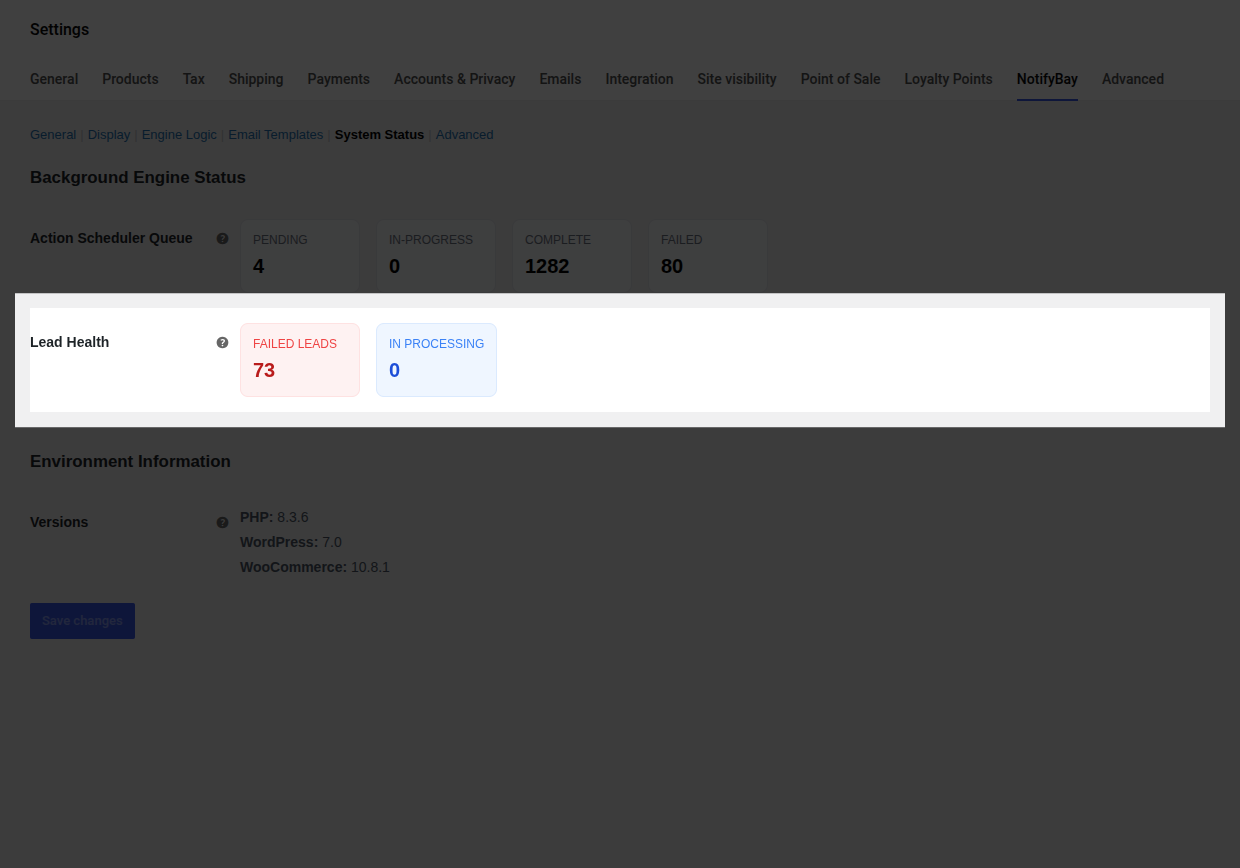
- In Processing: Leads currently being evaluated by the engine. If this number stays high for more than an hour, it may indicate a conflict with another plugin.
- Failed Leads: These are subscribers that encountered a permanent error (e.g., an invalid email format). You can review and fix these in your Leads Table.
2. Troubleshooting Common Merchant Issues
Section titled “2. Troubleshooting Common Merchant Issues””My customers aren’t receiving emails”
Section titled “”My customers aren’t receiving emails””If your analytics show notifications are being “Sent” but customers claim they haven’t received them, follow these steps:
- Check Spam: Ask the customer to check their junk folder.
- Verify Sender Email: Ensure your “From Email” in Settings > Email Templates matches your domain (e.g.,
sales@yourstore.com). - Install an SMTP Plugin: We strongly recommend using a dedicated SMTP plugin (like WP Mail SMTP) to ensure high deliverability and prevent your emails from being blocked by providers like Gmail or Outlook.
”The ‘Notify Me’ button isn’t appearing”
Section titled “”The ‘Notify Me’ button isn’t appearing””- Check Stock Status: Ensure the product is set to “Out of Stock” in WooCommerce.
- Check Settings: Verify that the Waitlist feature is enabled in Settings > General.
- Theme Conflict: If you are using a custom page builder (like Elementor), you may need to place the button manually using Shortcodes or Blocks.
3. Advanced Maintenance
Section titled “3. Advanced Maintenance”The Advanced tab contains powerful tools usually reserved for troubleshooting or store migrations.
Debug Mode (Developer Logging)
Section titled “Debug Mode (Developer Logging)”If you contact our support team, they might ask you to enable Developer Logging.
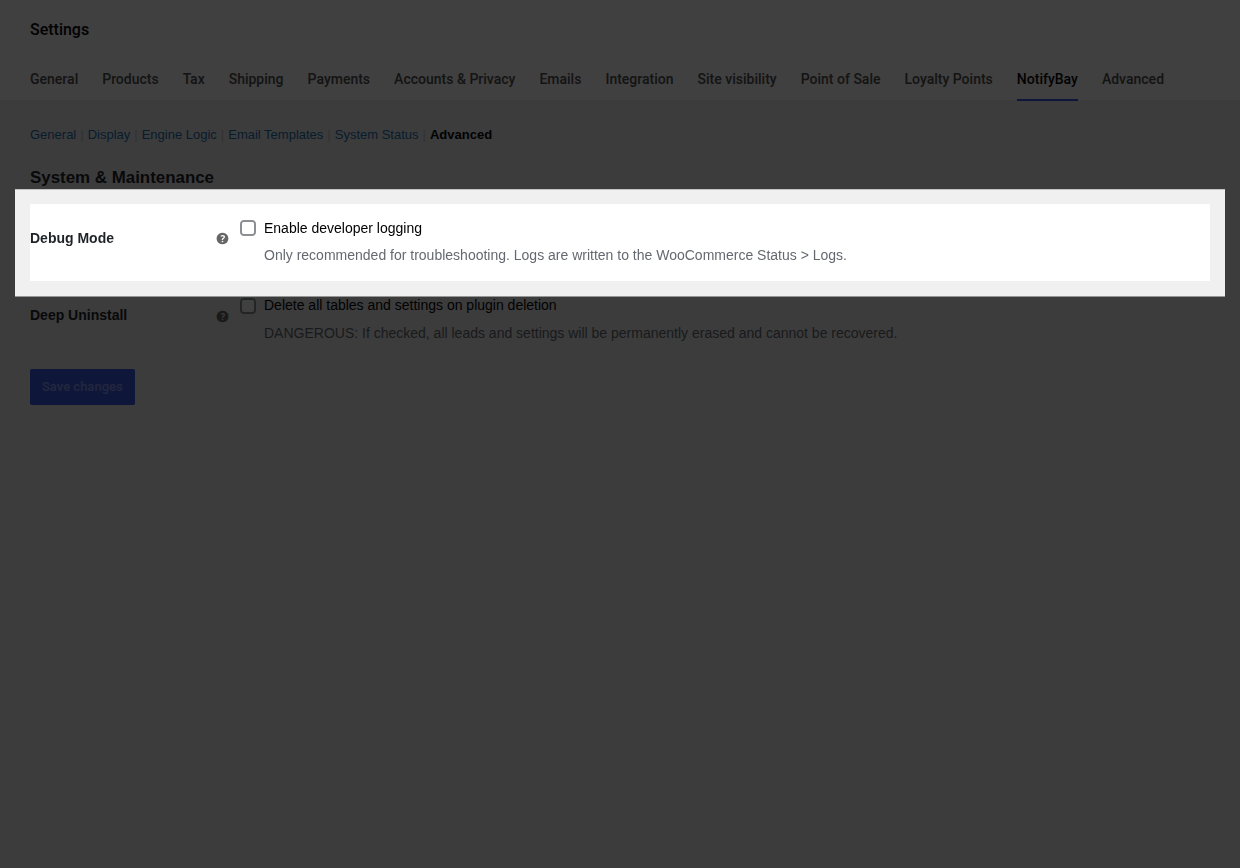
- What it does: Writes a detailed “play-by-play” of the plugin’s background actions into your WooCommerce logs.
- Where to find logs: Navigate to WooCommerce > Status > Logs and look for files starting with
notifybay-. - Important: Disable this once your issue is resolved to save server disk space.
The “Deep Uninstall” Option
Section titled “The “Deep Uninstall” Option”This setting determines what happens to your data if you delete the NotifyBay plugin.
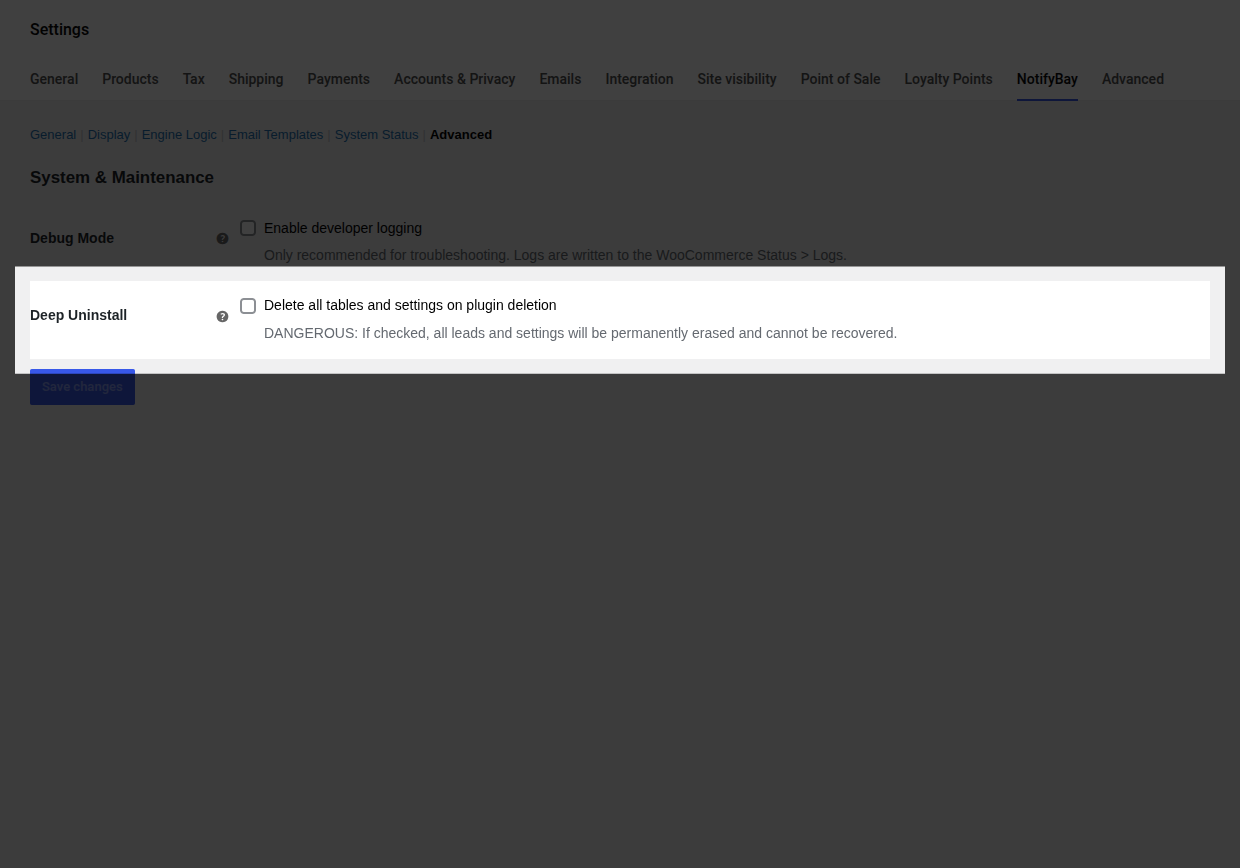
- OFF (Default): Keeps your data safe. If you delete and later reinstall NotifyBay, your thousands of leads and analytics history will still be there.
- ON: Wipes the slate clean. This will permanently erase all leads, analytics, and settings from your database when the plugin is deleted.
[!WARNING] Only enable Deep Uninstall if you are certain you want to lose all your NotifyBay data forever. We recommend taking a database backup first.