

Lead Management
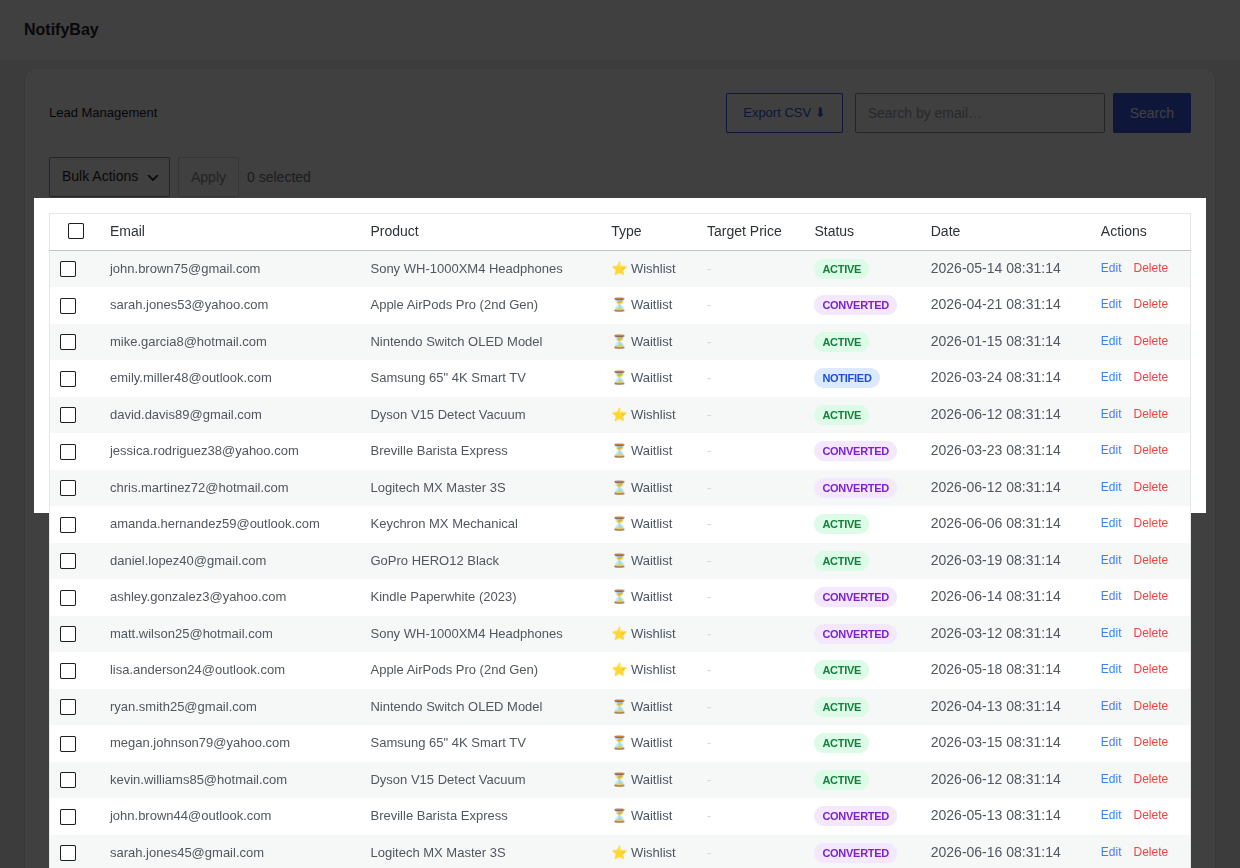
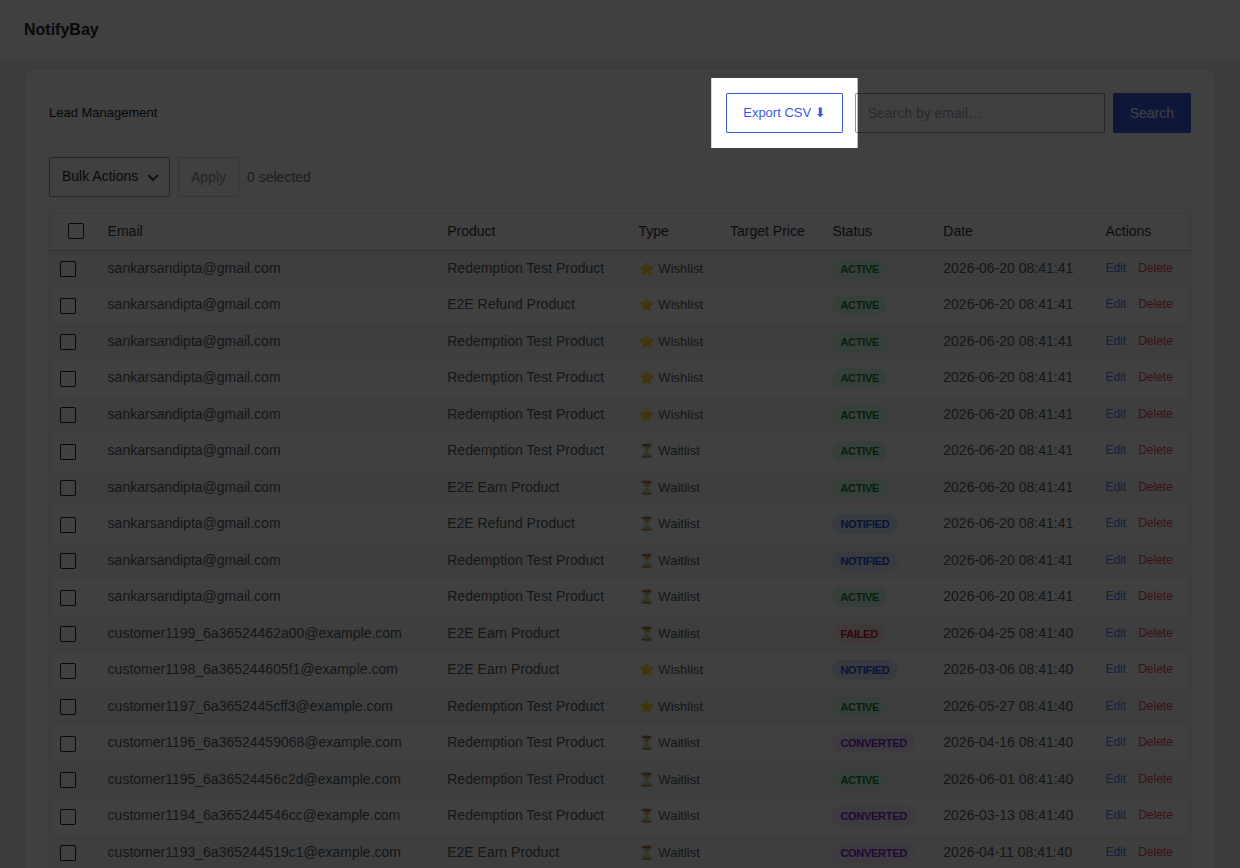
The NotifyBay > Leads tab is your central command center for all customer intent data. Here, you can monitor every waitlist and wishlist request, manually manage subscribers, and analyze where your customers are in the conversion funnel.
The Leads Table
Section titled “The Leads Table”The main table provides a comprehensive overview of your subscribers. By default, it displays the 20 most recent leads, but you can browse through your entire history using the pagination buttons at the bottom.
Data Columns
Section titled “Data Columns”- Email: The customer’s contact address.
- Product: The specific item (including variation) they are interested in.
- Type: Labeled as ⏳ Waitlist (Back-in-Stock) or ⭐ Wishlist (Price Drop).
- Target Price: For Wishlist leads, this shows the exact price point required to trigger their notification.
- Status: The current stage of the lead in your automation engine.
- Date: When the customer first subscribed.
Understanding Lead Statuses
Section titled “Understanding Lead Statuses”Every lead follows a lifecycle. Understanding these statuses is key to troubleshooting why a customer may not have received an email.
| Status | Meaning |
|---|---|
| Active | The lead is valid and waiting for a restock or price drop. |
| Pending Verification | User has signed up but has not yet clicked the link in their Double Opt-In email. |
| Notified | An automated email has been successfully sent to this customer. |
| Converted | The customer clicked the email link and successfully purchased the product. |
| Expired | The lead reached your configured expiration limit (e.g., 30 days) without a restock. |
| Unsubscribed | The customer manually opted out via the link in their email or dashboard. |
| Failed | The email couldn’t be delivered (likely due to an invalid email or SMTP issue). |
Searching & Filtering
Section titled “Searching & Filtering”Finding specific data is fast and intuitive, even with thousands of leads.
🔍 Quick Search
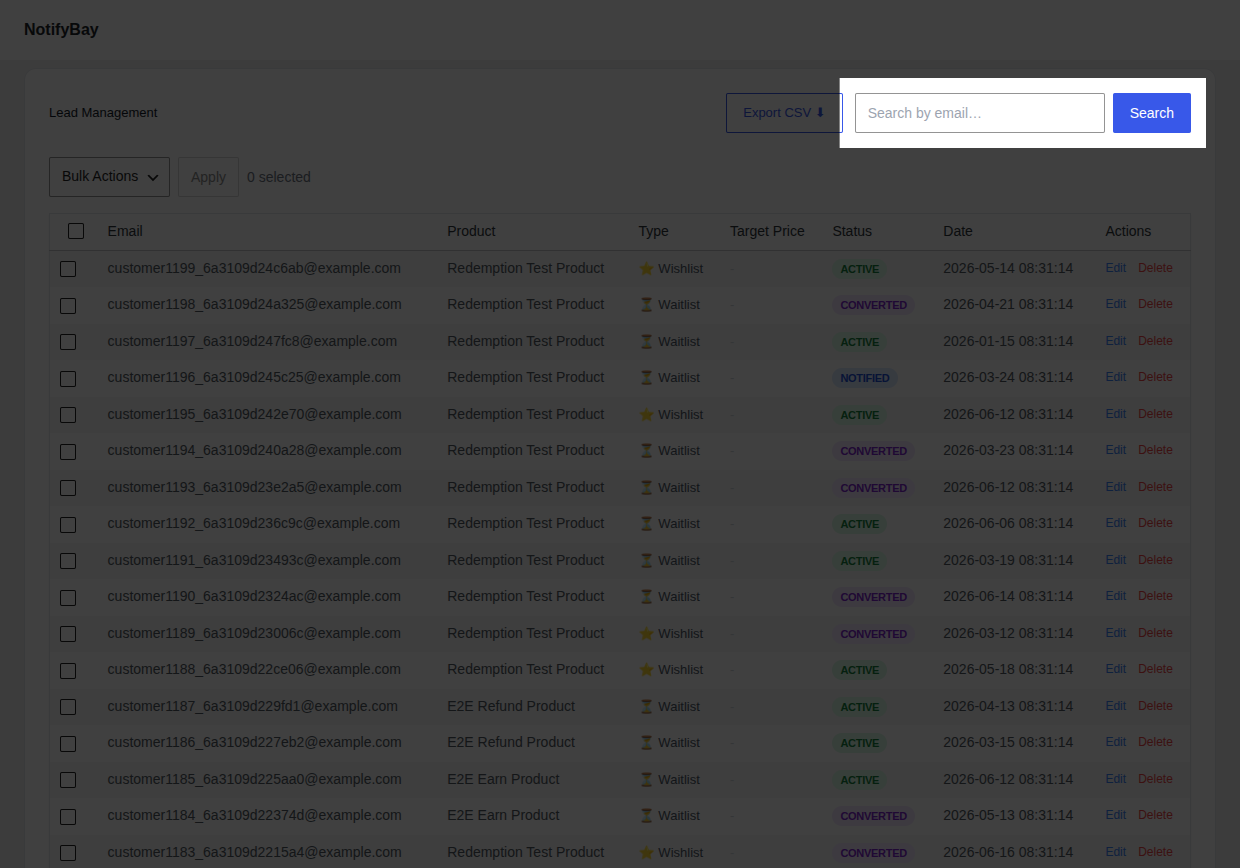
Section titled “🔍 Quick Search”Use the search bar at the top right to find a lead by their email address. This is useful for answering support tickets or manually updating a single user.
⚡ Bulk Actions
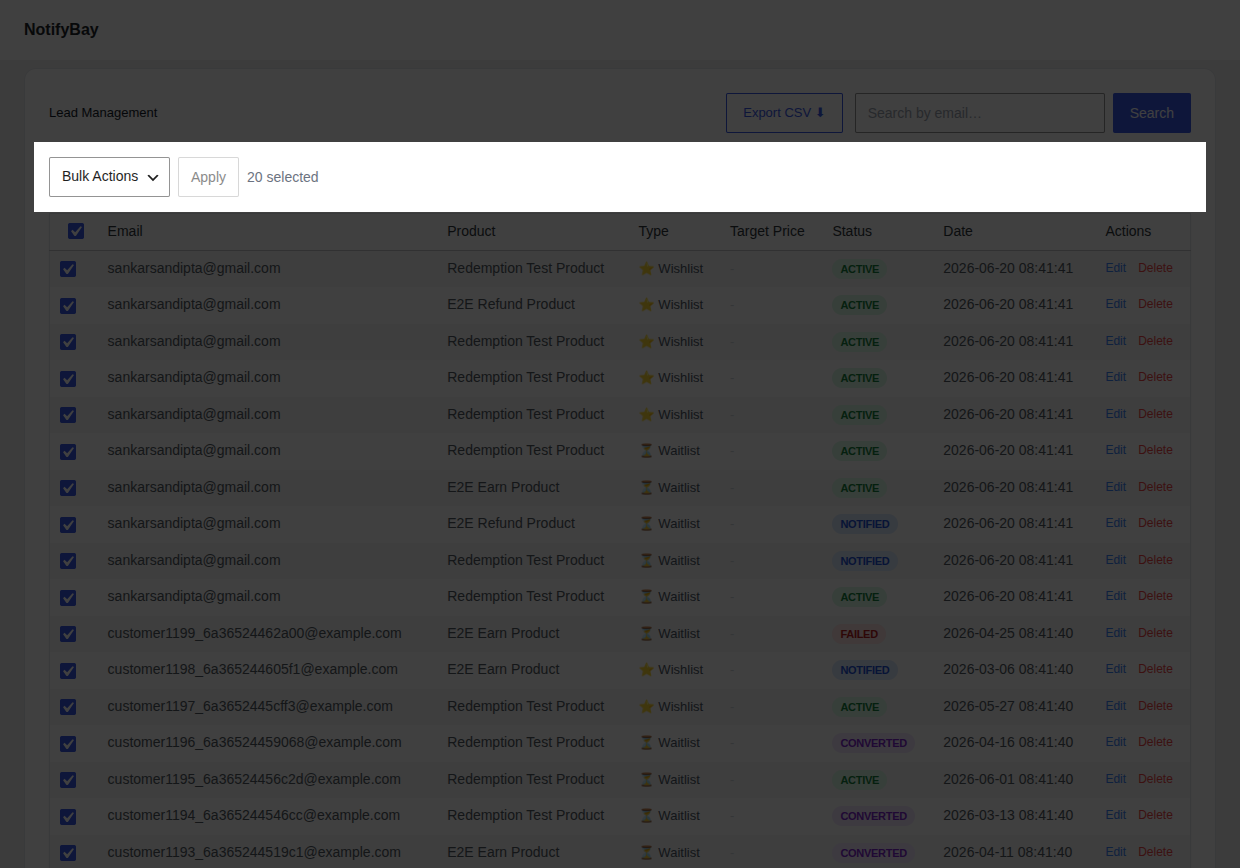
Section titled “⚡ Bulk Actions”Manage multiple leads at once by selecting their checkboxes and using the Bulk Actions dropdown:
- Mark Active: Reset “Notified” or “Expired” leads back to “Active” if you want them to receive the next alert.
- Mark Expired: Manually retire old leads.
- Delete: Permanently remove selected leads from your database.
Manually Editing a Subscriber
Section titled “Manually Editing a Subscriber”Sometimes you need to correct a customer’s mistake, such as a typo in their email or a target price that was set too low.
- Locate the lead and click the Edit button in the Actions column.
- In the Edit Subscriber modal, you can change:
- Email Address: Fix typos to ensure delivery.
- Status: Manually move them between Active, Notified, or Unsubscribed.
- Price at Subscription: (Wishlist only) Adjust the target price if the customer changed their mind.
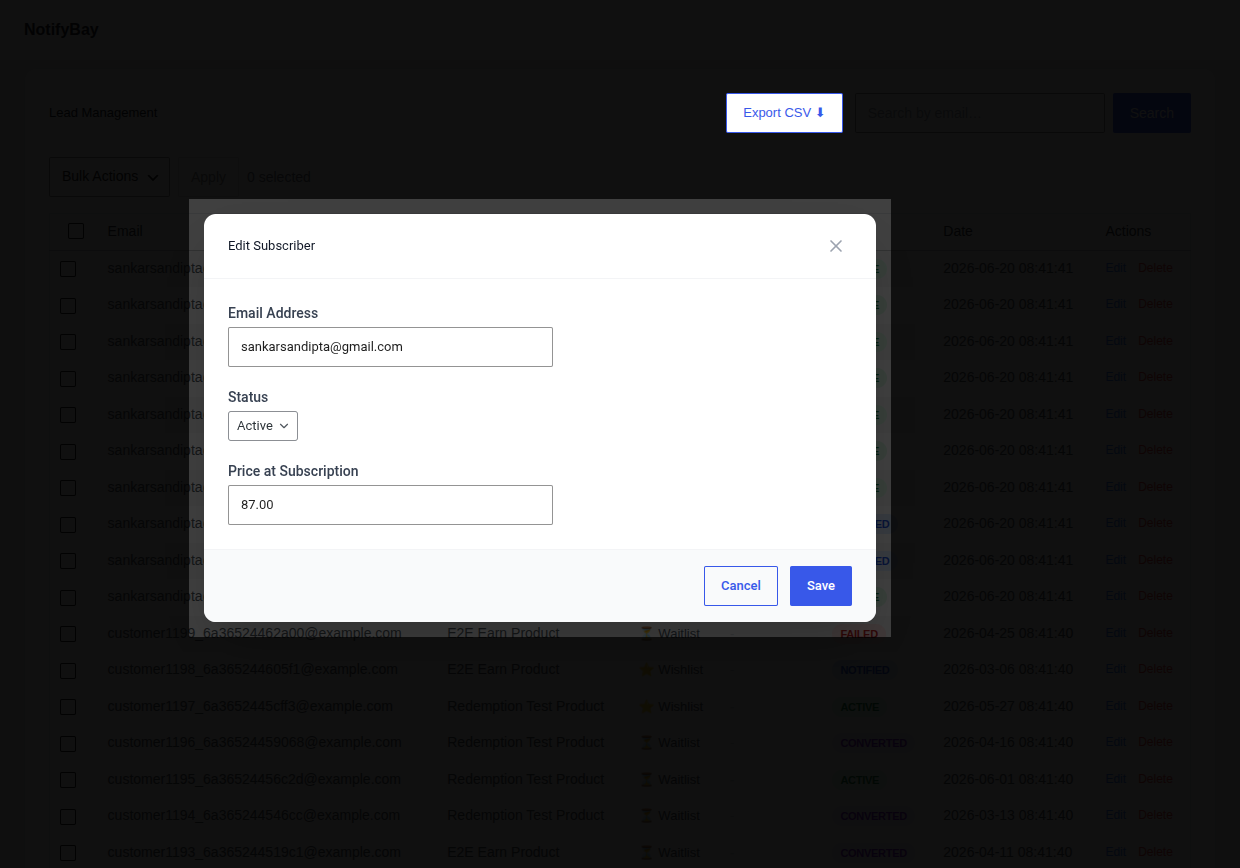
- Click Save to apply the changes immediately.
Data Portability (Export)
Section titled “Data Portability (Export)”You can download your entire subscriber list as a CSV file at any time. This is perfect for importing high-intent leads into your external CRM or email marketing tools (like Mailchimp or Klaviyo).
- Click the Export CSV ⬇ button at the top of the Leads page.
- The download will begin automatically.
[!TIP] Use the Converted filter (or export) to identify your most loyal customers for future reward programs!