

Quick Start Guide
Once you have installed NotifyBay, you can get it up and running on your storefront in just a few minutes. This guide walks you through the absolute essentials to start recovering revenue today.
Step 1: Activate Your Core Modules
Section titled “Step 1: Activate Your Core Modules”First, decide which notification features you want to offer your customers.
- Navigate to NotifyBay > Settings in your WordPress admin sidebar.
- On the General tab, find the Feature Selection section.
- Ensure Waitlist (Back-in-Stock) is toggled ON to capture intent for out-of-stock items.
- Toggle Enable Wishlist to ON if you want customers to track price drops.
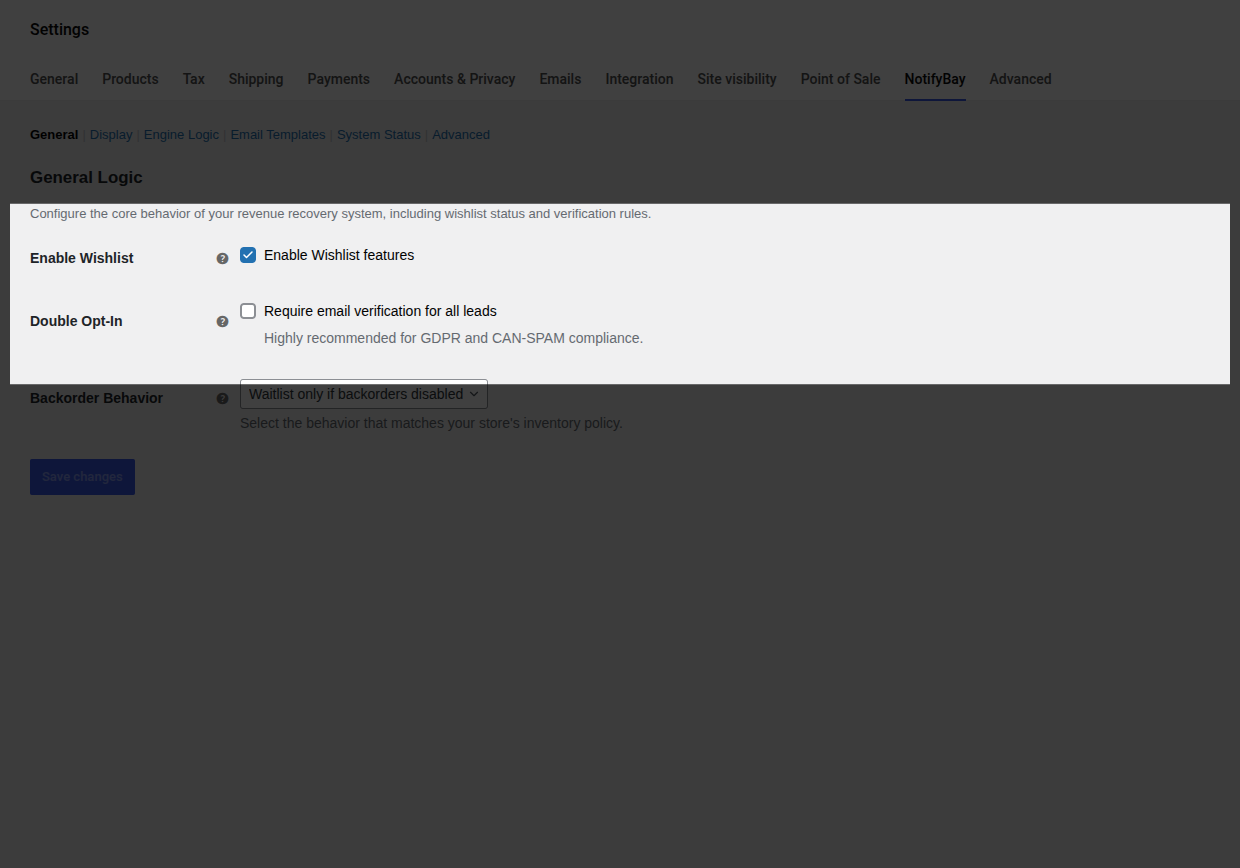
- Click Save Settings at the bottom of the page.
Step 2: Configure Your Button Appearance
Section titled “Step 2: Configure Your Button Appearance”NotifyBay needs to look like a native part of your store. You can customize the look and placement in the Display tab.
- Click the Display (Appearance) tab at the top of the Settings screen.
- Placement: By default, NotifyBay is set to Automatic. This works for almost all themes by automatically inserting the form near the “Add to Cart” button.
- Button Styling:
- Change the Waitlist Button Text (e.g., “Alert me when in stock!”).
- Add your theme’s primary button class to the Button CSS Class field (e.g.,
button altorbtn-primary) to ensure a perfect visual match.
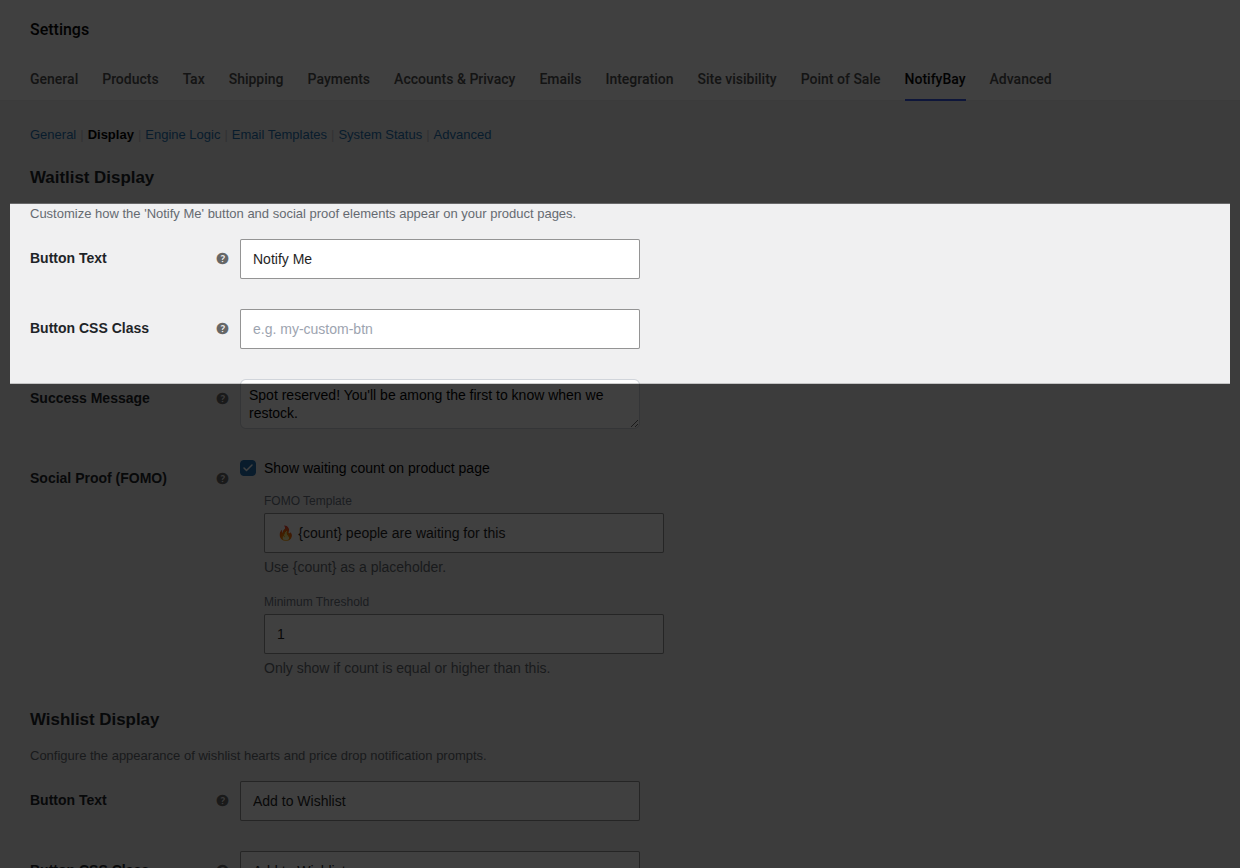
- Click Save Settings.
Step 3: Verify & Send Your First Test
Section titled “Step 3: Verify & Send Your First Test”Before going live, it’s critical to verify the “Customer-to-Dashboard” flow.
- Open an Incognito Window: Open your store as a guest visitor.
- Join a Waitlist: Go to any Out of Stock product. You should see your new button. Click it, enter a test email, and submit.
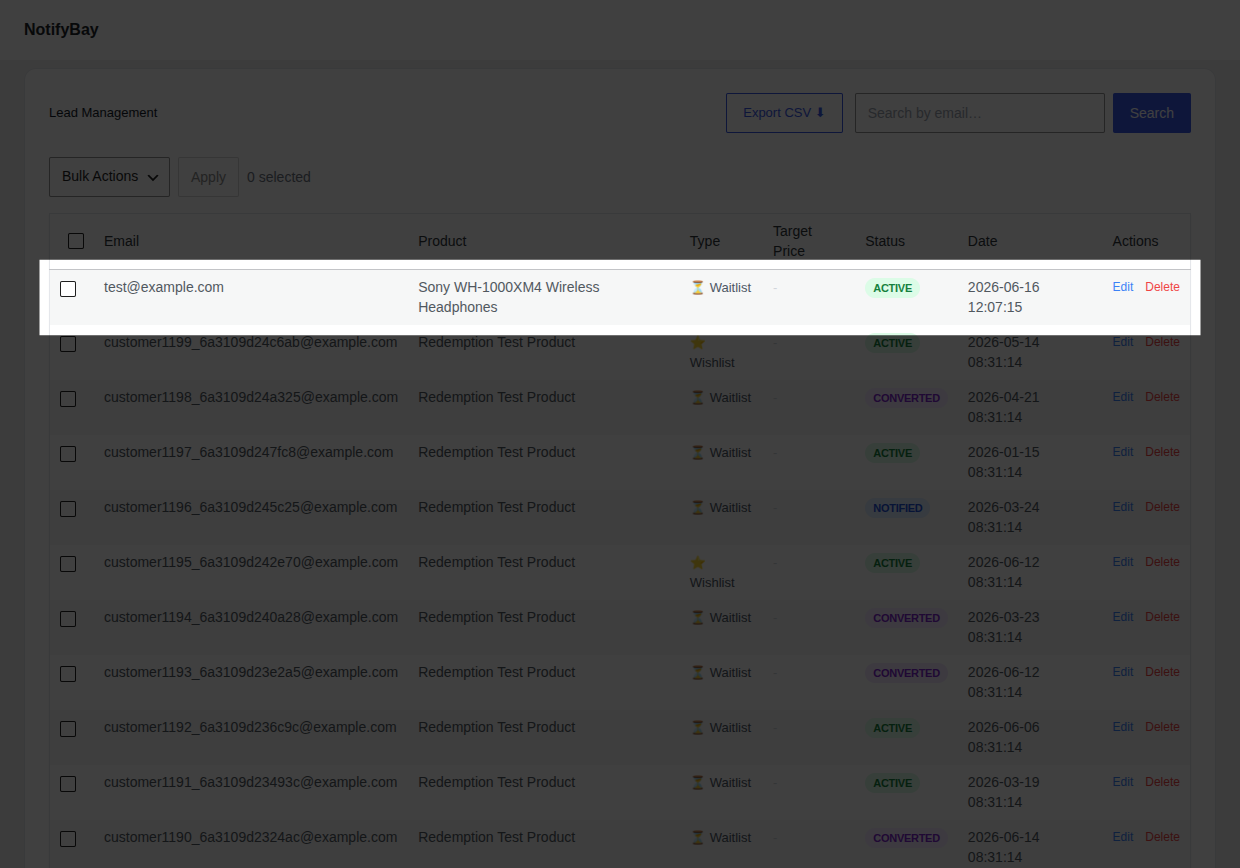
- Check your Dashboard: Go back to your admin browser tab and navigate to NotifyBay > Leads.
- Success: You should see your test email at the top of the list with an “Active” status.
What’s Next?
Section titled “What’s Next?”Now that your engine is running, you can:
- Customize your email templates to match your brand voice.
- Set up Double Opt-In for better email hygiene.
- Learn how to place forms manually using Shortcodes or Blocks.