
General & Display Settings
The Settings panel is your command center for customizing how NotifyBay interacts with your customers and how it looks on your storefront. Navigate to NotifyBay > Settings to begin.
This guide covers the General and Display (Appearance) tabs.
1. General Logic Tab
Section titled “1. General Logic Tab”The General tab controls the fundamental rules for your notification engine.
Core Feature Selection
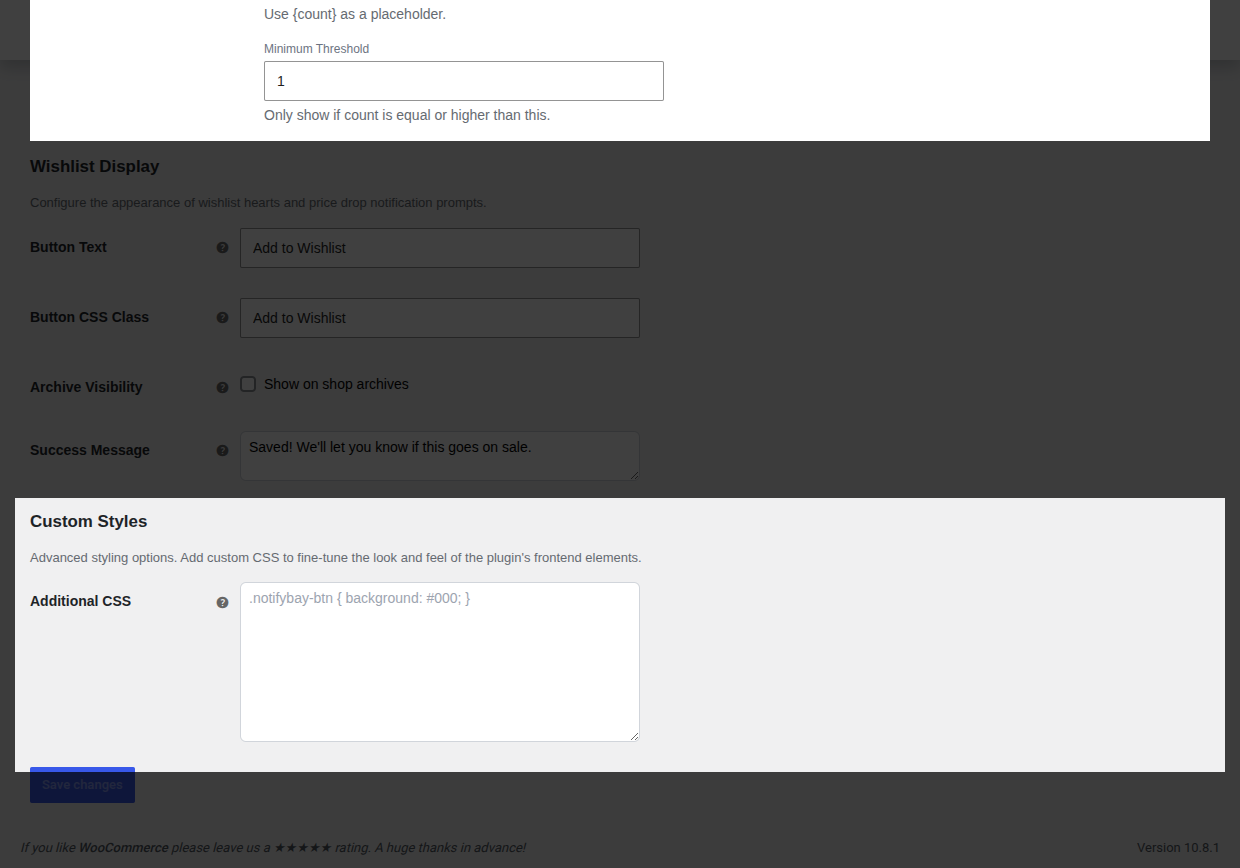
Section titled “Core Feature Selection”- Enable Wishlist: Toggle this ON to allow customers to track price drops on in-stock items. If disabled, only the Waitlist (Back-in-Stock) functionality will be active.
Compliance & Security
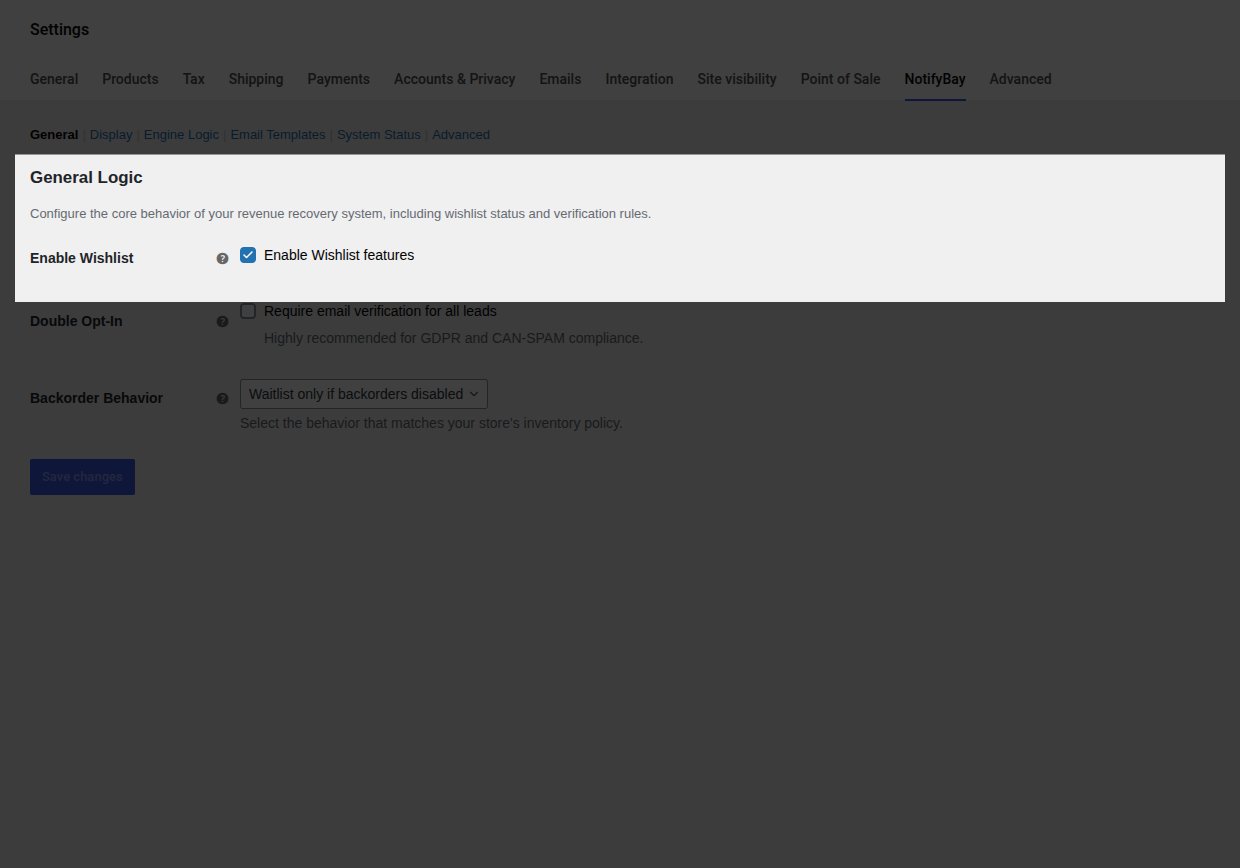
Section titled “Compliance & Security”- Double Opt-In: When enabled, guest users receive a verification email. They must click a link in that email before their subscription becomes active.
- Why use this? It ensures high-quality leads and is highly recommended for GDPR and CAN-SPAM compliance. It prevents bots from spamming your forms and ensures you only email people who truly want your notifications.
Inventory & Backorder Logic
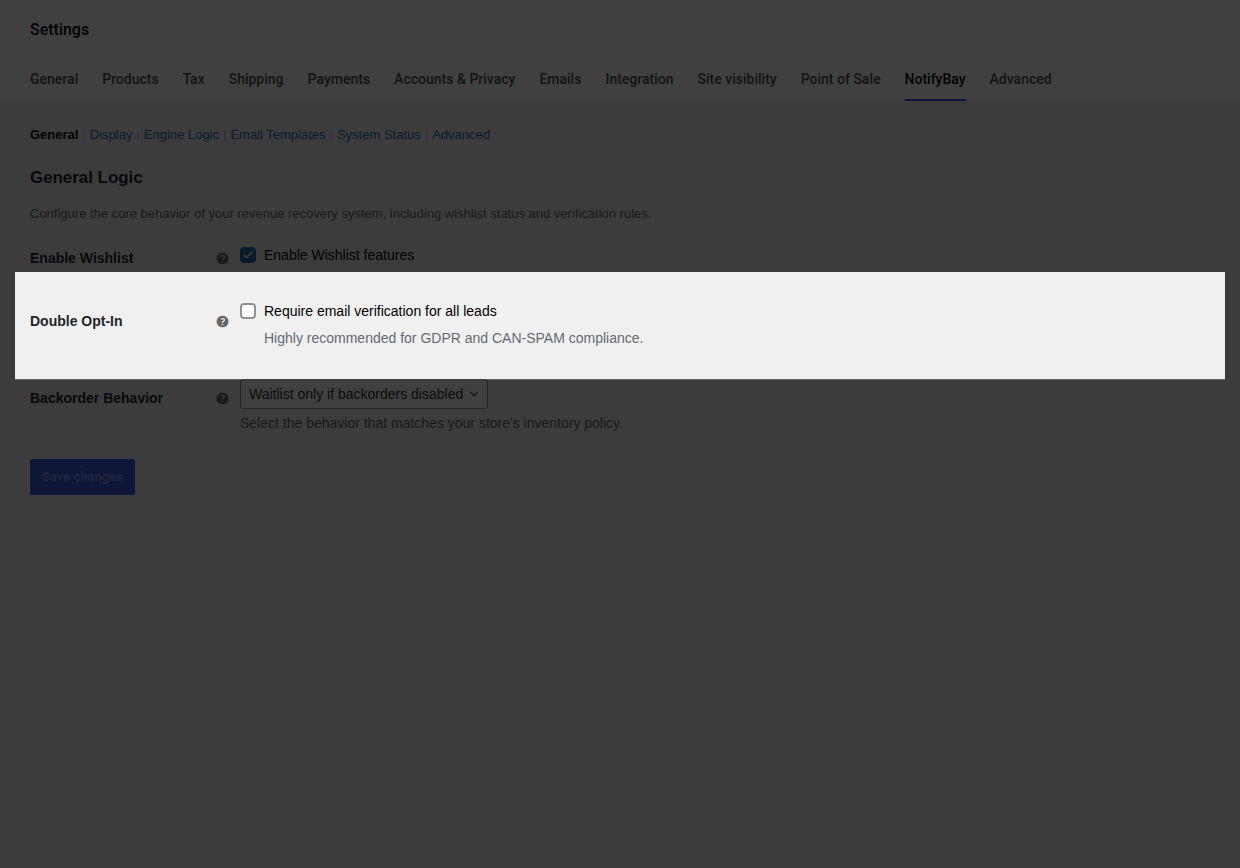
Section titled “Inventory & Backorder Logic”Choose how NotifyBay should behave when a product allows backorders in WooCommerce:
- Waitlist only if backorders disabled: The standard mode. The form only appears if the item is strictly unpurchasable.
- Show waitlist regardless of backorders: Useful if you want to gauge interest even while accepting orders.
- Never show waitlist for backorderable items: Keeps your product pages clean for items you can still ship.
2. Display (Appearance) Tab
Section titled “2. Display (Appearance) Tab”The Display tab allows you to integrate NotifyBay buttons seamlessly into your store’s unique design.
Waitlist Styling
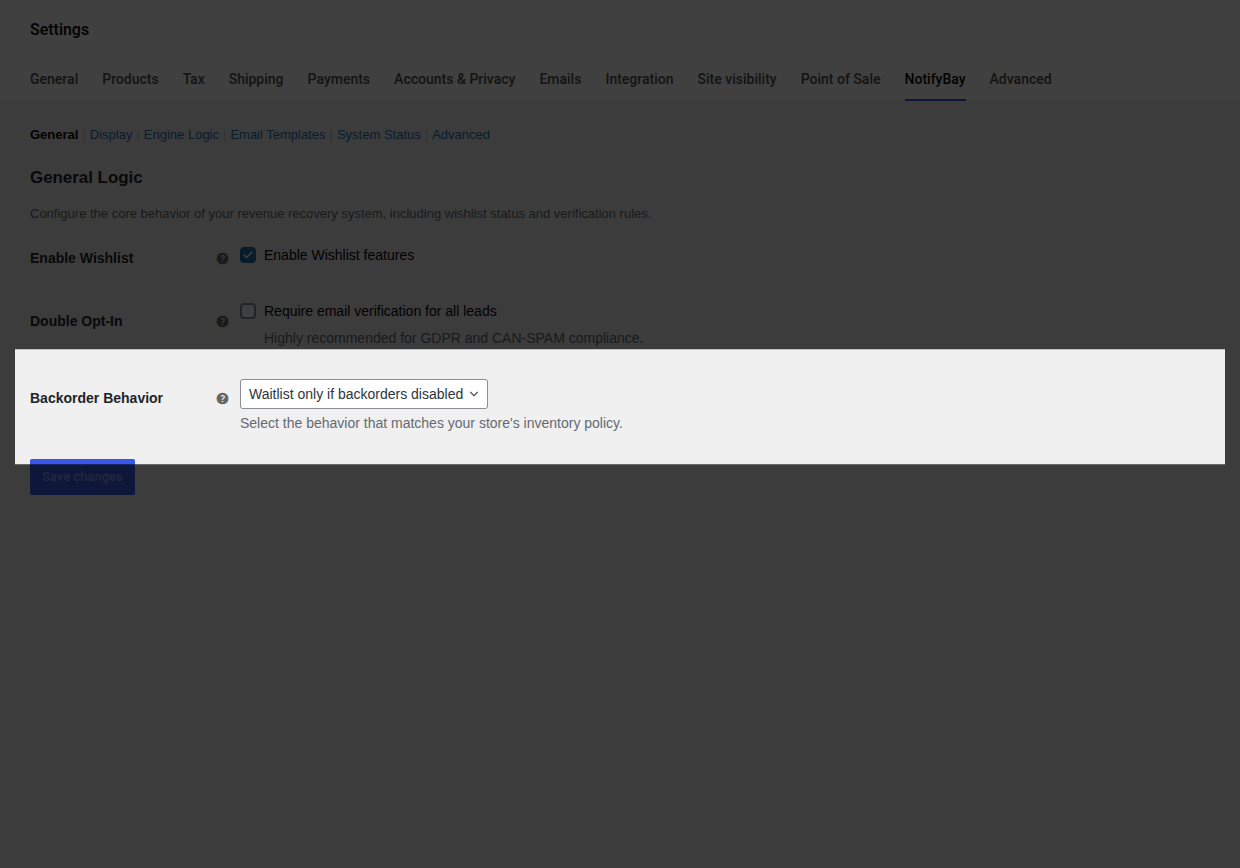
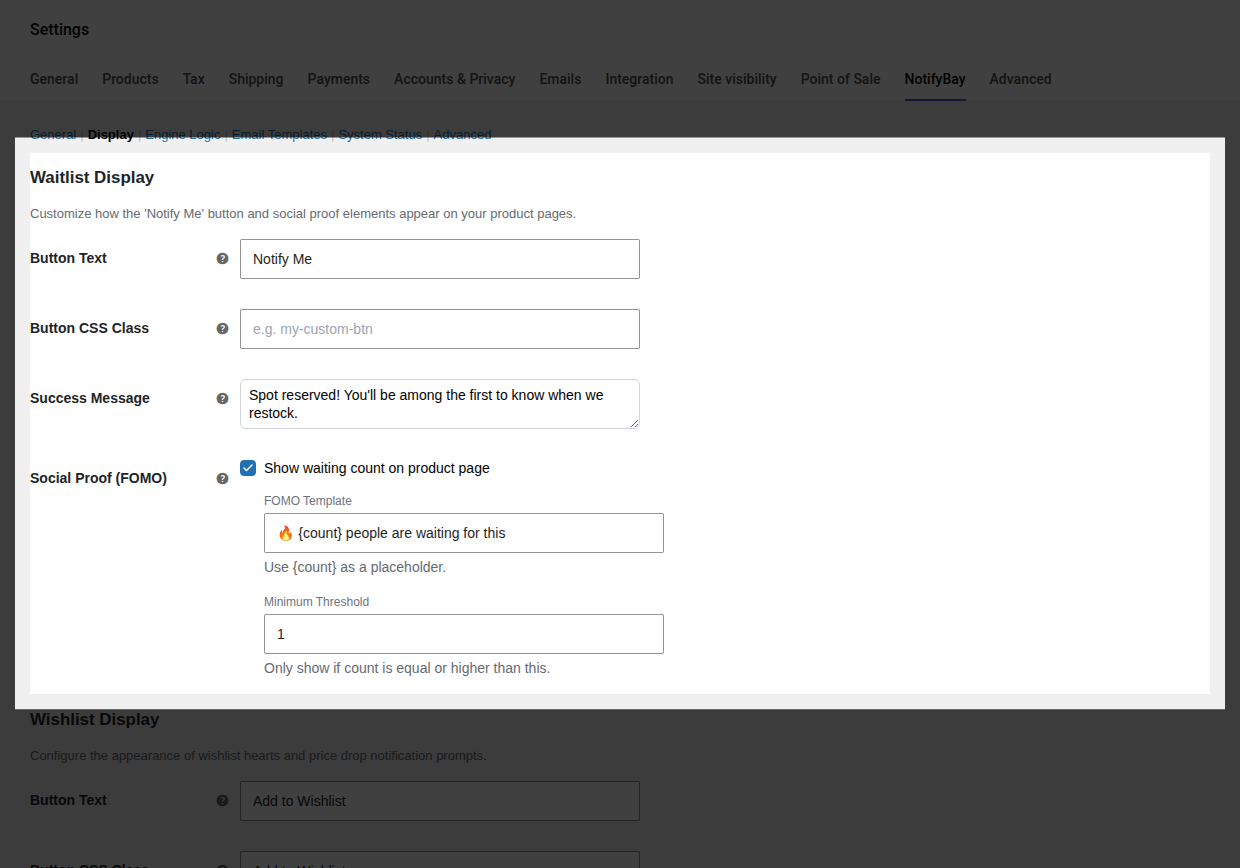
Section titled “Waitlist Styling”- Button Text: Customize the call-to-action (e.g., “Notify Me when Back!”).
- Button CSS Class: Add your theme’s native button classes (e.g.,
button altorbtn-primary) so the form matches your site perfectly. - Success Message: The text shown immediately after a user joins the list.
Social Proof (FOMO)
Section titled “Social Proof (FOMO)”Create urgency by showing shoppers that others are interested in the product.
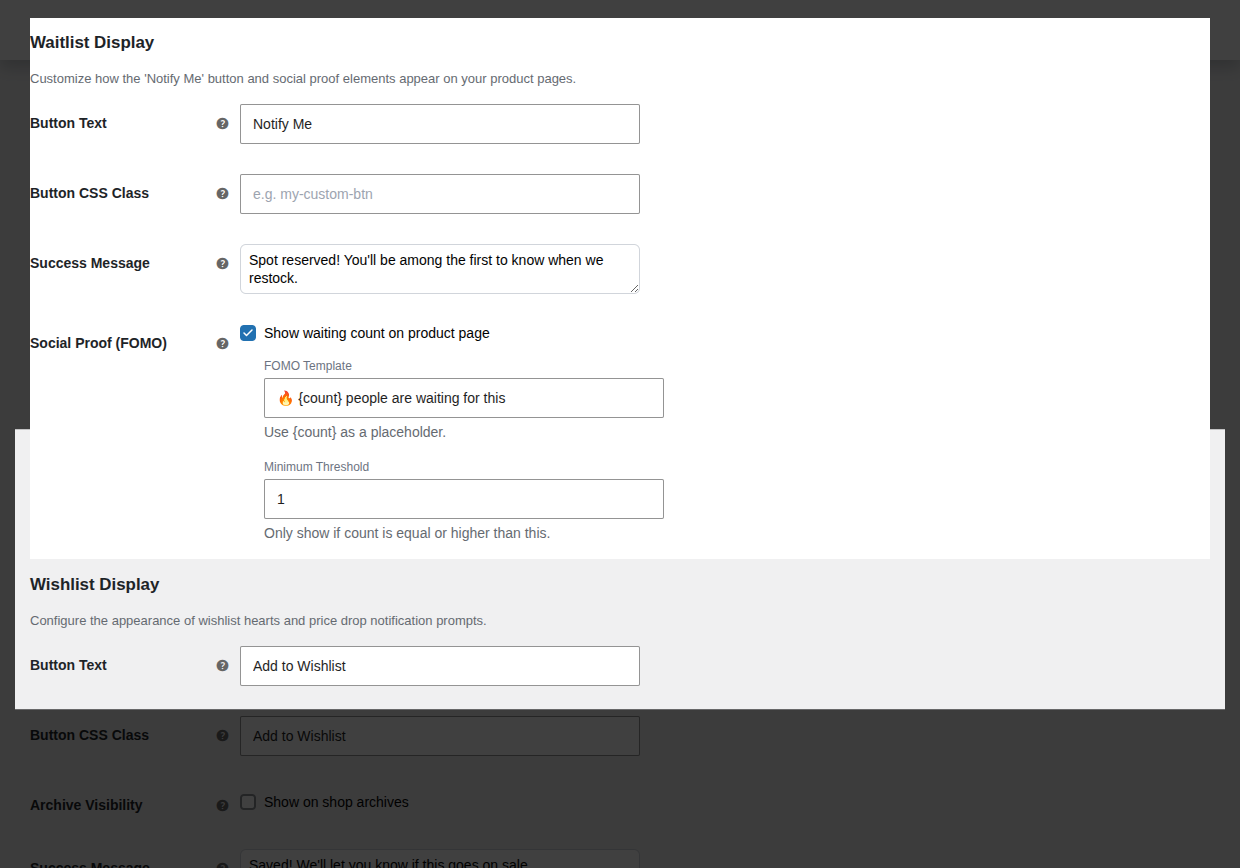
- FOMO Template: Use the
{count}tag to create custom messages (e.g., ”🔥 Join {count} others waiting for this item”). - Minimum Threshold: To keep your brand look premium, only show the message if the count is high enough (e.g., only show if at least 5 people are waiting).
Wishlist Styling
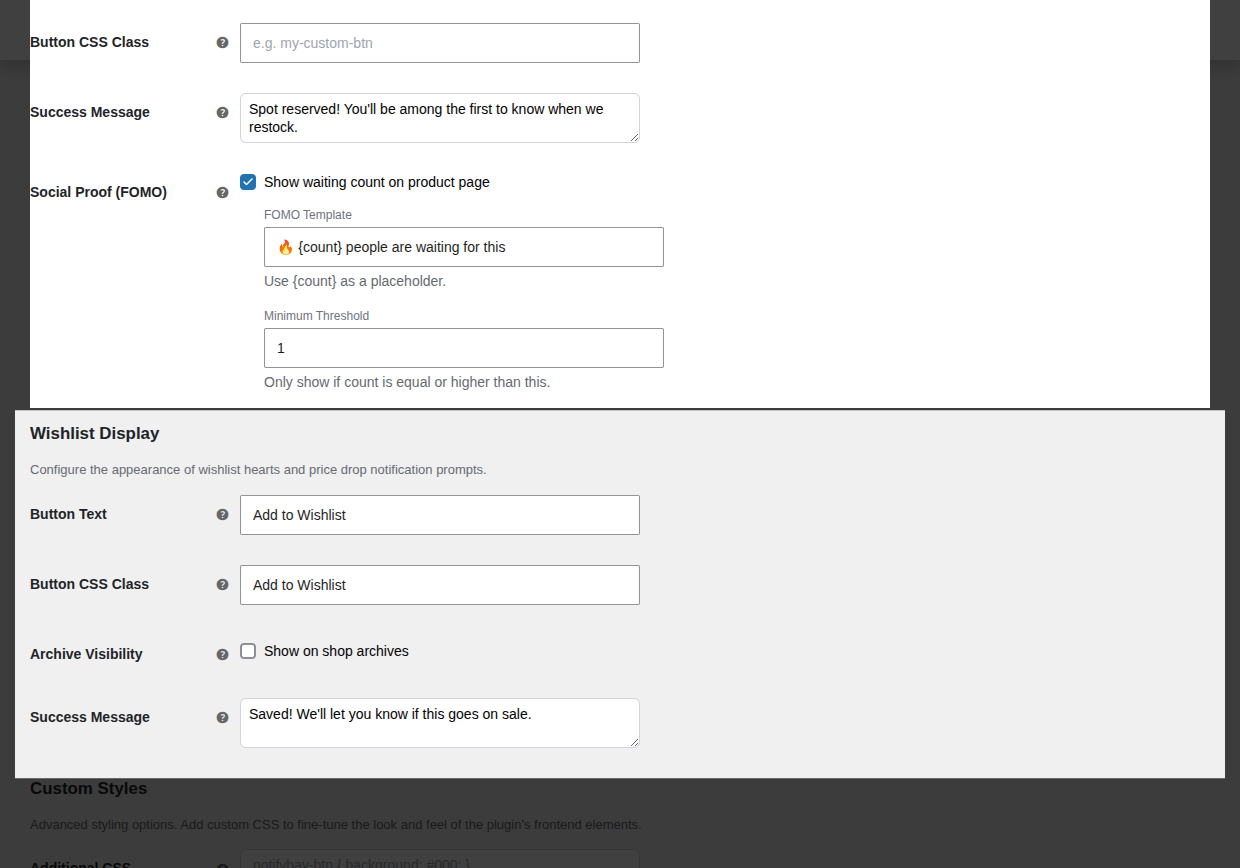
Section titled “Wishlist Styling”(Note: These settings only appear if “Enable Wishlist” is toggled ON in the General tab).
- Archive Visibility: If enabled, a small heart icon or button will appear on your shop and category pages. This allows customers to track prices without ever leaving the product gallery.
3. Advanced Customization (CSS)
Section titled “3. Advanced Customization (CSS)”For store owners who want complete control over the layout, NotifyBay includes a built-in CSS editor.
- Additional CSS: Enter raw CSS here to override any part of the plugin’s frontend. You can target classes like
.notifybay-waitlist-btnor.notifybay-wishlist-wrapper.
[!WARNING] Do not include
<style>tags in this field. Only enter raw CSS rules.