

Installation & Licensing
This is the first stop before you can reward a single point it covers installing PointBay, confirming it took hold in your store, and, if you’re using PointBay Pro, activating your license so it keeps itself updated.
Prerequisites
Section titled “Prerequisites”Before you install, make sure your store meets these minimums:
- WordPress 6.8 or higher
- WooCommerce 6.1 or higher (required PointBay is a WooCommerce extension and won’t do anything without it active)
- PHP 7.0 or higher (8.0+ recommended for best performance)
- MySQL 5.6+ or MariaDB 10.1+ using the InnoDB storage engine (the modern default on virtually every host)
If you’re using PointBay Pro, have your license key ready you’ll find it in your purchase receipt, in the format WPAB-XXXXX-XXXXX-XXXXX.
Walkthrough: Install the Plugin
Section titled “Walkthrough: Install the Plugin”Choose whichever method matches how you normally manage plugins on this site.
Option A: Upload in WordPress (recommended)
Section titled “Option A: Upload in WordPress (recommended)”- Download the plugin
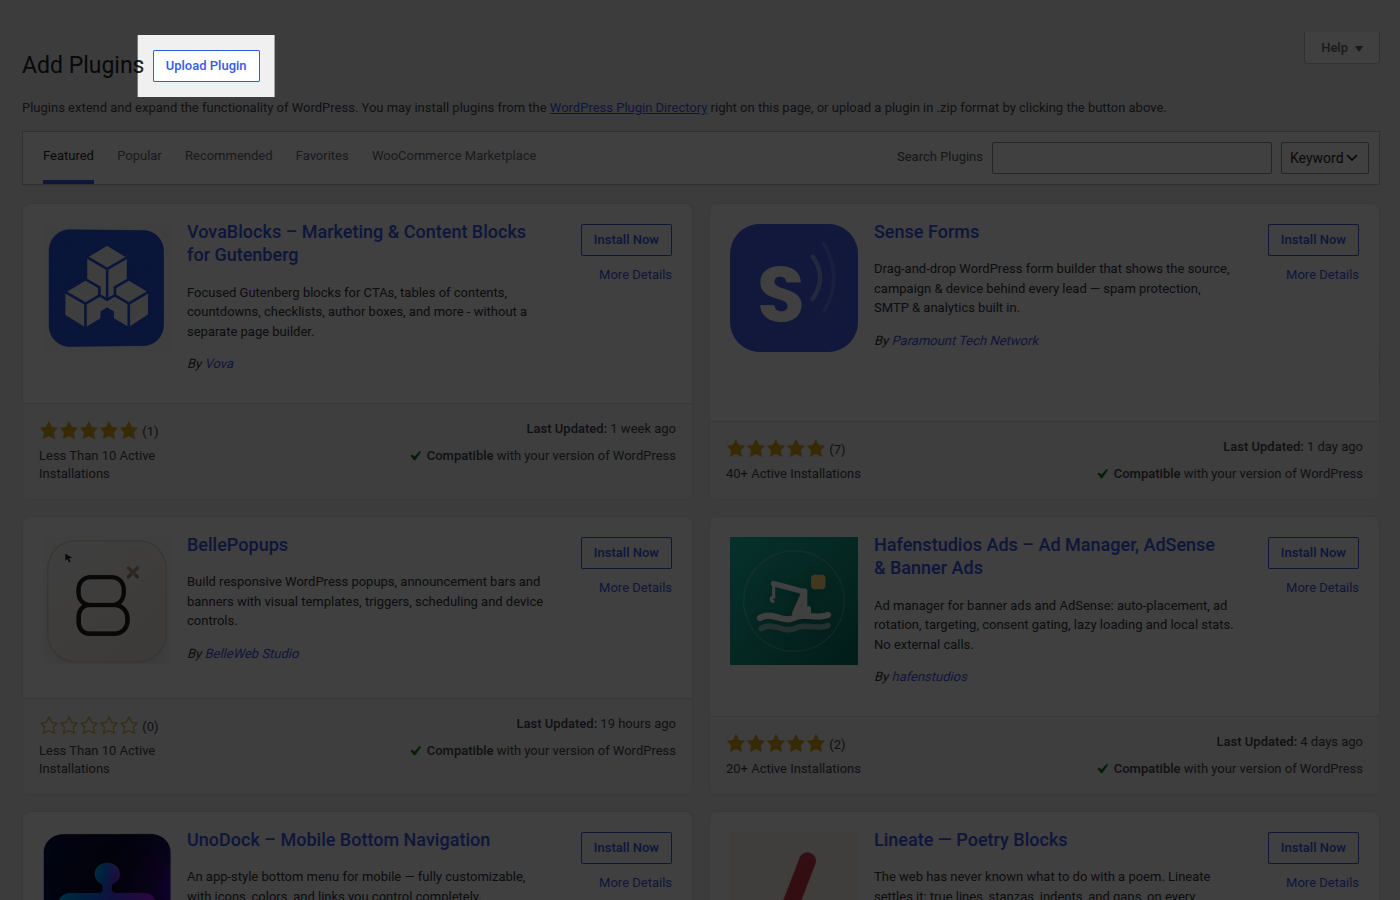
.zipfile from your account. - In your WordPress admin, go to Plugins → Add New and click Upload Plugin.
- Click Choose File, select the
.zipyou downloaded, and click Install Now.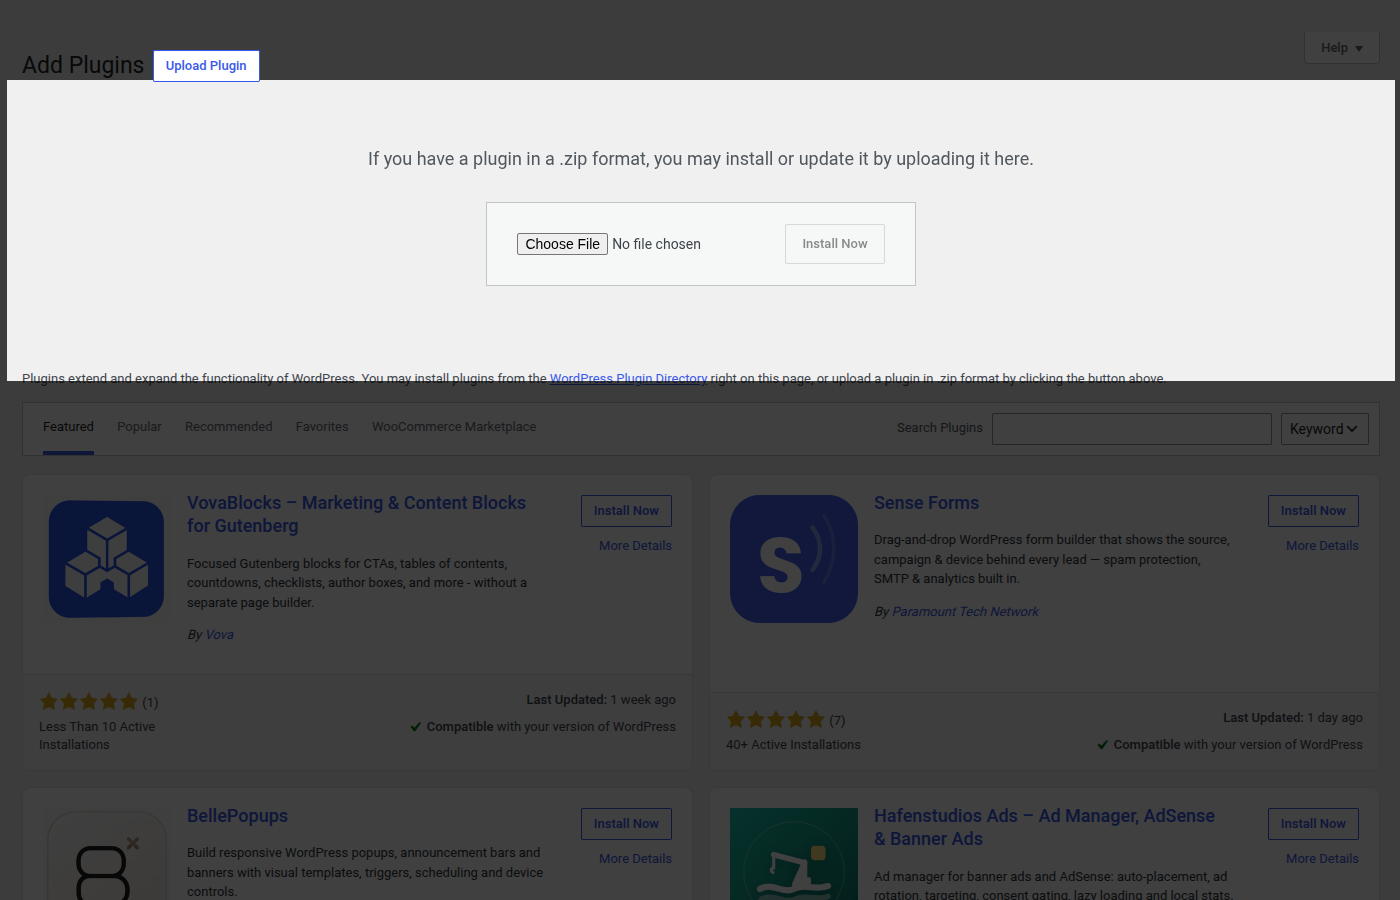
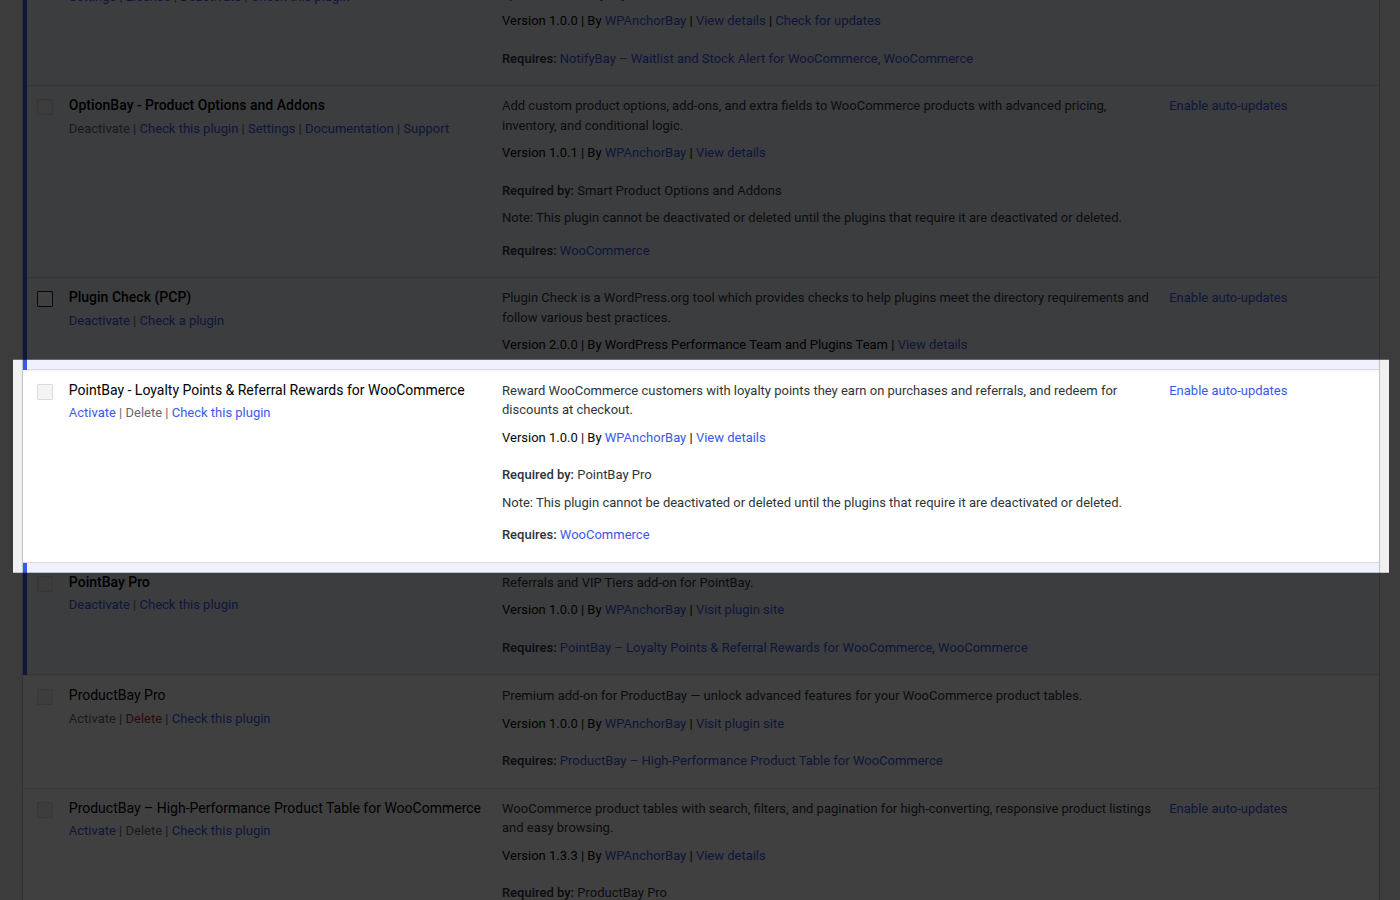
- When the upload finishes, click Activate Plugin.
Option B: Upload by FTP
Section titled “Option B: Upload by FTP”Use this if your host limits web-based uploads (some shared-hosting plans do):
- Unzip the download on your computer to get the plugin folder.
- Connect to your server with an FTP/SFTP client and open
/wp-content/plugins/. - Upload the plugin folder there.
- In WordPress, go to Plugins → Installed Plugins, find PointBay in the list, and click Activate.
Verify It Worked
Section titled “Verify It Worked”Once activation finishes, everything PointBay adds lives under the WooCommerce menu in your admin sidebar:
- WooCommerce → Settings → Loyalty Points the settings screen where you configure the whole program. This same screen is also reachable via the shorter Loyalty link that appears directly under the WooCommerce menu.
- WooCommerce → Points History the full record of every points transaction, and where you can make manual adjustments.
- A My Rewards page inside every customer’s My Account area, showing their balance and history.
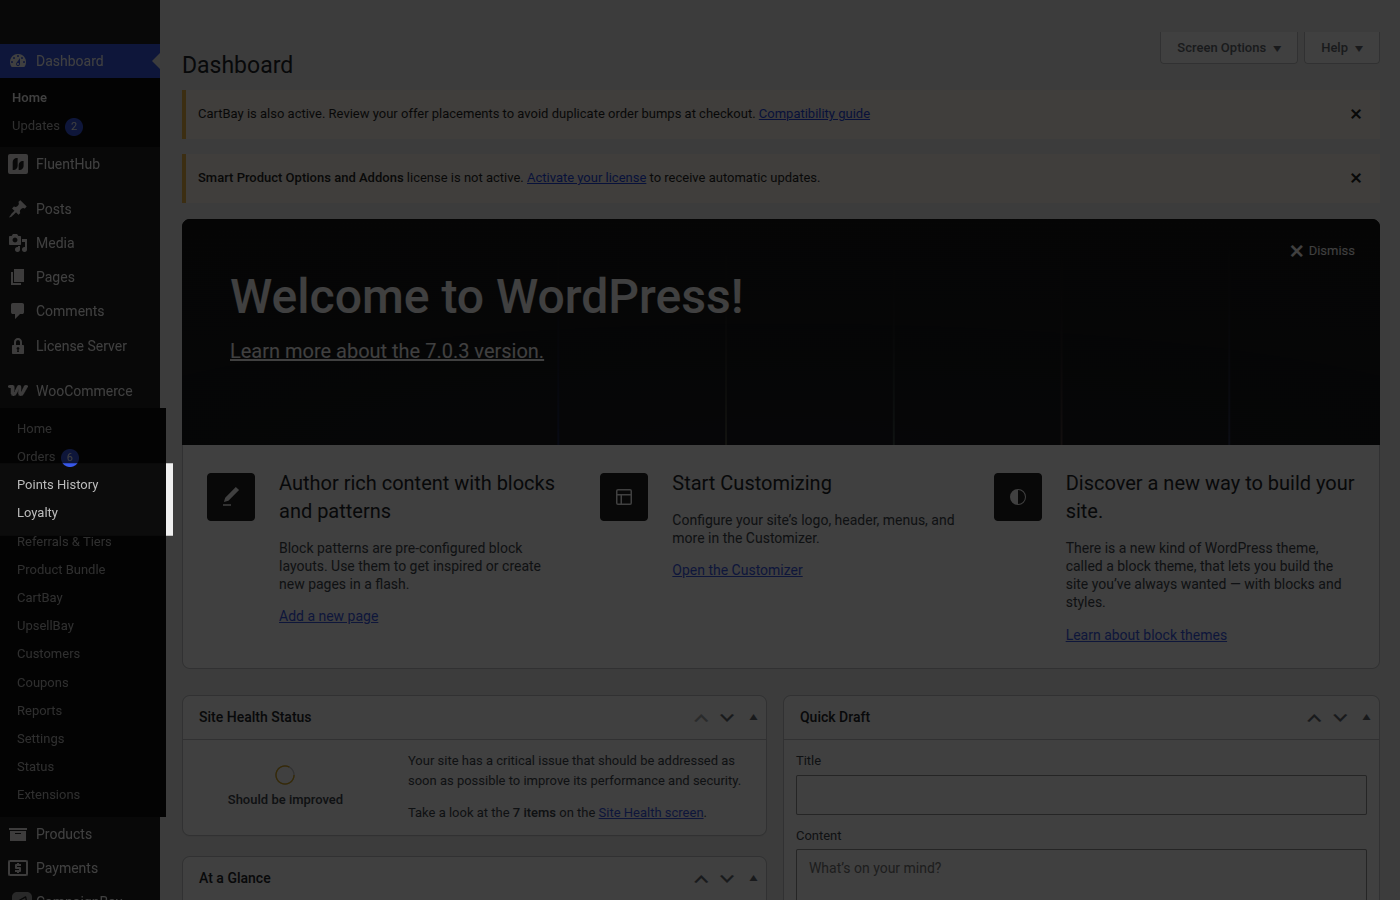
If you see the Loyalty and Points History links in the WooCommerce menu, installation succeeded and you’re ready to configure the plugin see Quick Setup.
Activating Your Pro License
Section titled “Activating Your Pro License”Activating your license unlocks automatic updates for PointBay Pro, so you don’t have to manually reinstall it every time a new version ships.
- Go to WooCommerce → Settings → Loyalty Points and scroll to the License Settings group.
- Paste in your license key (
WPAB-XXXXX-XXXXX-XXXXX). - Click Activate.
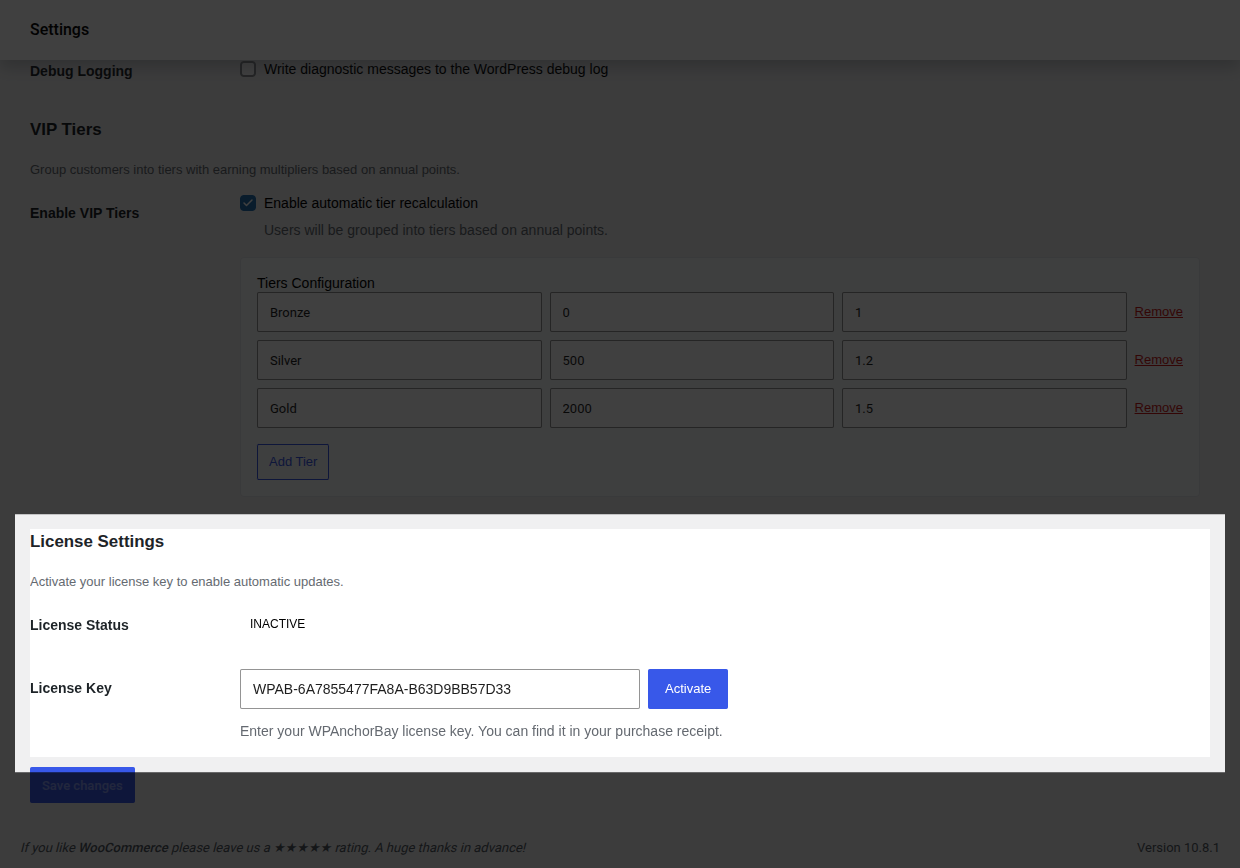
- Verify it worked: confirm License Status now reads Active. The key field locks and a Deactivate button appears in its place.
To move the license to a different site later, come back to this screen and click Deactivate first a license can only be active on one site at a time.
What’s Next
Section titled “What’s Next”Head to Quick Setup to configure your first earning and redemption rules.