Manual Methods
While the Guided Wizard provides a guided onboarding experience, you can also initiate table creation through a more straightforward interface.
Manual Entry Points
You can open the table creation interface from multiple locations:
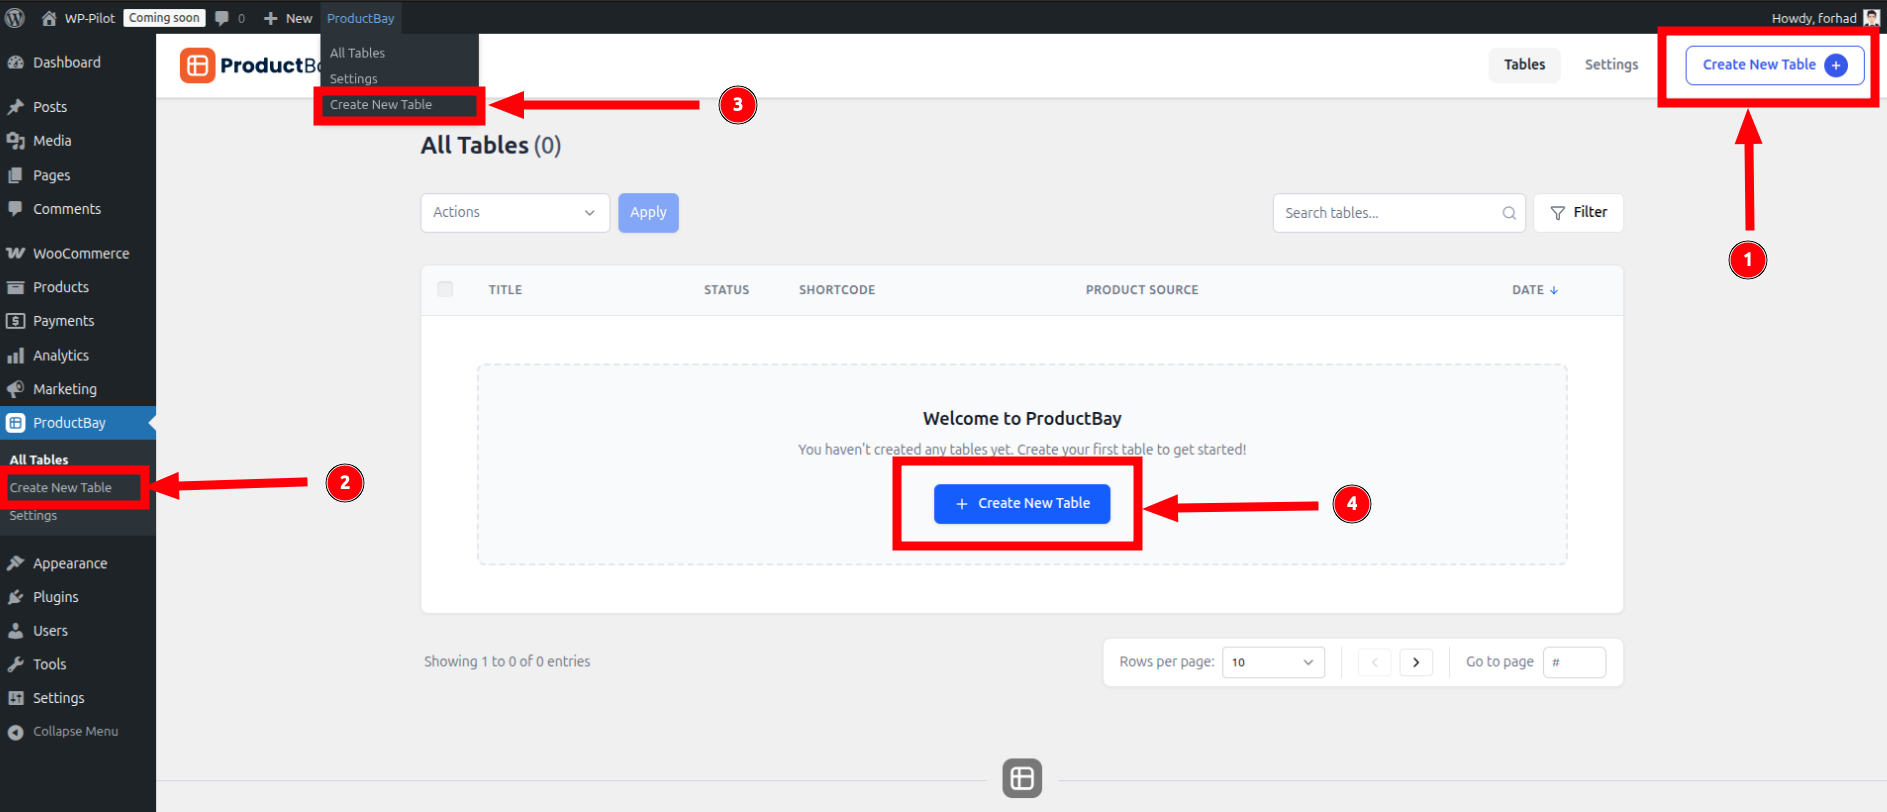
1. Plugin Navbar
Inside the ProductBay admin dashboard, you'll find a Create New Table button in the top navigation bar. This is the most common way to start a new table when you're already managing your existing ones.
2. WordPress Admin Menu
You can jump directly to the creation screen from any page in the WordPress admin by navigating to ProductBay → Create New Table in the left-hand sidebar menu.
3. WordPress Topbar
When the plugin is active, a specialized ProductBay menu is added to the WordPress admin topbar. Hover over it and select Create New Table for instant access. You can turn this feature on or off in the Plugin Settings page.
4. Dashboard Empty State
If you haven't created any tables yet, a prominent Create New Table call-to-action will appear in the center of the Table Dashboard.
Configuring Your Product Table
Once you've clicked Create New Table, you'll be directed to the table configuration screen. This interface allows you to define exactly how your product table looks and behaves.
There are three tabs on the table configuration page:
1. Table Tab
The Table Tab contains the foundational settings for your table, including its name and source data.
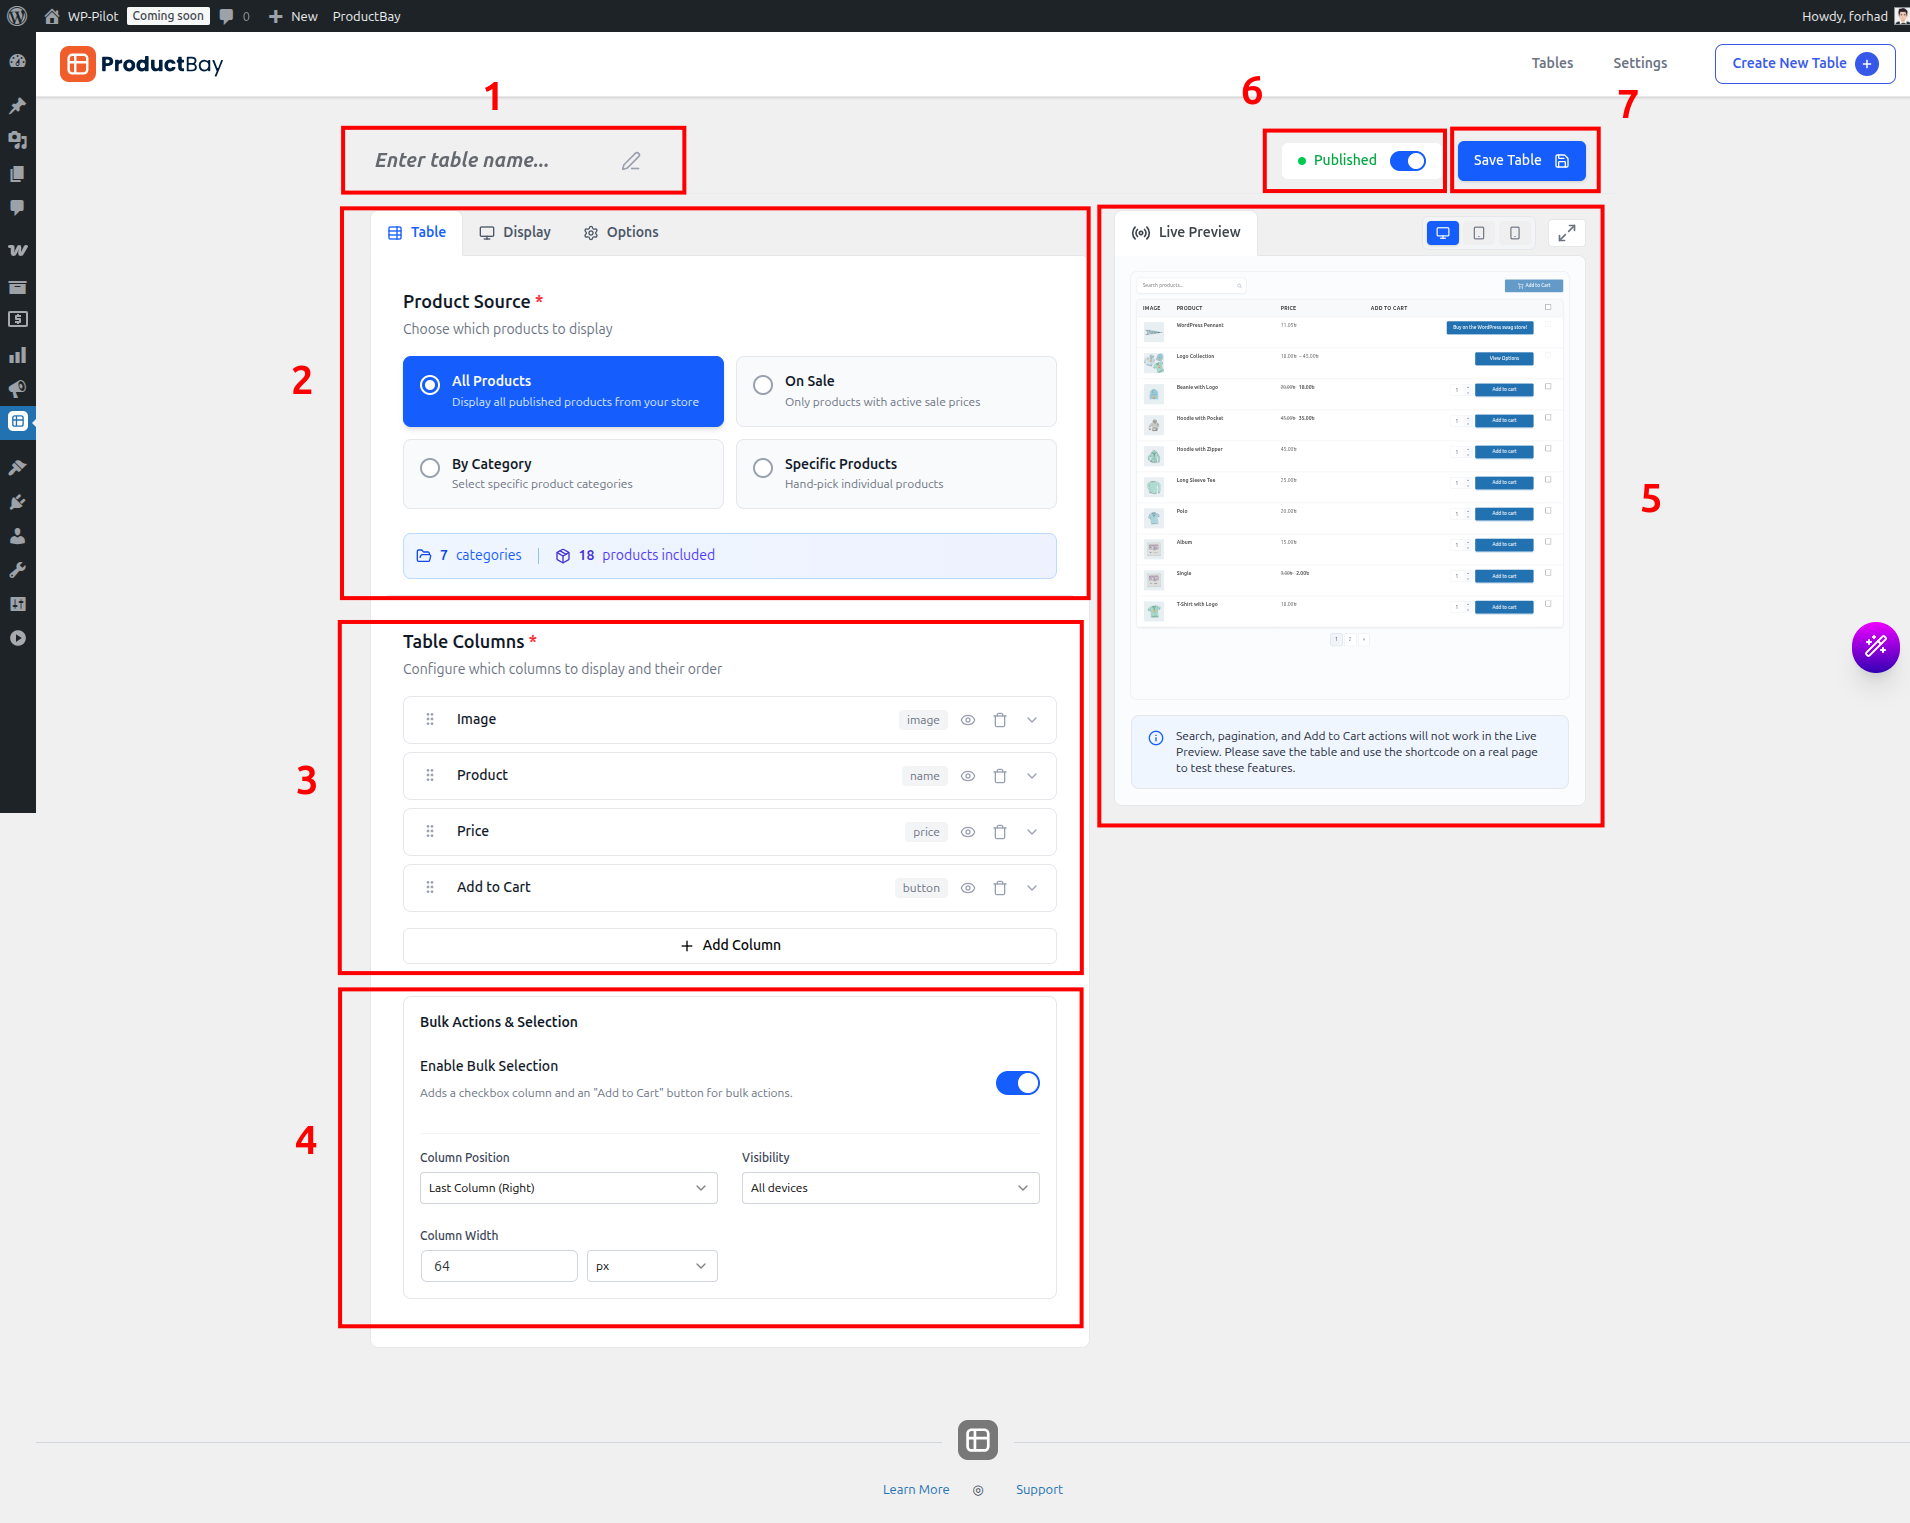
- Table Name: Give your table a descriptive name. This is required for internal organization.
- Product Source: Choose where the products for this table come from. By default, this is set to "All Products," but you can filter by category, select specific products, or products on sale.
- Table Columns: Select and order the columns you want to display (e.g., Image, Title, Price, Add to Cart).
- Bulk Actions & Selection: Enable checkboxes for users to select multiple products and perform bulk "Add to Cart" actions.
- Live Preview: This dynamic preview updates in real-time as you adjust settings, allowing you to see your changes instantly.
- Status: Control the visibility of your table. "Published" tables are ready for use, while "Private" tables are only visible to administrators.
- Save Table: Click this button to commit your changes.
2. Display Tab
The Display Tab allows you to customize the visual aesthetics of your table to match your store's branding.
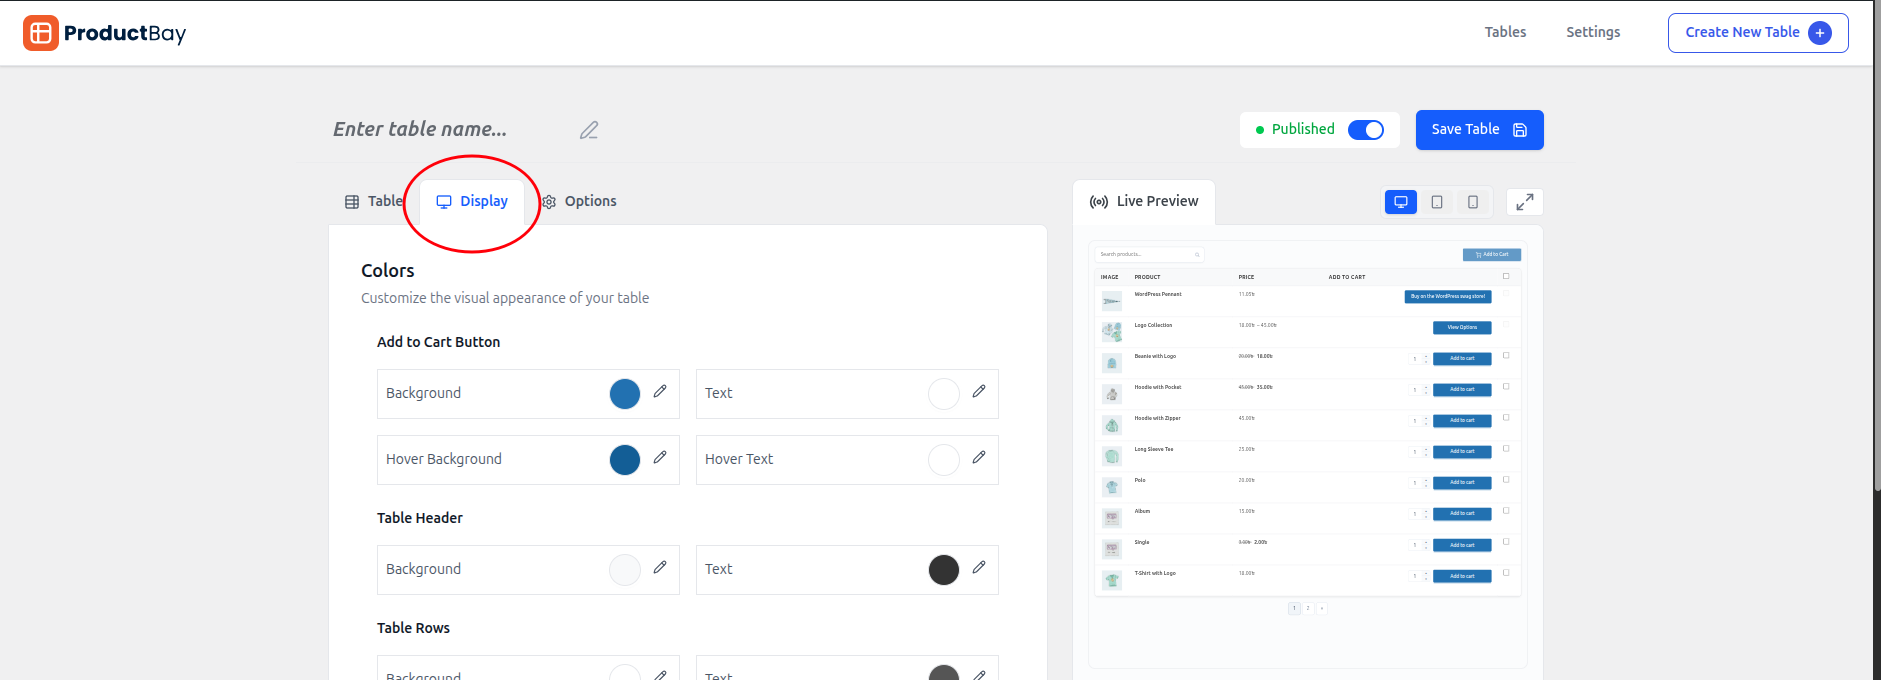
- Colors: Personalize the table's color scheme.
- Add to Cart Button Color: Change the background and text color of the primary action button.
- Table Header Color: Set the background color for the table's header row.
- Table Rows Color: Set the default background color for rows.
- Alternating Rows Color: Apply a different color to every other row for better readability.
- Row Hover Color: Define the color when a user hovers their cursor over a row.
- Layout & Spacing: Adjust the structural feel of the table.
- Border Style: Choose from solid, dashed, or no border.
- Border Color: Set the color of the table and cell borders.
- Border Radius: Round the corners of your table for a softer look.
- Cell Padding: Control the space between the content and the cell borders.
- Typography: Fine-tune the text appearance for the header.
- Header Font Weight: Choose between Normal, Bold, or Extra Bold.
- Header Text Transform: Set text to Uppercase, Lowercase, Capitalize, or leave as Normal.
3. Options Tab
The Options Tab provides advanced controls for table functionality, filters, and cart behavior.
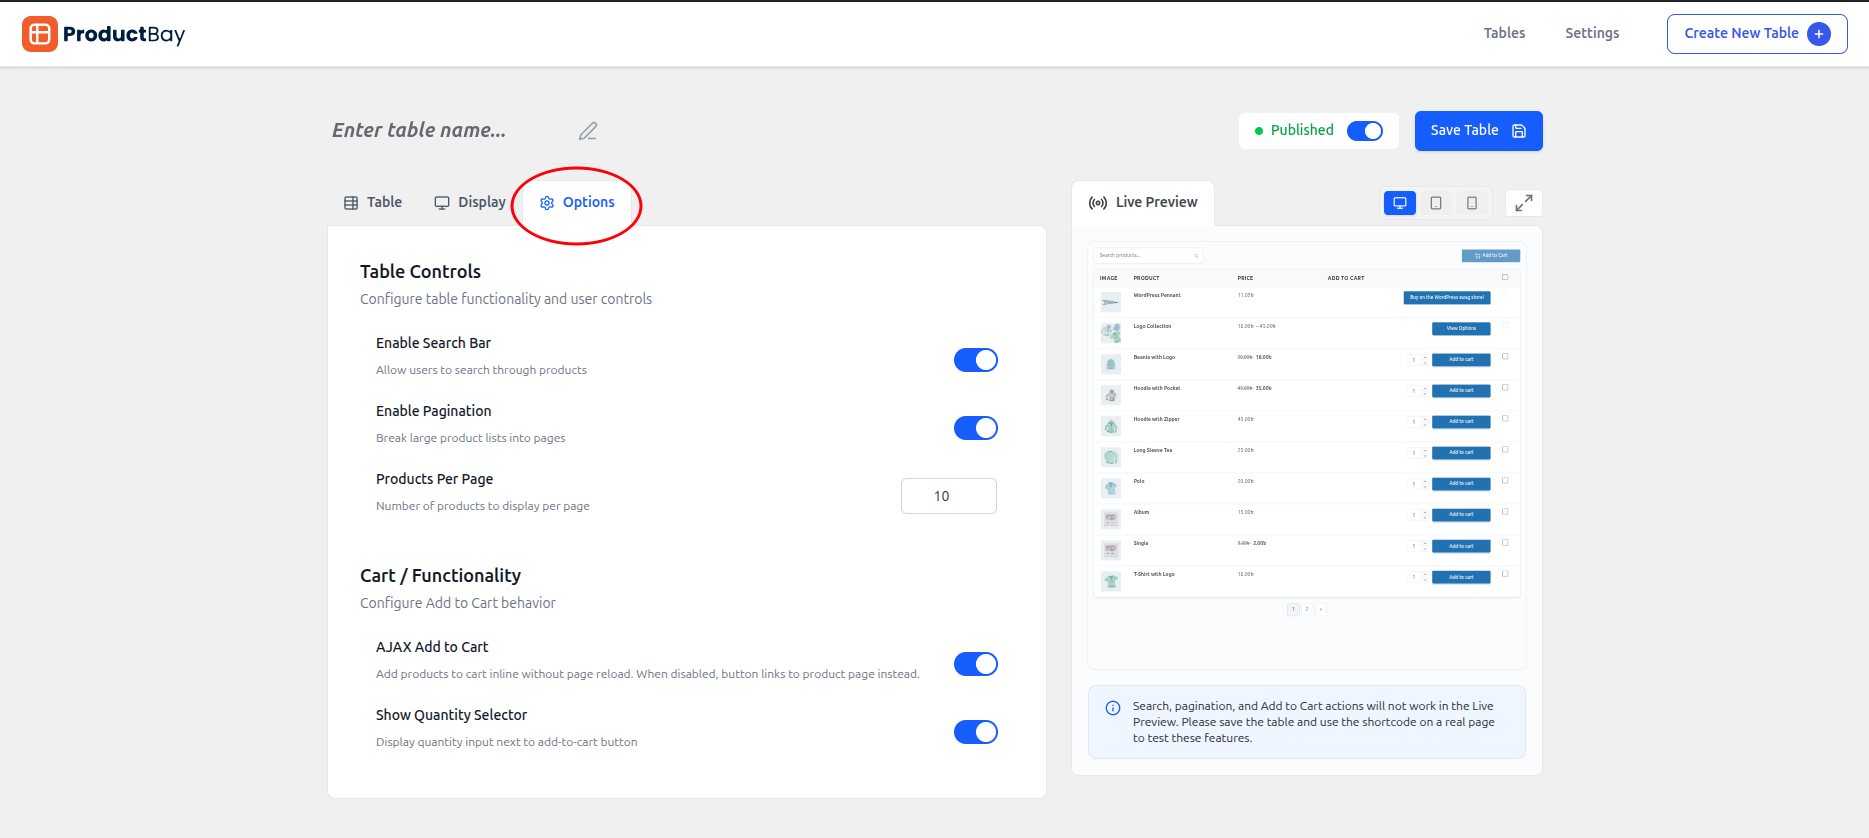
- Table Controls: Configure how users interact with the table.
- Enable Search Bar: Allow users to filter products via a search input.
- Enable Pagination: Break long lists into multiple pages.
- Products Per Page: Define how many products show before pagination kicks in.
- Pagination Style: Choose Standard (numbers), Load More button PRO, or Infinite Scroll PRO.
- Enable Image Lightbox: Open full-size product images in a popup on click.
- Taxonomy & Type Filters: Frontend filter dropdowns.
- Enable Categories Filter: Show a category dropdown filter above the table.
- Enable Product Type Filter: Show a product type dropdown (Simple, Variable, etc.).
- Cart Functionality: Enhance the shopping experience.
- Enable Add to Cart: Show add-to-cart buttons.
- AJAX Add to Cart: Add to cart without page reload.
- Show Quantity Selector: Allow quantity input per row.
- Variation Badges: Show badges for variations added to cart.
- Show Clear All Button: Display a bulk deselect button.
- Selected Items View Panel: Show a floating summary of selected items.
- Variable & Grouped Products: Configure display modes for complex product types.
- Variable Product Mode: Inline Dropdown (Free), Popup Modal PRO, Nested Rows PRO, Separate Rows PRO.
- Grouped Product Mode: Inline Dropdown (Free), Popup Modal PRO, Nested Rows PRO, Separate Rows PRO.
- Show Options Count: Display "X options available" subtitle.
- Expand Nested Rows PRO: Start nested rows expanded by default.
INFO
The Table Name, Live Preview, Status, and Save Table controls are persistent and remain accessible regardless of which tab you are currently viewing. Once you are satisfied with your table configuration, click Save Table to create your table and add it to the Table Dashboard.