

Initial Setup
Once you have installed and activated LoyaltyBay, follow this guide to configure settings, understand calculation models, and test the plugin in your store.
Step 1: Configure Point Earning Rules
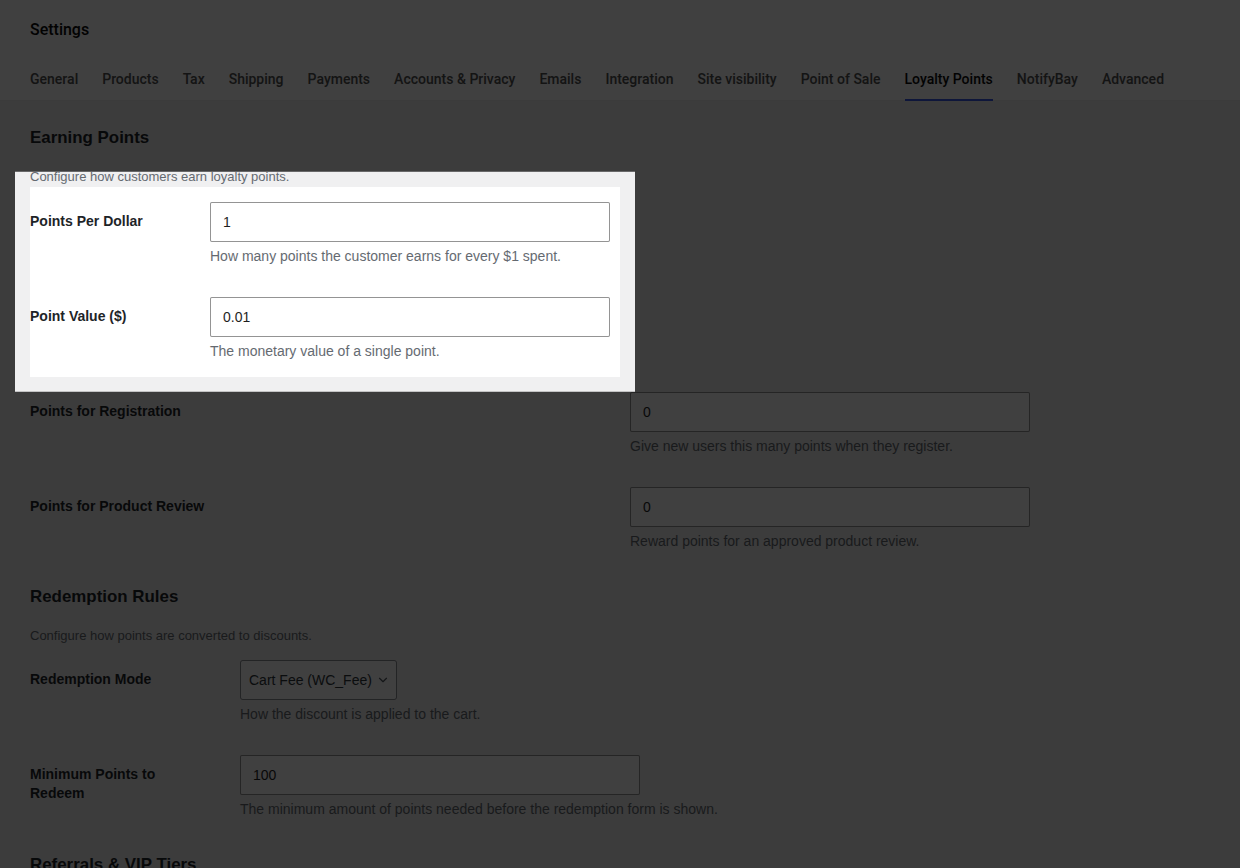
Section titled “Step 1: Configure Point Earning Rules”By default, the plugin awards 1 point for every $1 spent. You should configure these ratios to align with your store’s economy and customer acquisition costs.
-
Navigate to WooCommerce > Settings and click the Loyalty Points tab.
-
Scroll down to the Earning Points section.
-
Modify the Points per dollar field (default is
1).- Example: If you want customers to receive 5 points per $1 spent, set this value to
5. A $10 purchase will then award 50 points.
- Example: If you want customers to receive 5 points per $1 spent, set this value to
-
Optionally configure additional reward activities:
- Points for Registration: Points awarded immediately upon user account creation (e.g. 100 points). This is a great incentive to drive guest checkouts into registering.
- Points for Product Review: Points awarded when a logged-in user submits a product review, once it is Approved (e.g. 50 points).
-
Click Save Changes at the bottom of the page.
Step 2: Configure Redemption Rules
Section titled “Step 2: Configure Redemption Rules”Redemption settings control how customers convert their points into monetary discounts at checkout.
-
Navigate to WooCommerce > Settings > Loyalty Points and click the Redemption Rules section.
-
Set the Point Value. This is the monetary value of a single loyalty point.
- Default:
0.01(1 point = $0.01, so 100 points = $1.00 discount).
- Default:
-
Choose your Redemption Mode:
- Cart Fee (Fee Mode): The discount is applied as a negative checkout fee (
WC_Fee). This keeps checkout and order detail structures clean but may conflict with some third-party automated tax software that does not calculate taxes on negative fees. - Virtual Coupon (Coupon Mode): Generates a temporary virtual WooCommerce coupon on the fly. This has 100% compatibility with external tax plugins (such as Avalara, TaxJar) and multi-currency plugins because it uses WooCommerce’s native coupon framework.
- Cart Fee (Fee Mode): The discount is applied as a negative checkout fee (
-
Set the Minimum Points to Redeem. The checkout points widget will remain hidden or locked unless the customer has accumulated at least this amount (default:
100). -
Set the Max Discount % (default:
50). This prevents points from discounting more than a specified percentage of the cart total, ensuring you always maintain a healthy margin.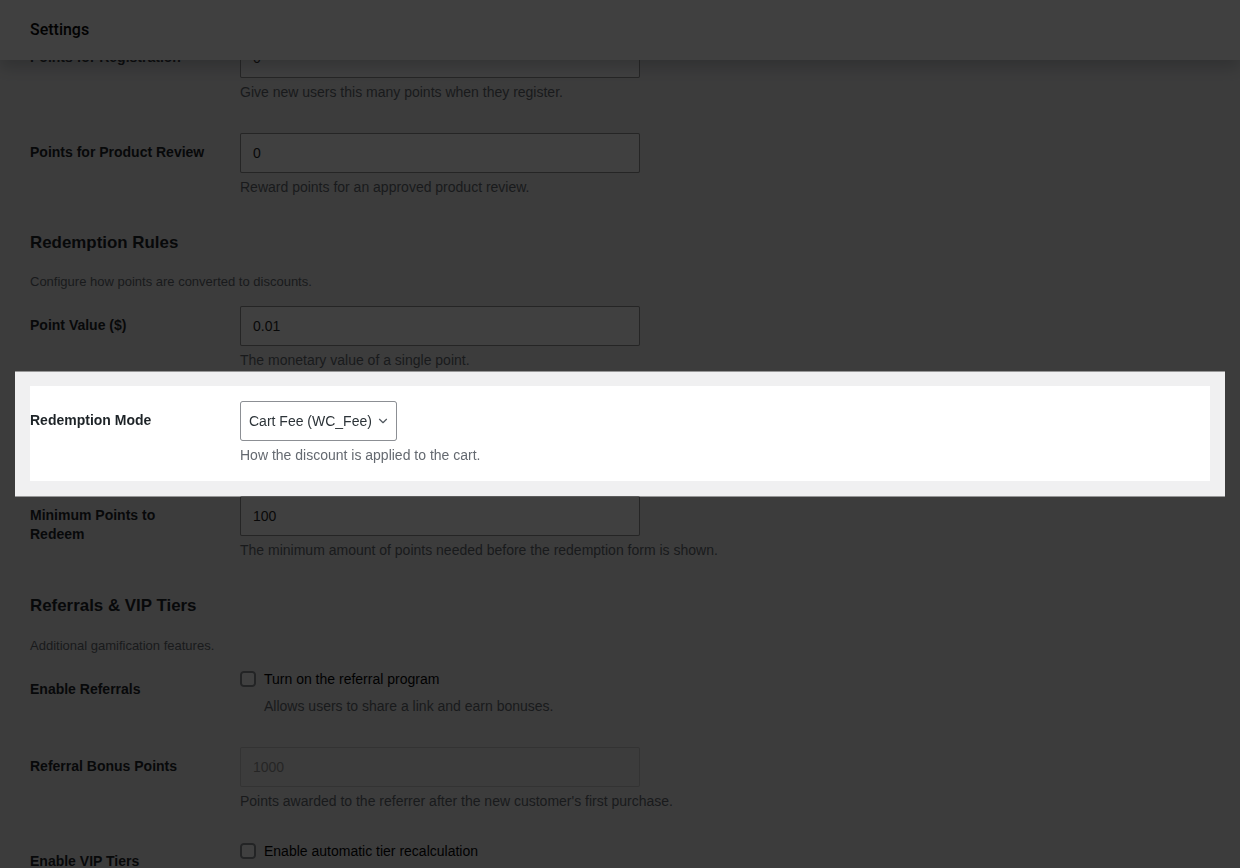
Step 3: Test the Earning Flow
Section titled “Step 3: Test the Earning Flow”To verify that points are credited accurately:
-
Open an incognito browser tab or log in as a test customer.
-
Add a product to the cart and complete the checkout process.
-
In your WordPress admin panel, go to WooCommerce > Orders, select the test order, and change its status to Completed (or whatever status you selected as the Order Status Trigger).
-
Verify that the points appear:
- In the Admin Ledger: Go to WooCommerce > Loyalty. You should see a credit entry for the test customer with a reference to the order ID.
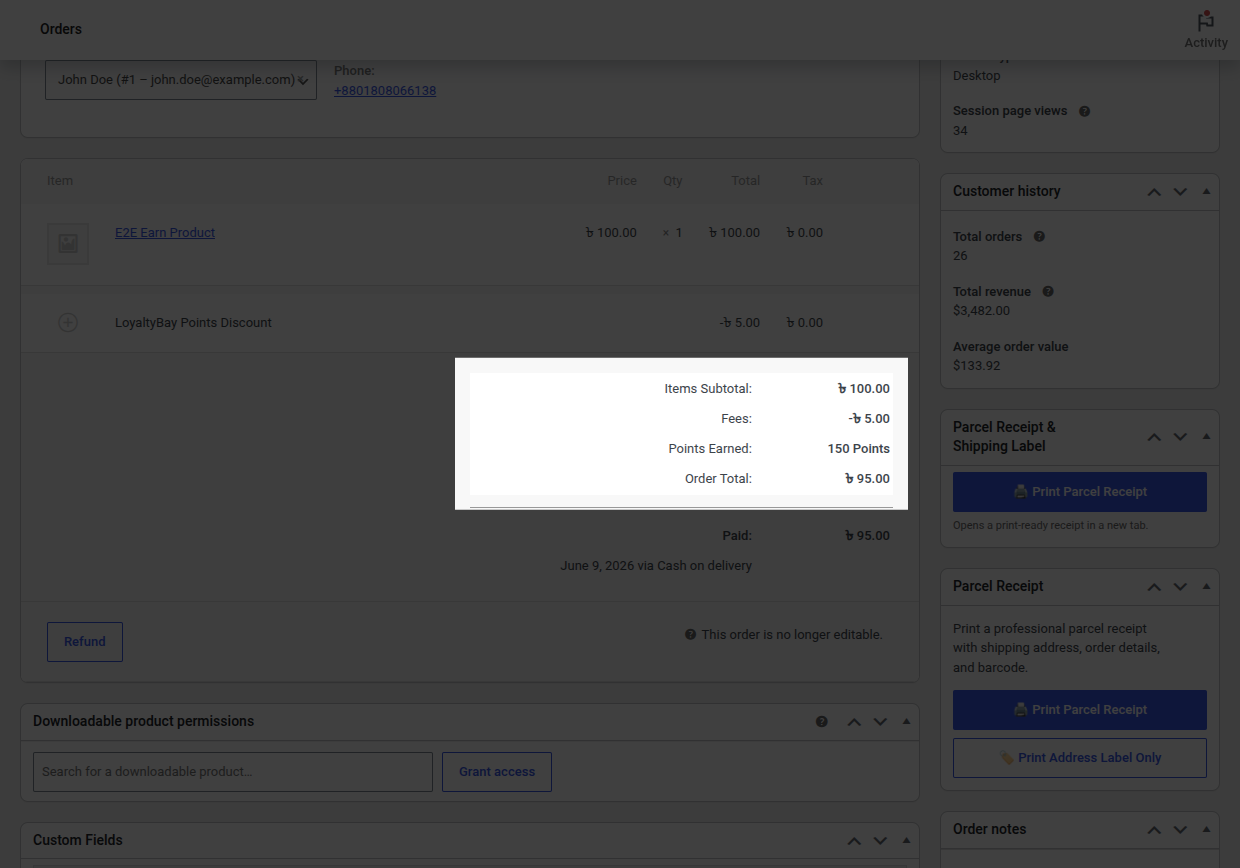
- On the Order Details: Check the order totals block in the WooCommerce admin. It should contain a row highlighting the points earned.
Step 4: Test the Redemption Flow
Section titled “Step 4: Test the Redemption Flow”To confirm customers can apply points to their orders:
- Ensure your test customer has accumulated enough points to meet the Minimum Points to Redeem threshold (e.g. 100 points).
- Log in as the test customer, add items to the cart, and proceed to the checkout page.
- Look for the points slider or manual redemption form:
- Use the slider to select a point amount to apply.
- Click Apply Discount.
- Verify that the cart total decreases by the correct value of points applied, and complete the order.
- Check the admin ledger to confirm a corresponding debit transaction has been recorded.