Quick Start
This guide walks you through creating your first product table and embedding it on a page, in under a few seconds.
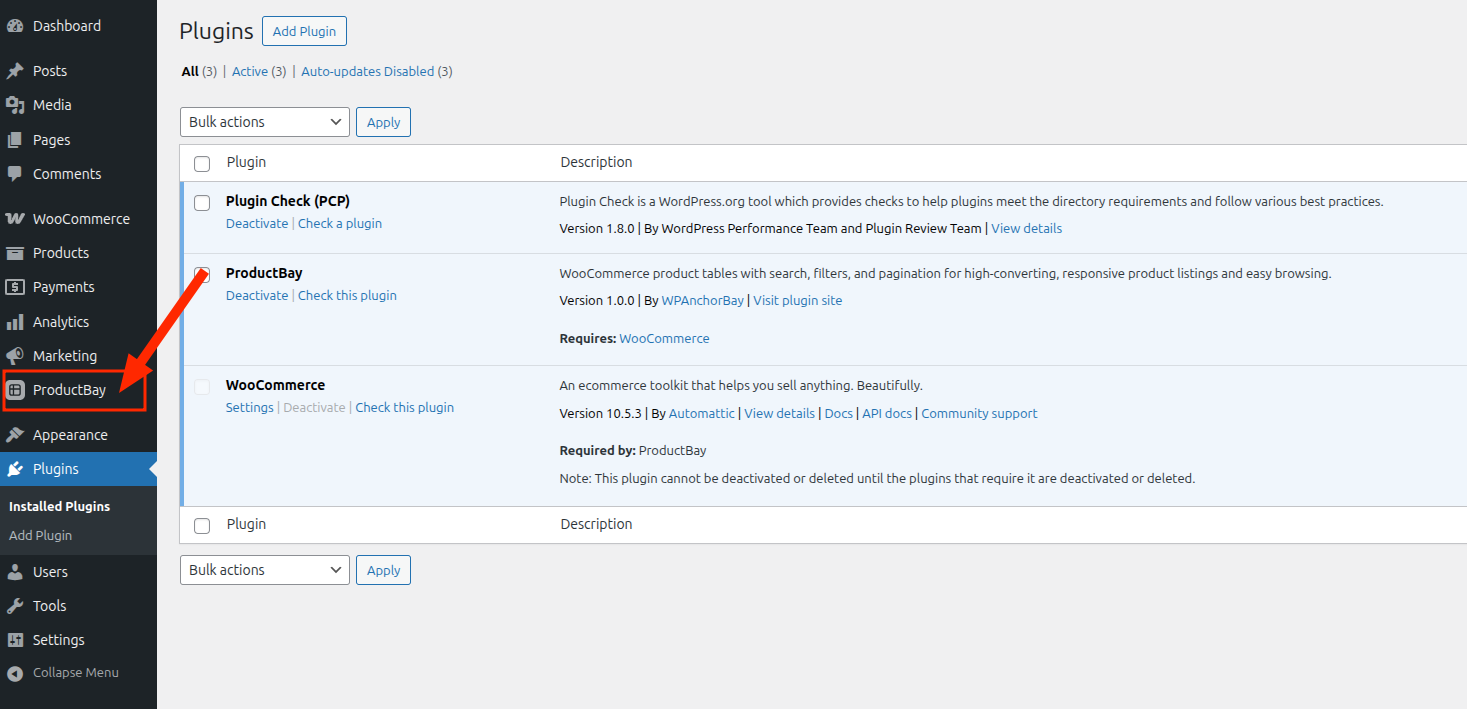
Step 1: Open ProductBay
Navigate to ProductBay in your WordPress admin sidebar and click on the "ProductBay" button.
You'll see a wizard to create a new table:
if not, click on the wizard button located at the bottom-right corner of the page, it will open the wizard:
![]()
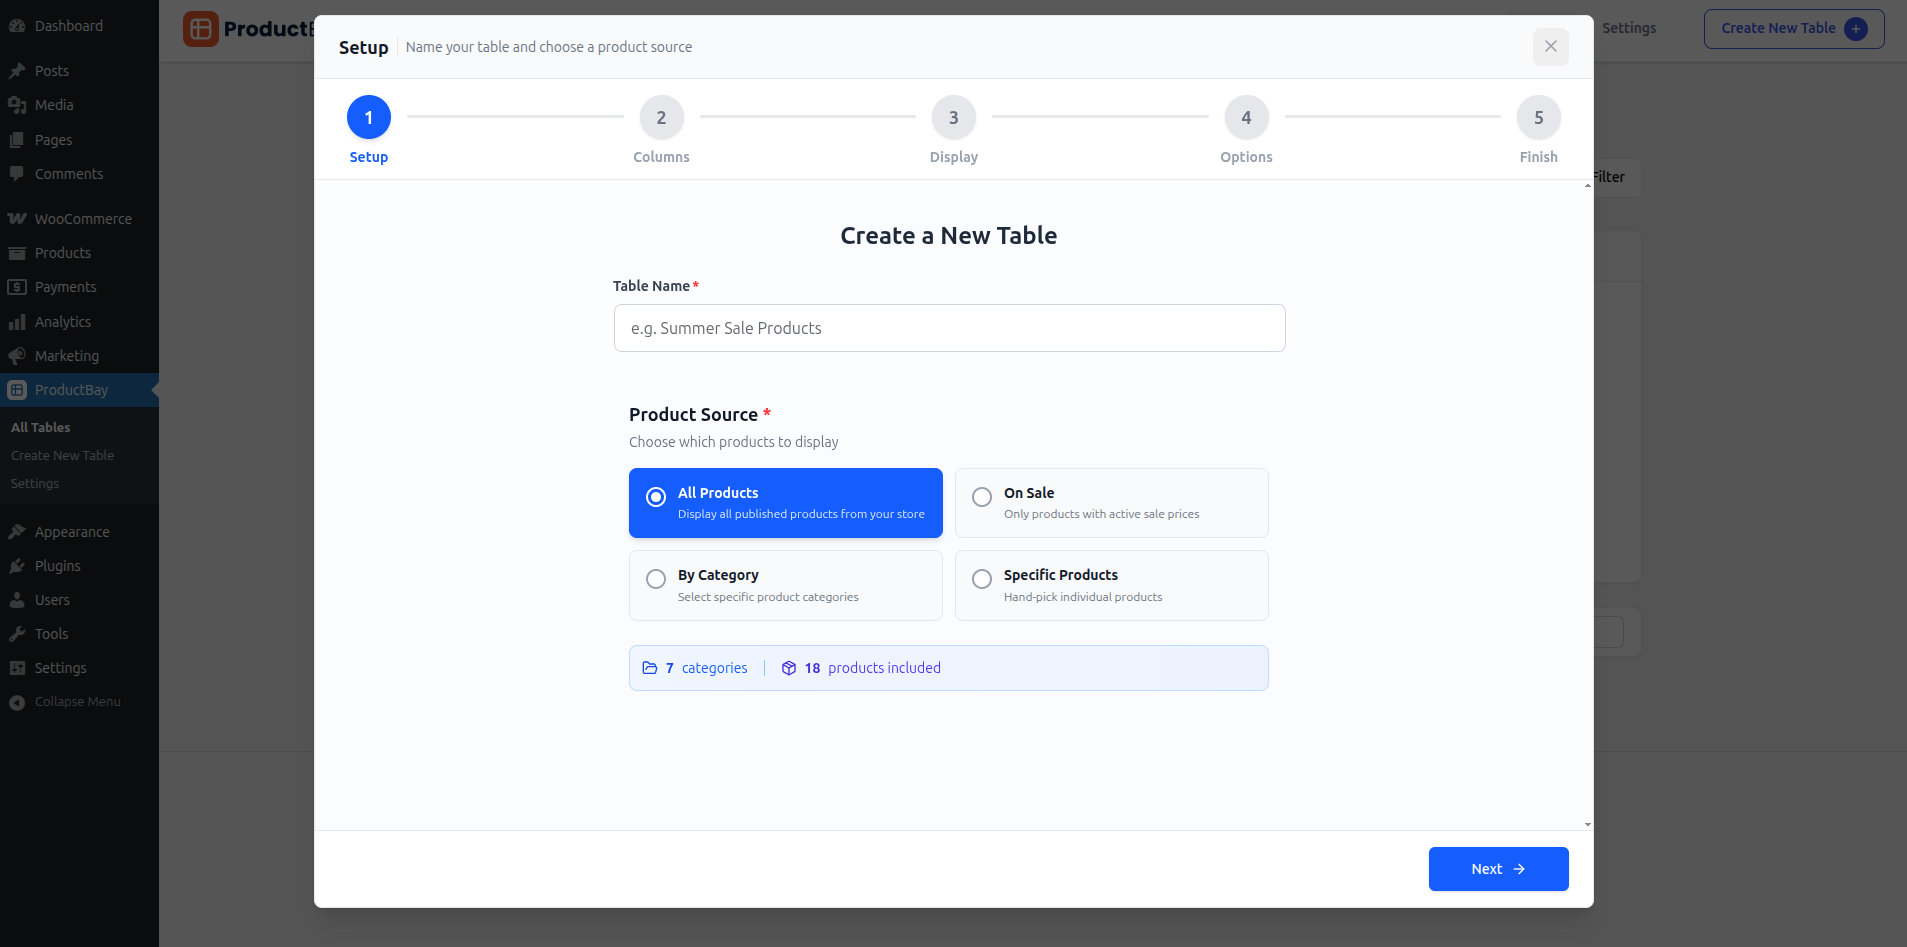
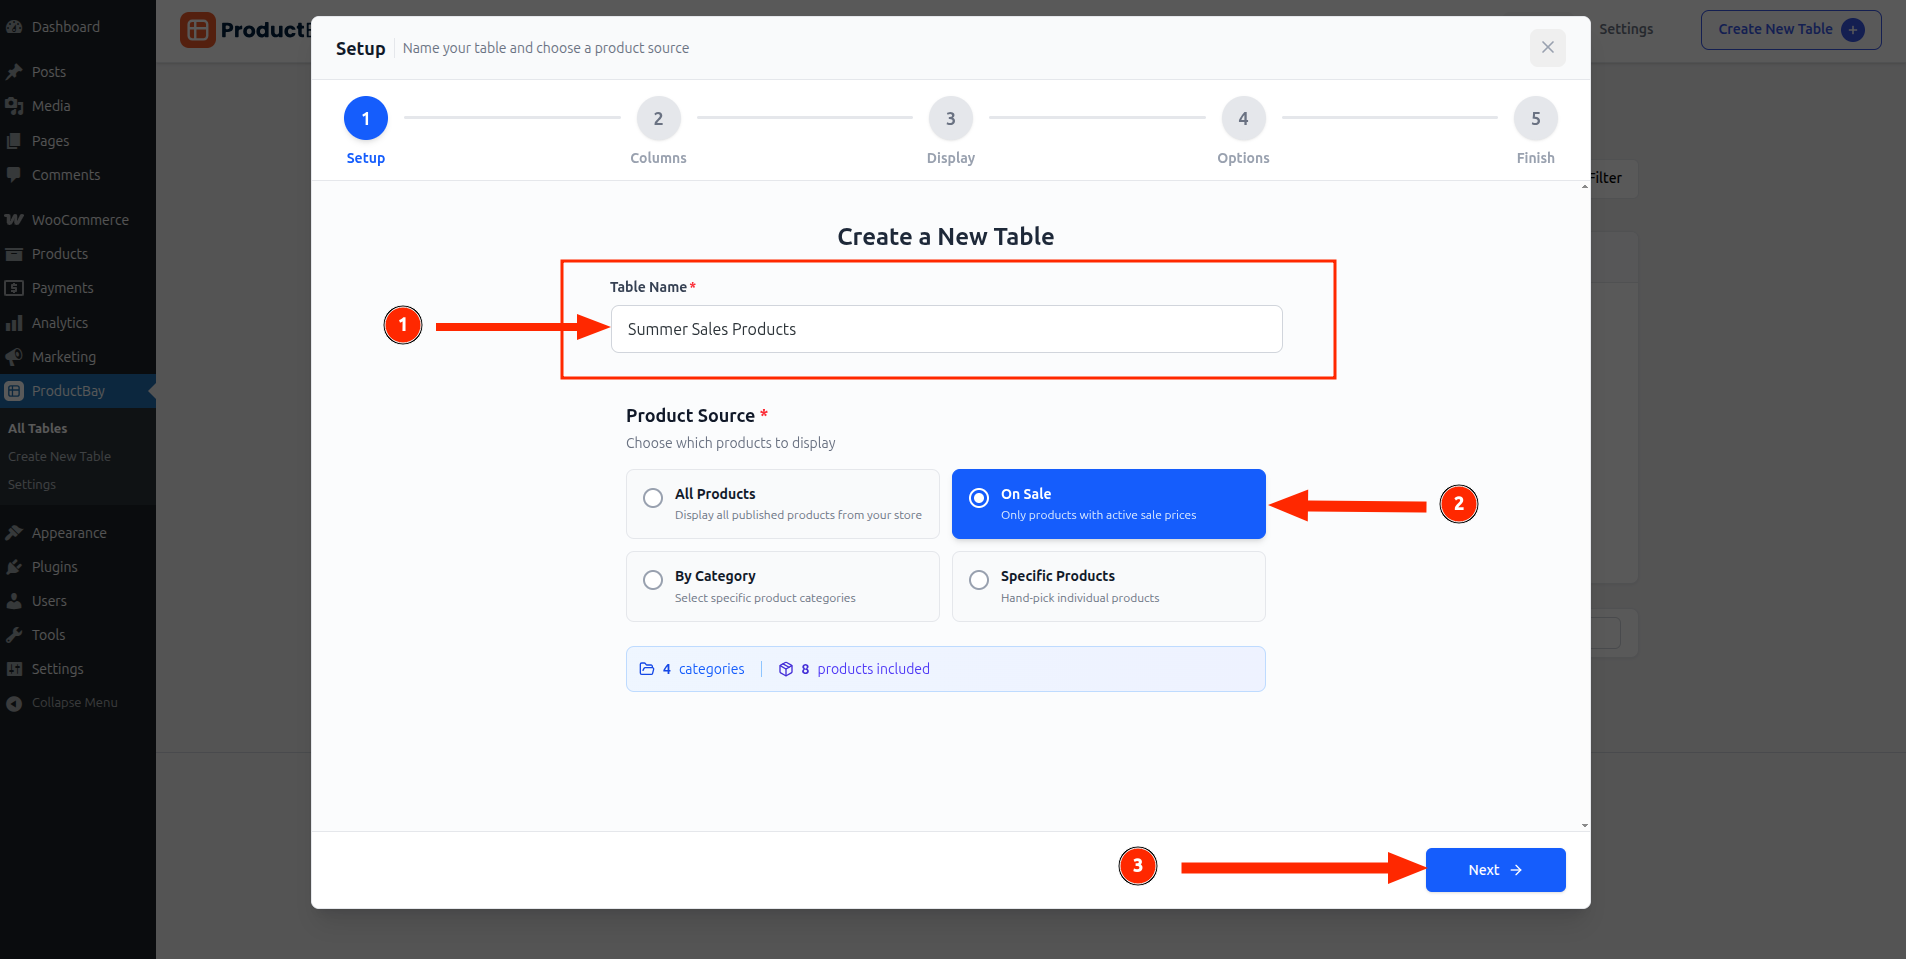
Step 2.1: Setup New Table
- Give your table a name (e.g., "Summer Sales Products")
- Choose a product source:
- All Products - display everything in your store
- By Category - select specific categories
- On Sale - only show products currently on sale
- Specific Products - hand-pick products by name, ID, or SKU
Click Next to proceed.
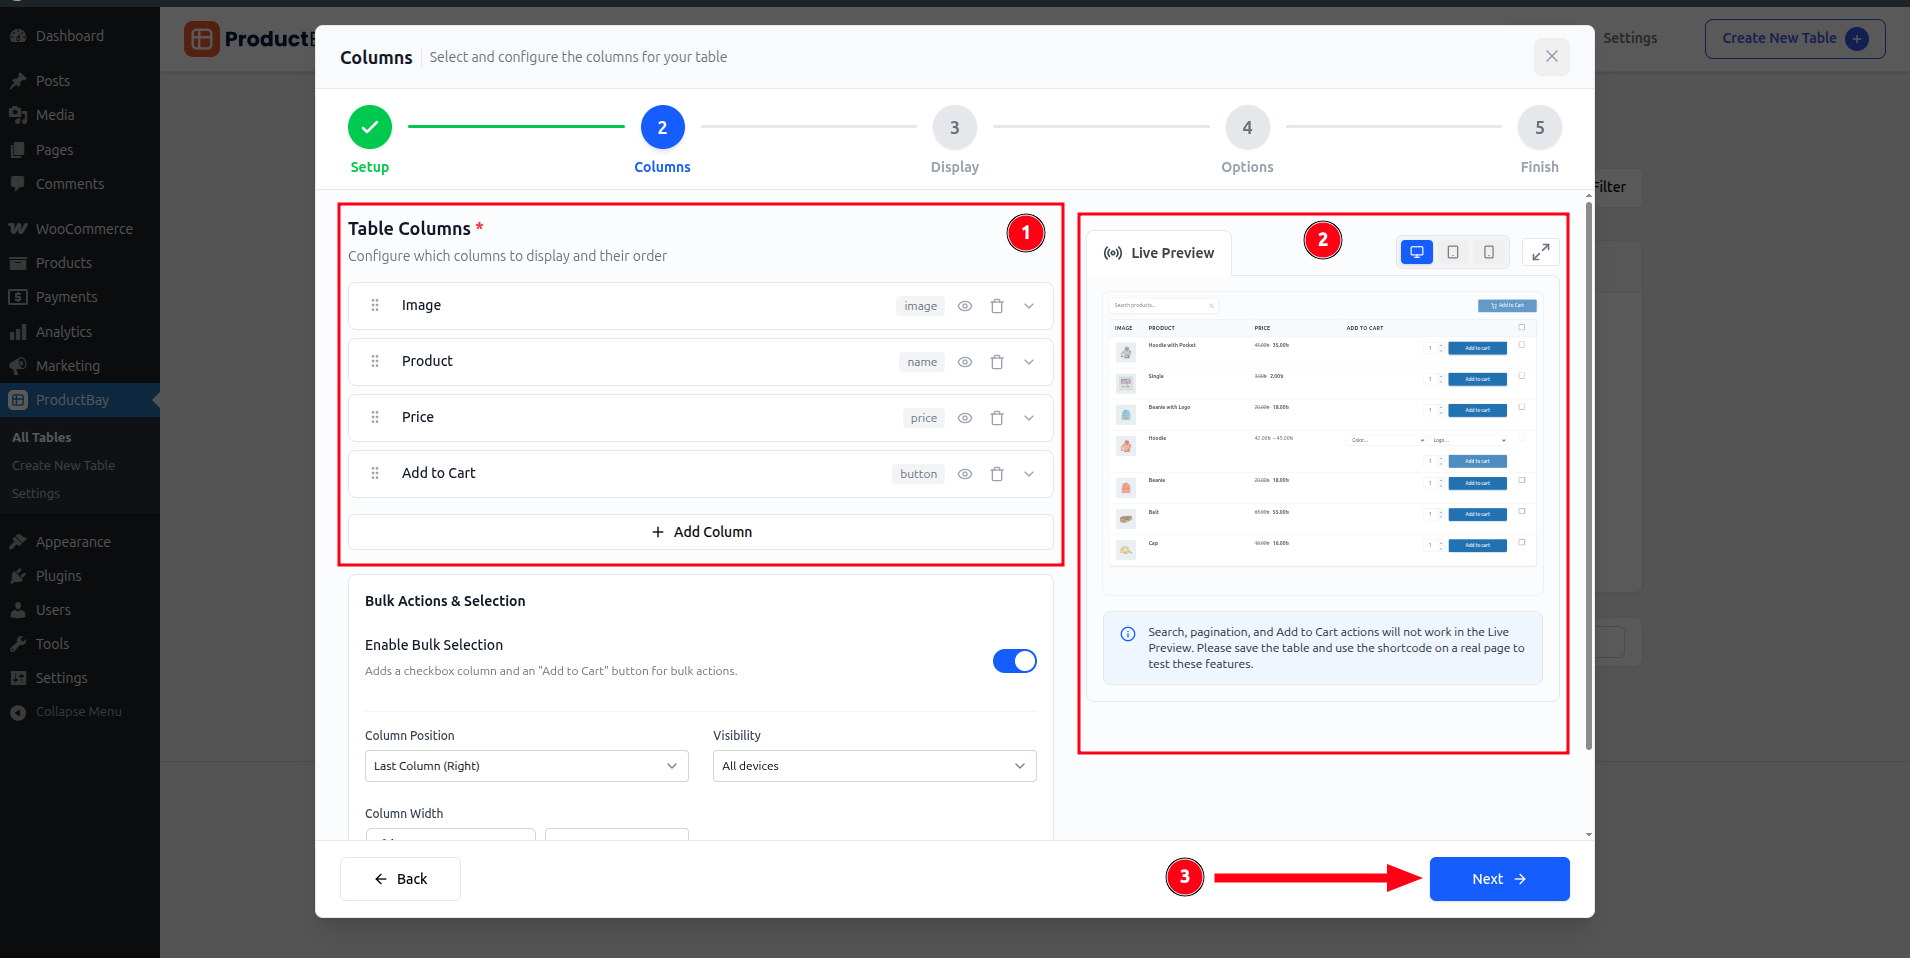
Step 2.2: Columns
- Configure which columns (1) to display (Image, Name, Price, SKU, Stock, Summary, etc.)
- Drag and drop to reorder columns
- Toggle visibility per device size (desktop, tablet, mobile)
- See live preview (2) of table changes while building
Click Next to proceed.
Step 2.3: Display
Customize the visual design of your table:
- Header and body colors
- Button styles and hover effects
- Border styles and cell padding
- Typography settings
(Scroll down to see all the options)
Live preview updates in real-time as you make changes.
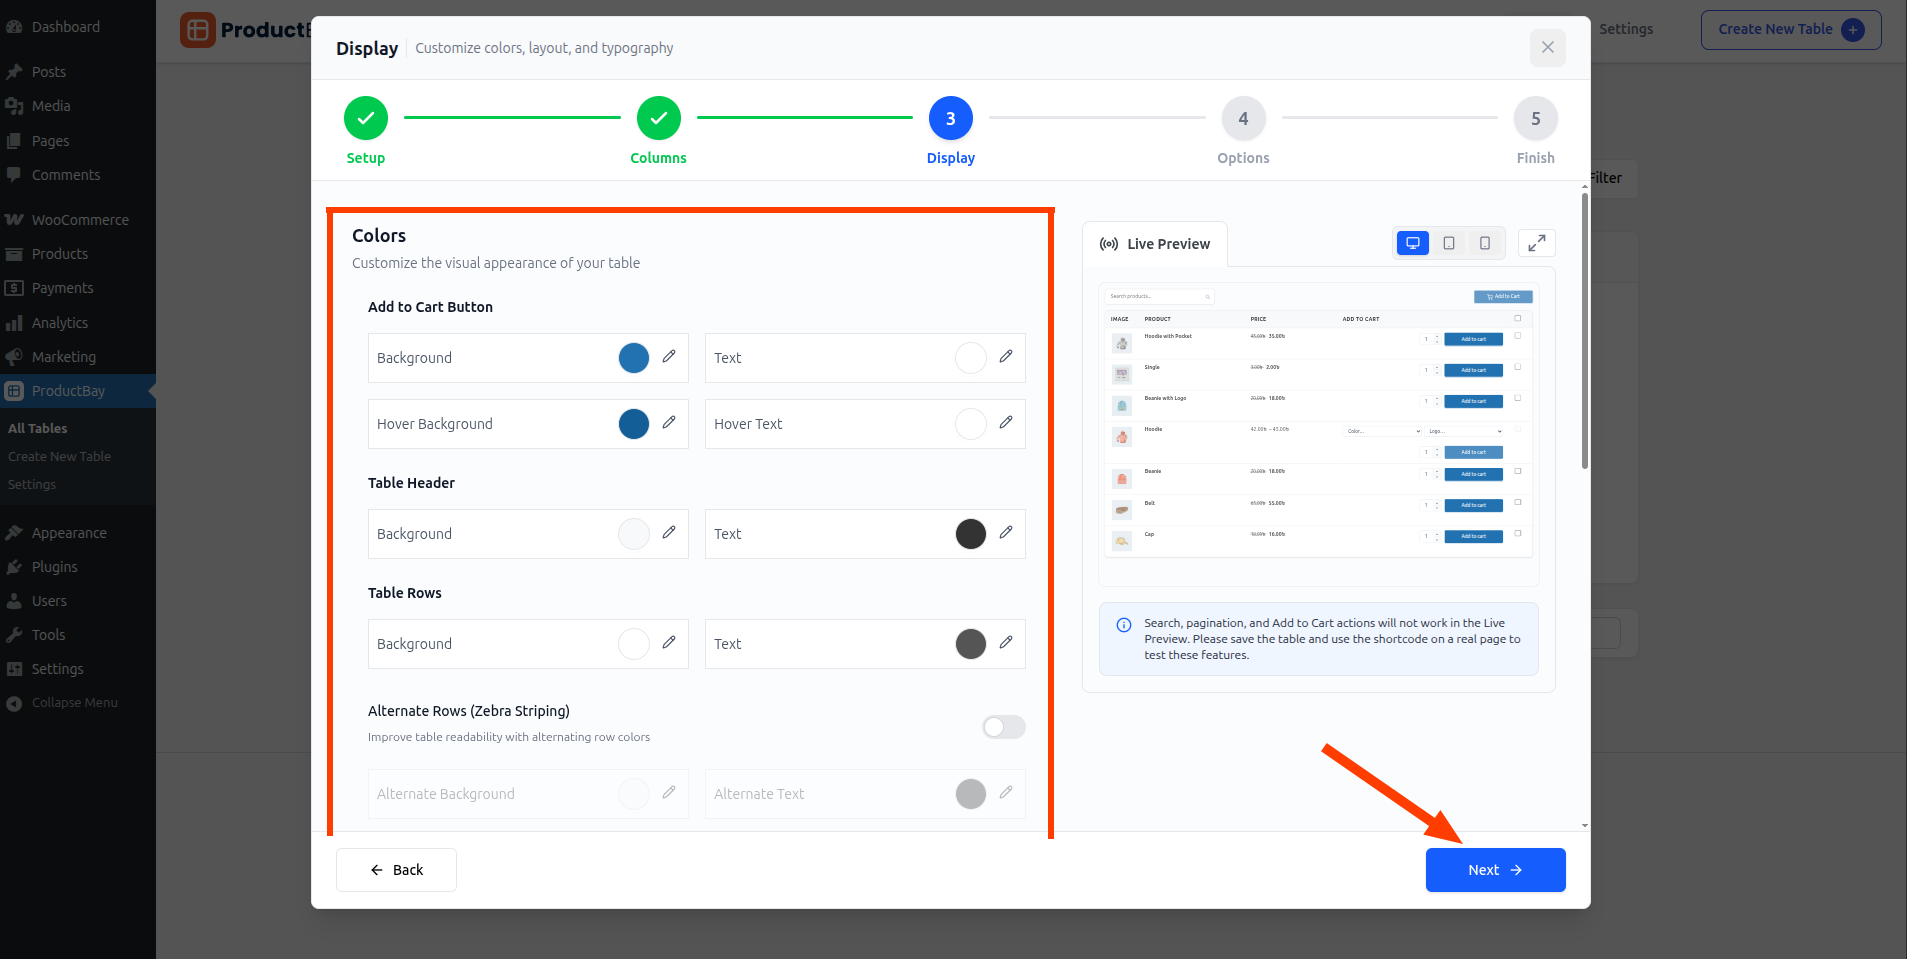
Click Next to proceed.
Step 2.4: Options
Configure table behavior:
- Enable/disable search, pagination, image lightbox
- Set products per page and pagination style
- Configure add-to-cart options (AJAX, quantity selectors)
- Enable category filters and product type filters
- Choose variable/grouped product display modes
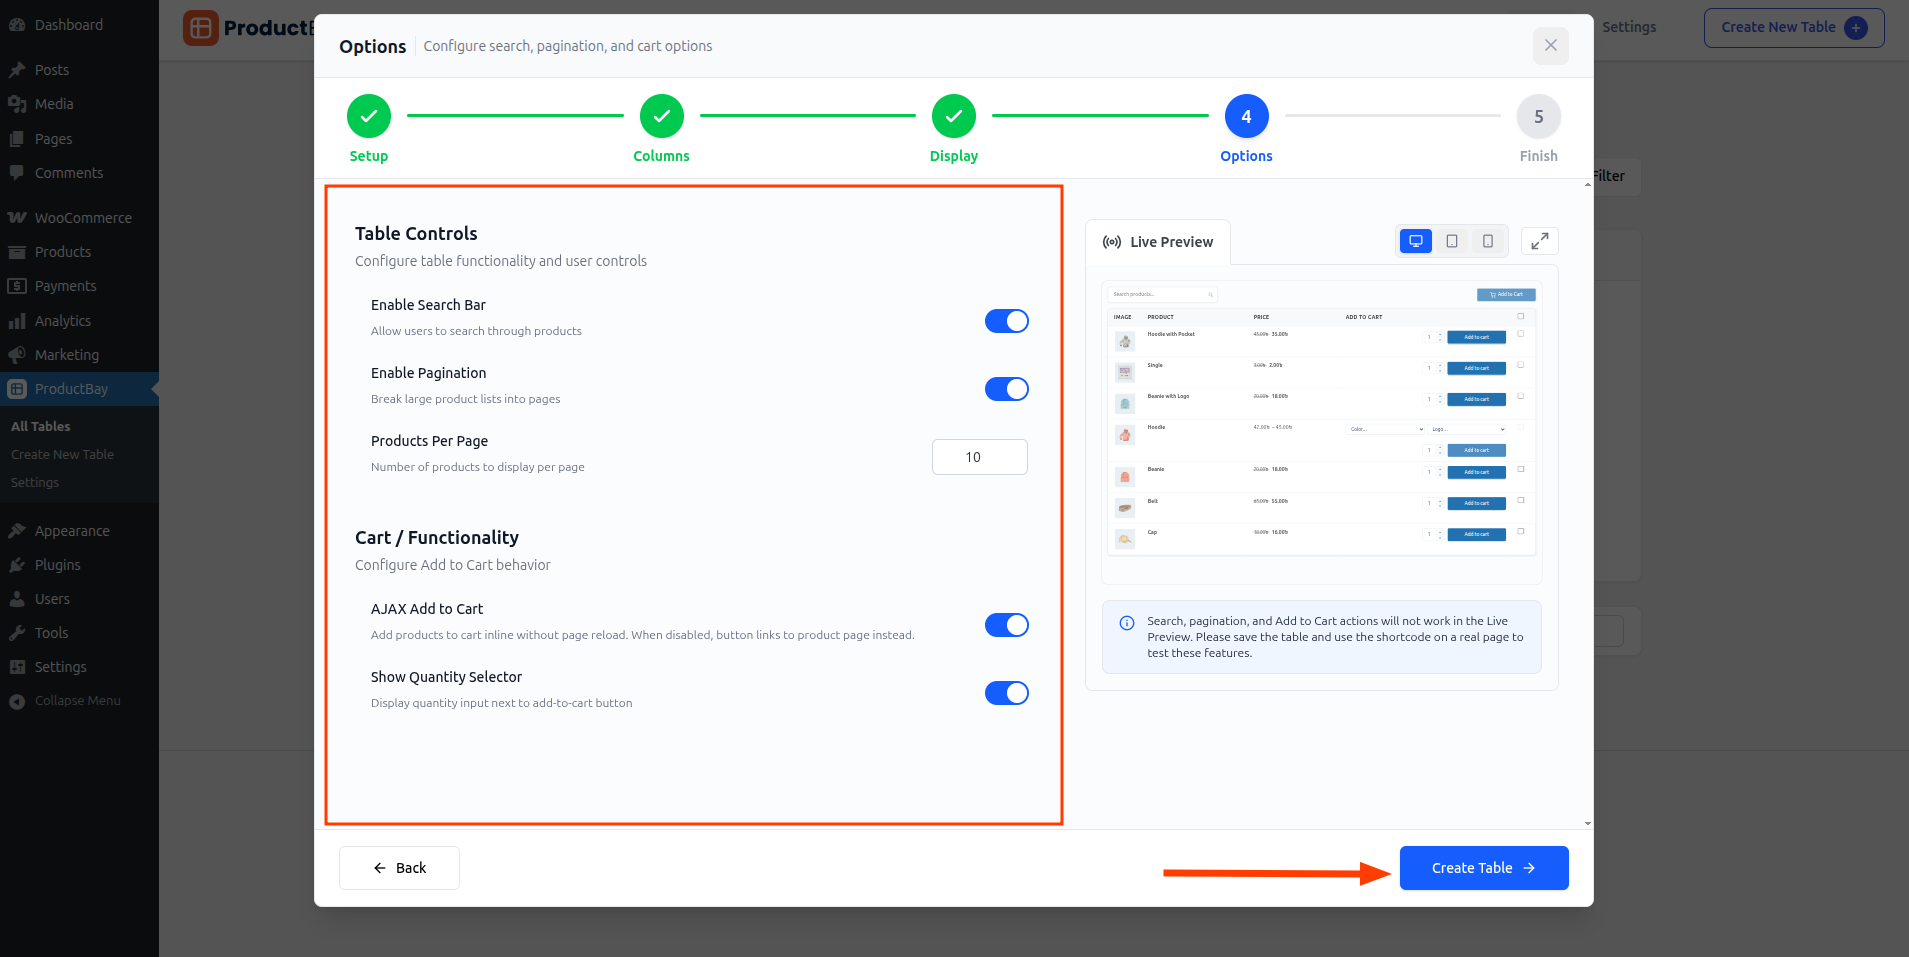
Click Create Table button to save your table.
Step 2.5: Finish
Congratulations! You've created your first product table. 🎉 A celebratory confetti animation confirms your table is live!
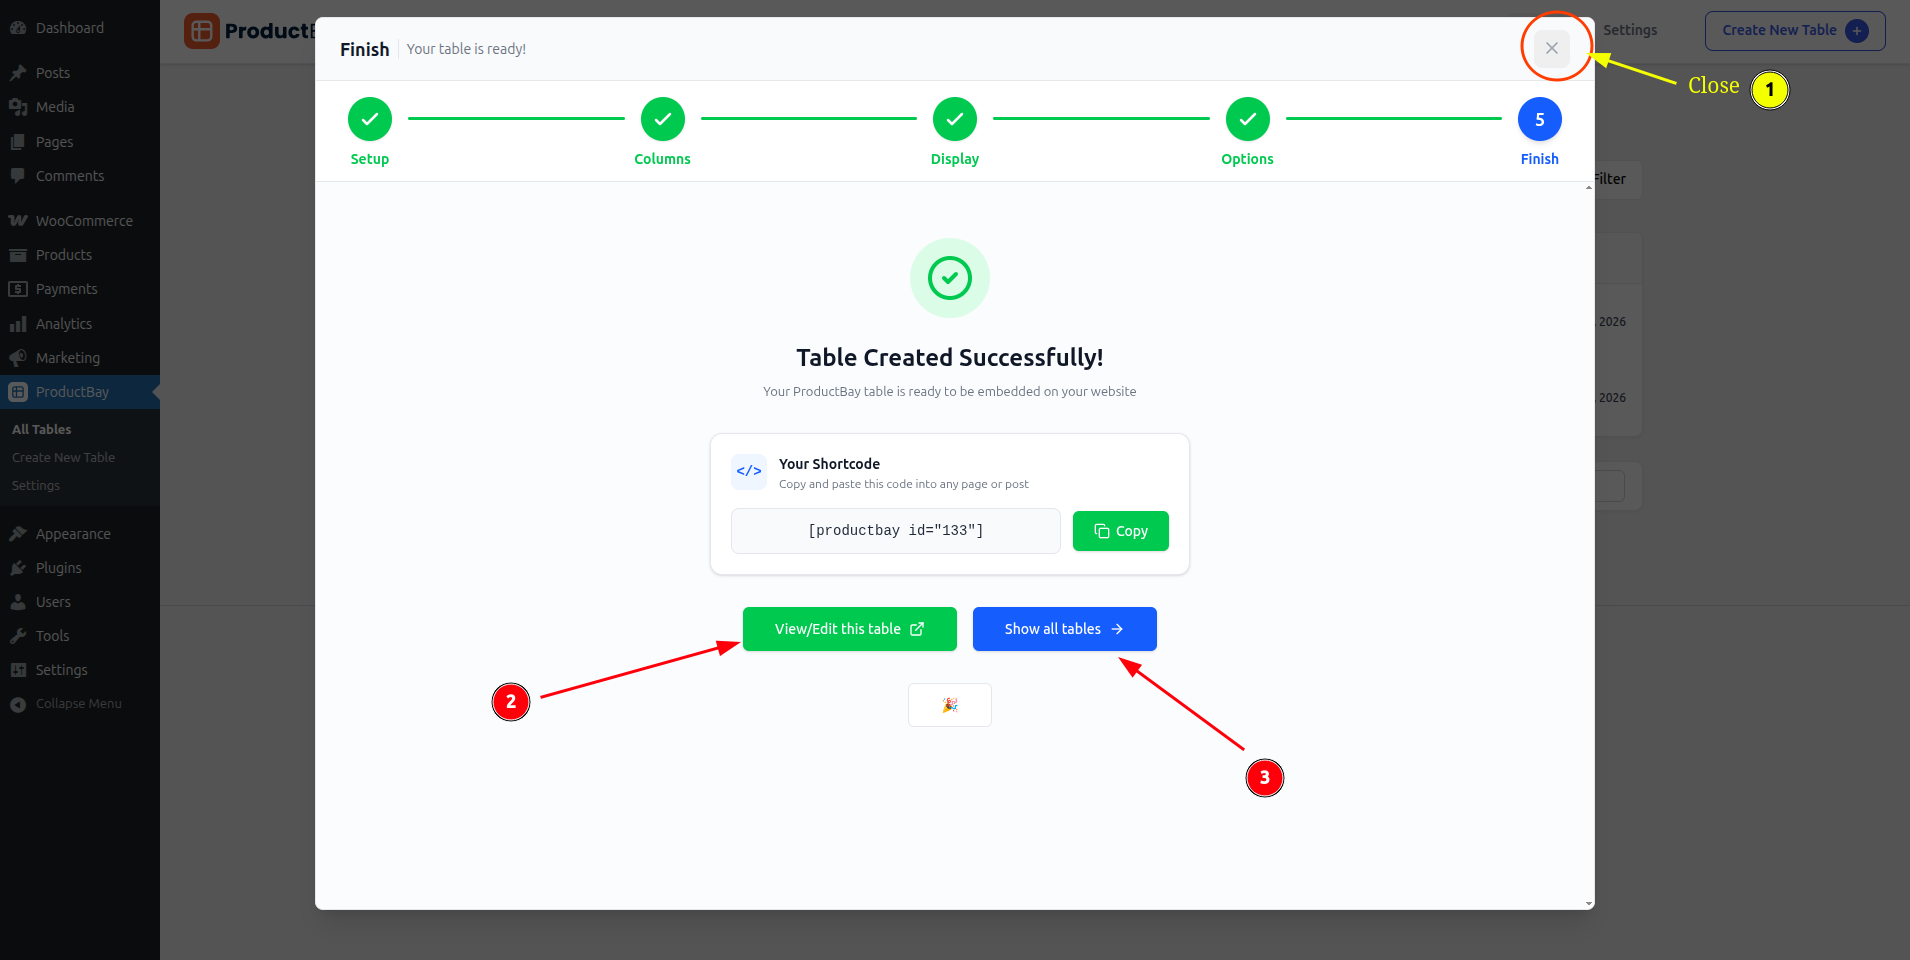
- You can close the wizard by clicking on the close button (X) in the top-right corner of the wizard.
- You can view/edit your table by clicking on the "View/Edit this table" button.
- You can see all tables list by clicking on the "Show all tables" button.
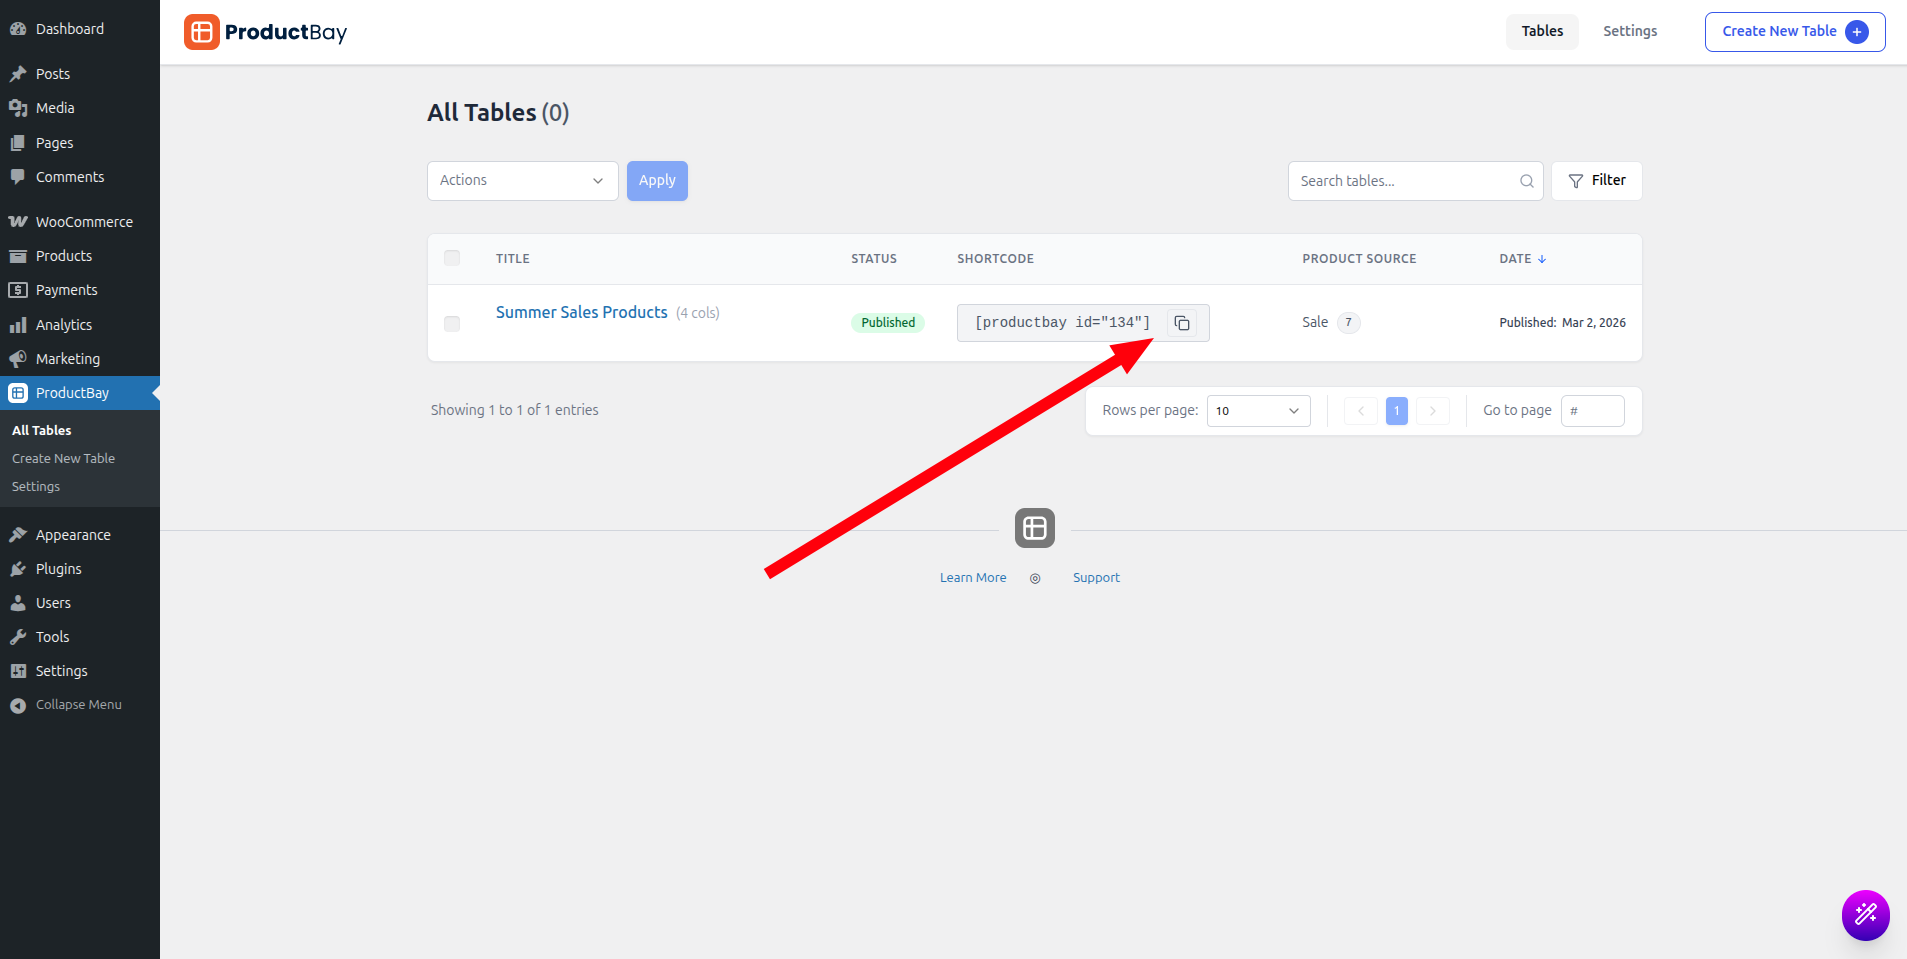
Step 3: Copy the Shortcode
After publishing, you'll see a shortcode like:
[productbay id="1"]Copy this shortcode. You can copy the shortcode by clicking on the copy button (Copy) in the shortcode box or select the shortcode and copy it manually.
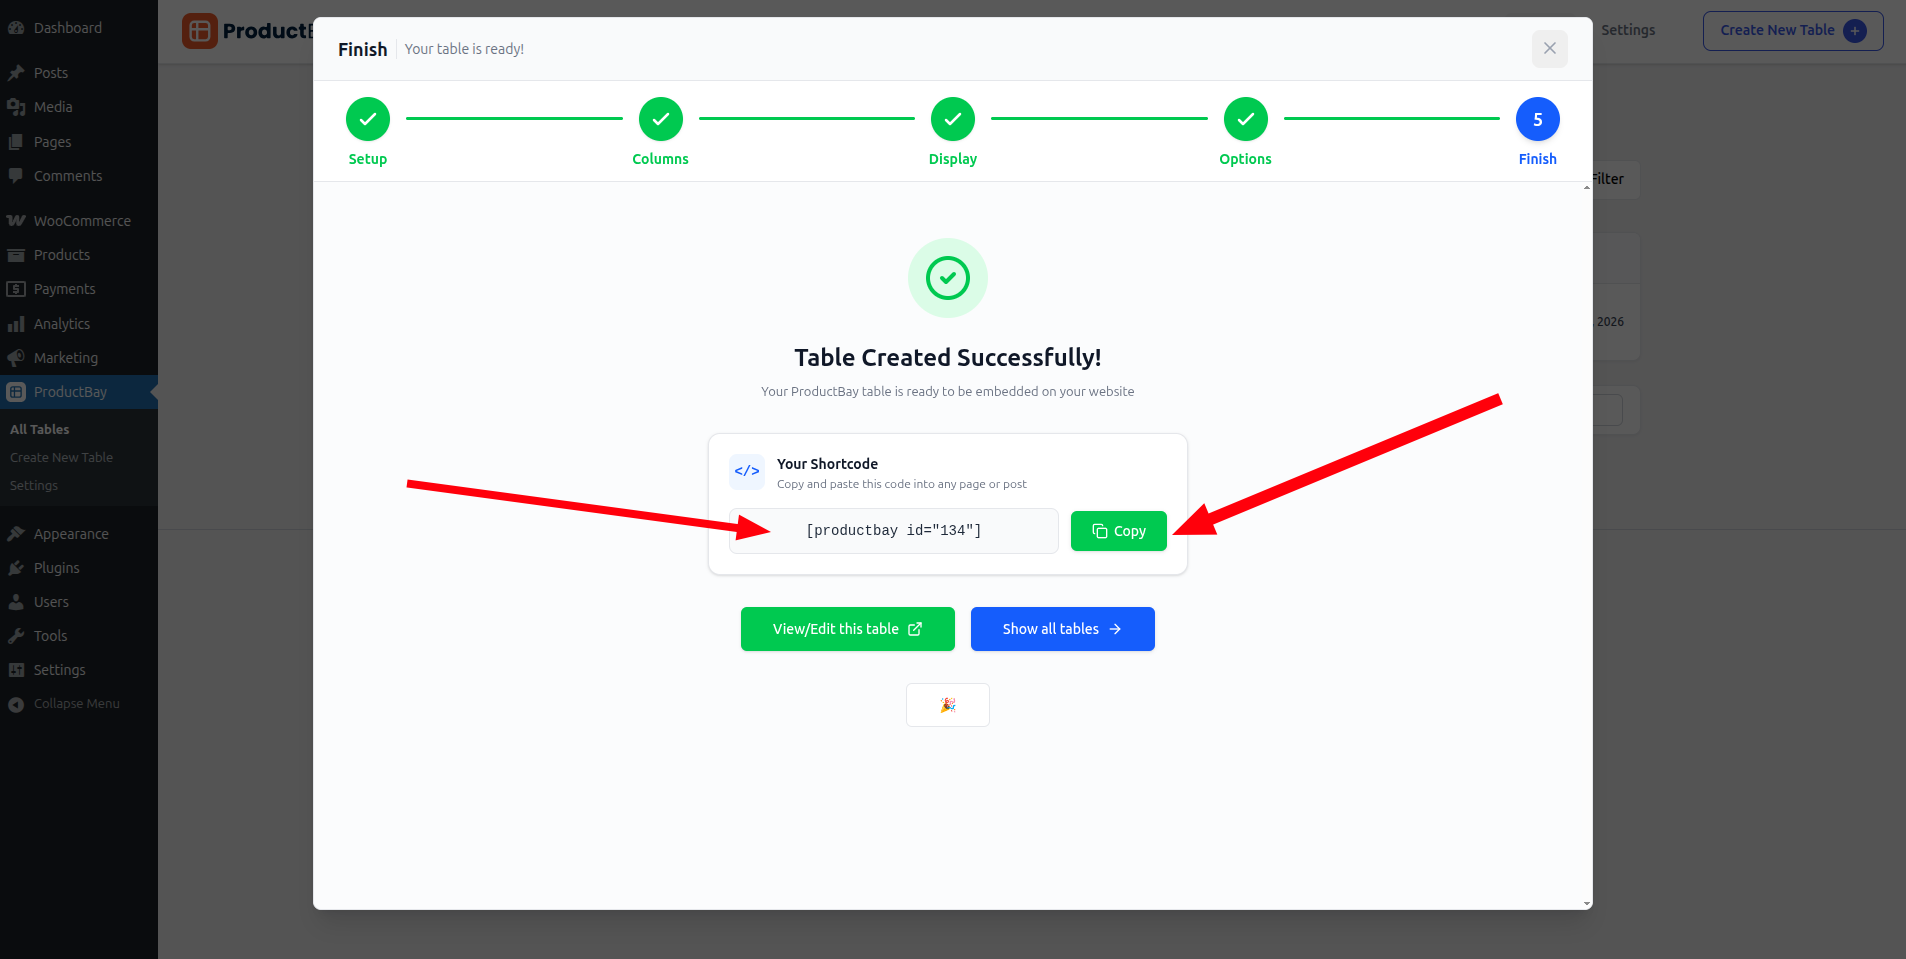
You can also copy the shortcode from the "Show all tables" page.
Step 4: Embed on a Page
- Go to Pages → Add New (or edit an existing page)
- Add a Shortcode block (or paste directly in a Classic Editor)
- Paste the shortcode:
[productbay id="1"] - Publish or Update the page
Step 5: View Your Table
Visit the page on the frontend. You should see your product table with all the columns, styling, and features you configured!
TIP
You can embed the same table on multiple pages, or place multiple different tables on a single page, each with its own independent styling.
What's Next?
- Explore Table Dashboard to manage your tables
- Learn how to Create Tables for best conversion rates
- See how to use Shortcodes to embed tables anywhere