---
title: "Setup wizard and dashboard"
description: "The five-step setup wizard and the SpaceBay admin dashboard."
---
The first time you open **SpaceBay** after activating the plugin, a short wizard helps you set up the community in five steps:
1. **Basics:** community name, address and who can view it. If WordPress registration is off, the wizard reminds you to turn on *Anyone can register* in **Settings → General**.
2. **Look:** logo, brand colour, colour mode and layout.
3. **Spaces:** create starter spaces: Announcements (only admins post), General and Introductions. You become admin of each one. Spaces that already exist with the same name are skipped.
4. **Moderation:** member approval, review of new posts and blocked words.
5. **Done:** open your community.
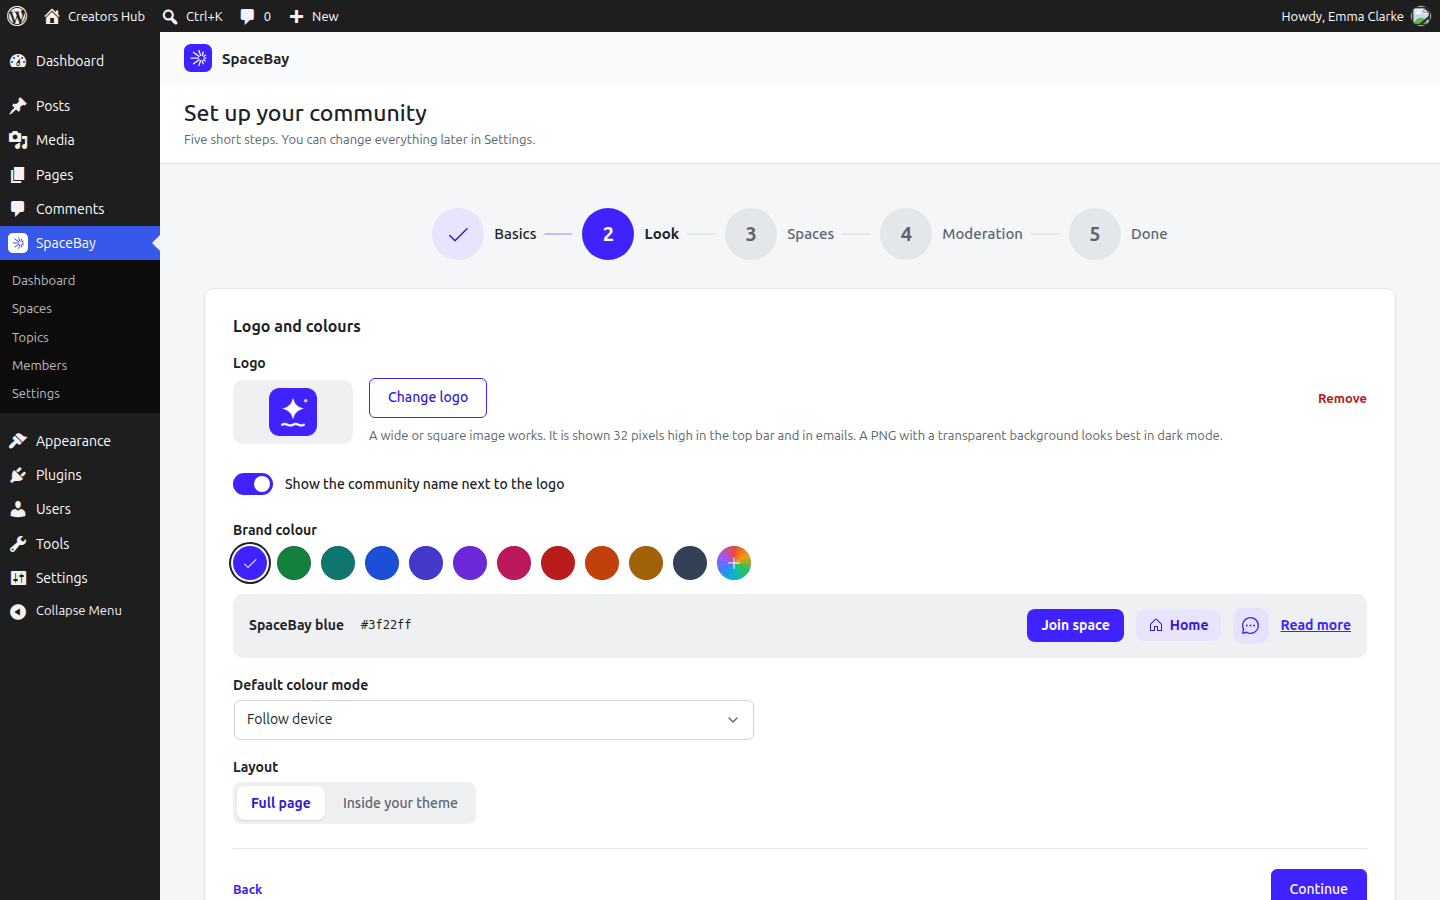 *Step 2 of the setup wizard.*
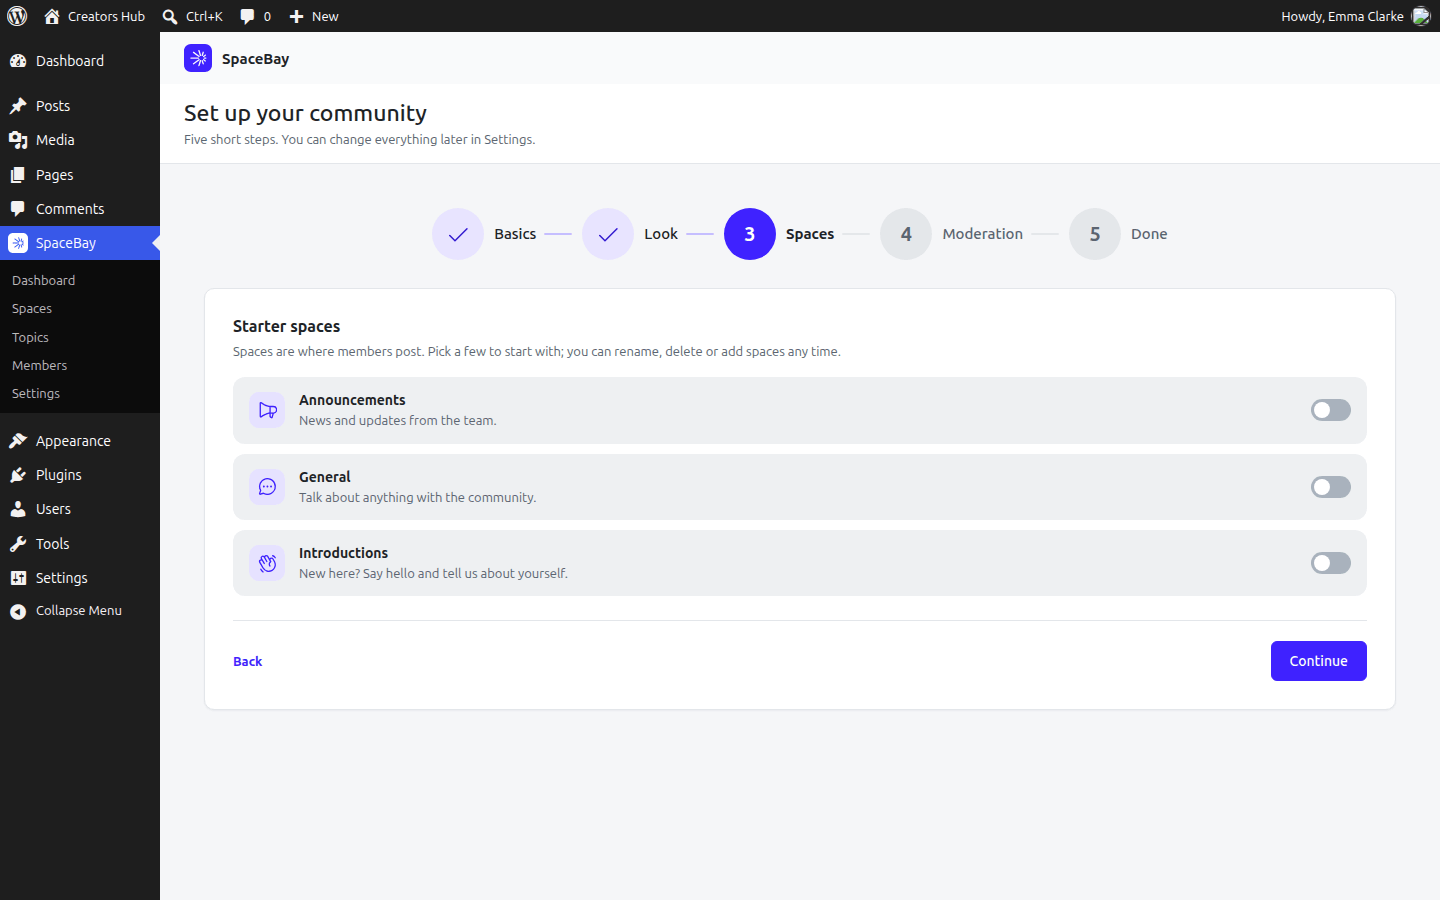 *Step 3: starter spaces.*
Select **Skip setup** to go straight to the dashboard. You can run the wizard again from the dashboard at any time.
## The SpaceBay admin menu
The SpaceBay menu in the WordPress admin has five pages: **Dashboard**, **Spaces**, **Topics**, **Members** and **Settings**. The dashboard shows totals for members, spaces, posts and comments, the number of items waiting for review and members waiting for approval, and your community address.
*Step 3: starter spaces.*
Select **Skip setup** to go straight to the dashboard. You can run the wizard again from the dashboard at any time.
## The SpaceBay admin menu
The SpaceBay menu in the WordPress admin has five pages: **Dashboard**, **Spaces**, **Topics**, **Members** and **Settings**. The dashboard shows totals for members, spaces, posts and comments, the number of items waiting for review and members waiting for approval, and your community address.
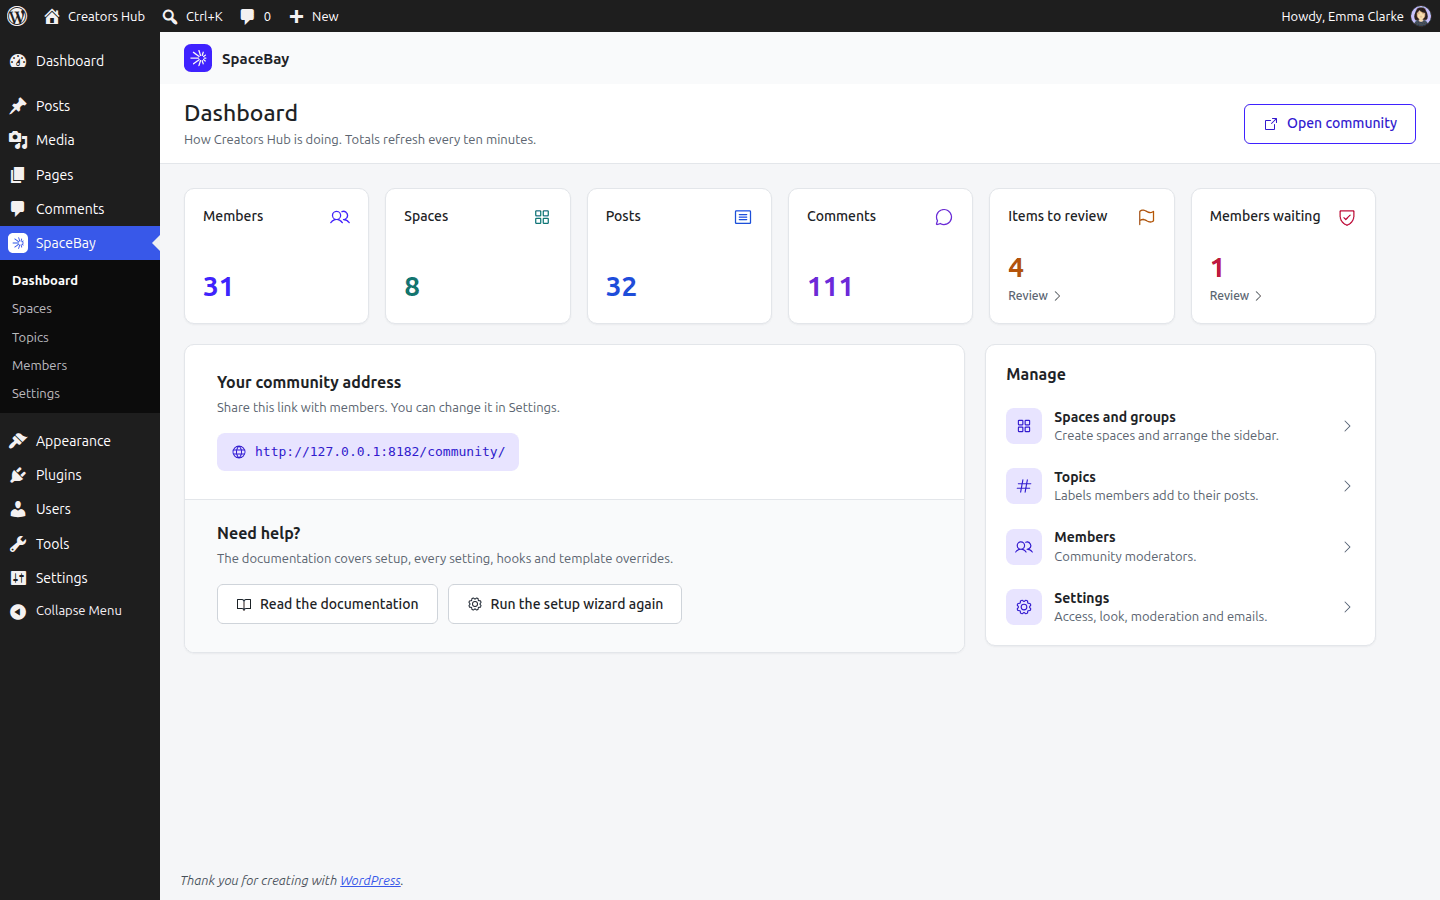 *The admin dashboard. Totals refresh every ten minutes.*